
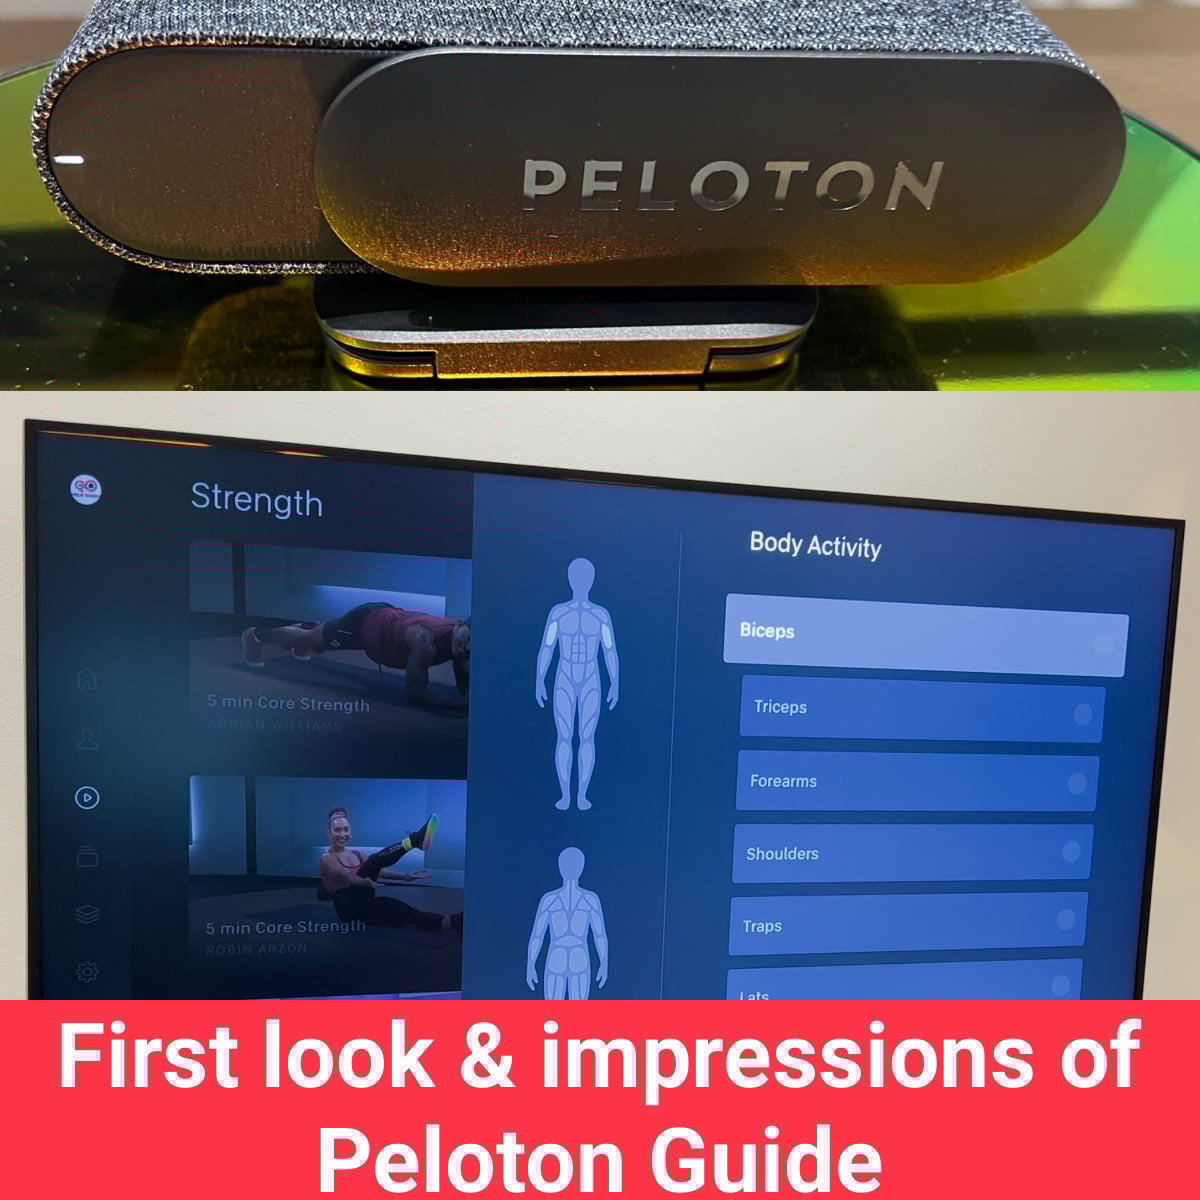
Peloton has released their newest device today – the Peloton Guide. We have now had the opportunity to try out the Peloton Guide in person, take a few classes with it, and try out the experience.
We’ll cover our first impressions below and go through how it works and what to expect when using a Peloton Guide. Once we’ve had more hands-on time with the Peloton Guide we will follow up with a full review in the coming weeks. Hopefully these first impressions will help people figure out if the Peloton Guide is the right device for them. Keep in mind the Peloton Guide is eligible as part of Peloton’s 30 Day Home Trial program – where you can get a full refund if you decide it’s not for you in the first 30 days.
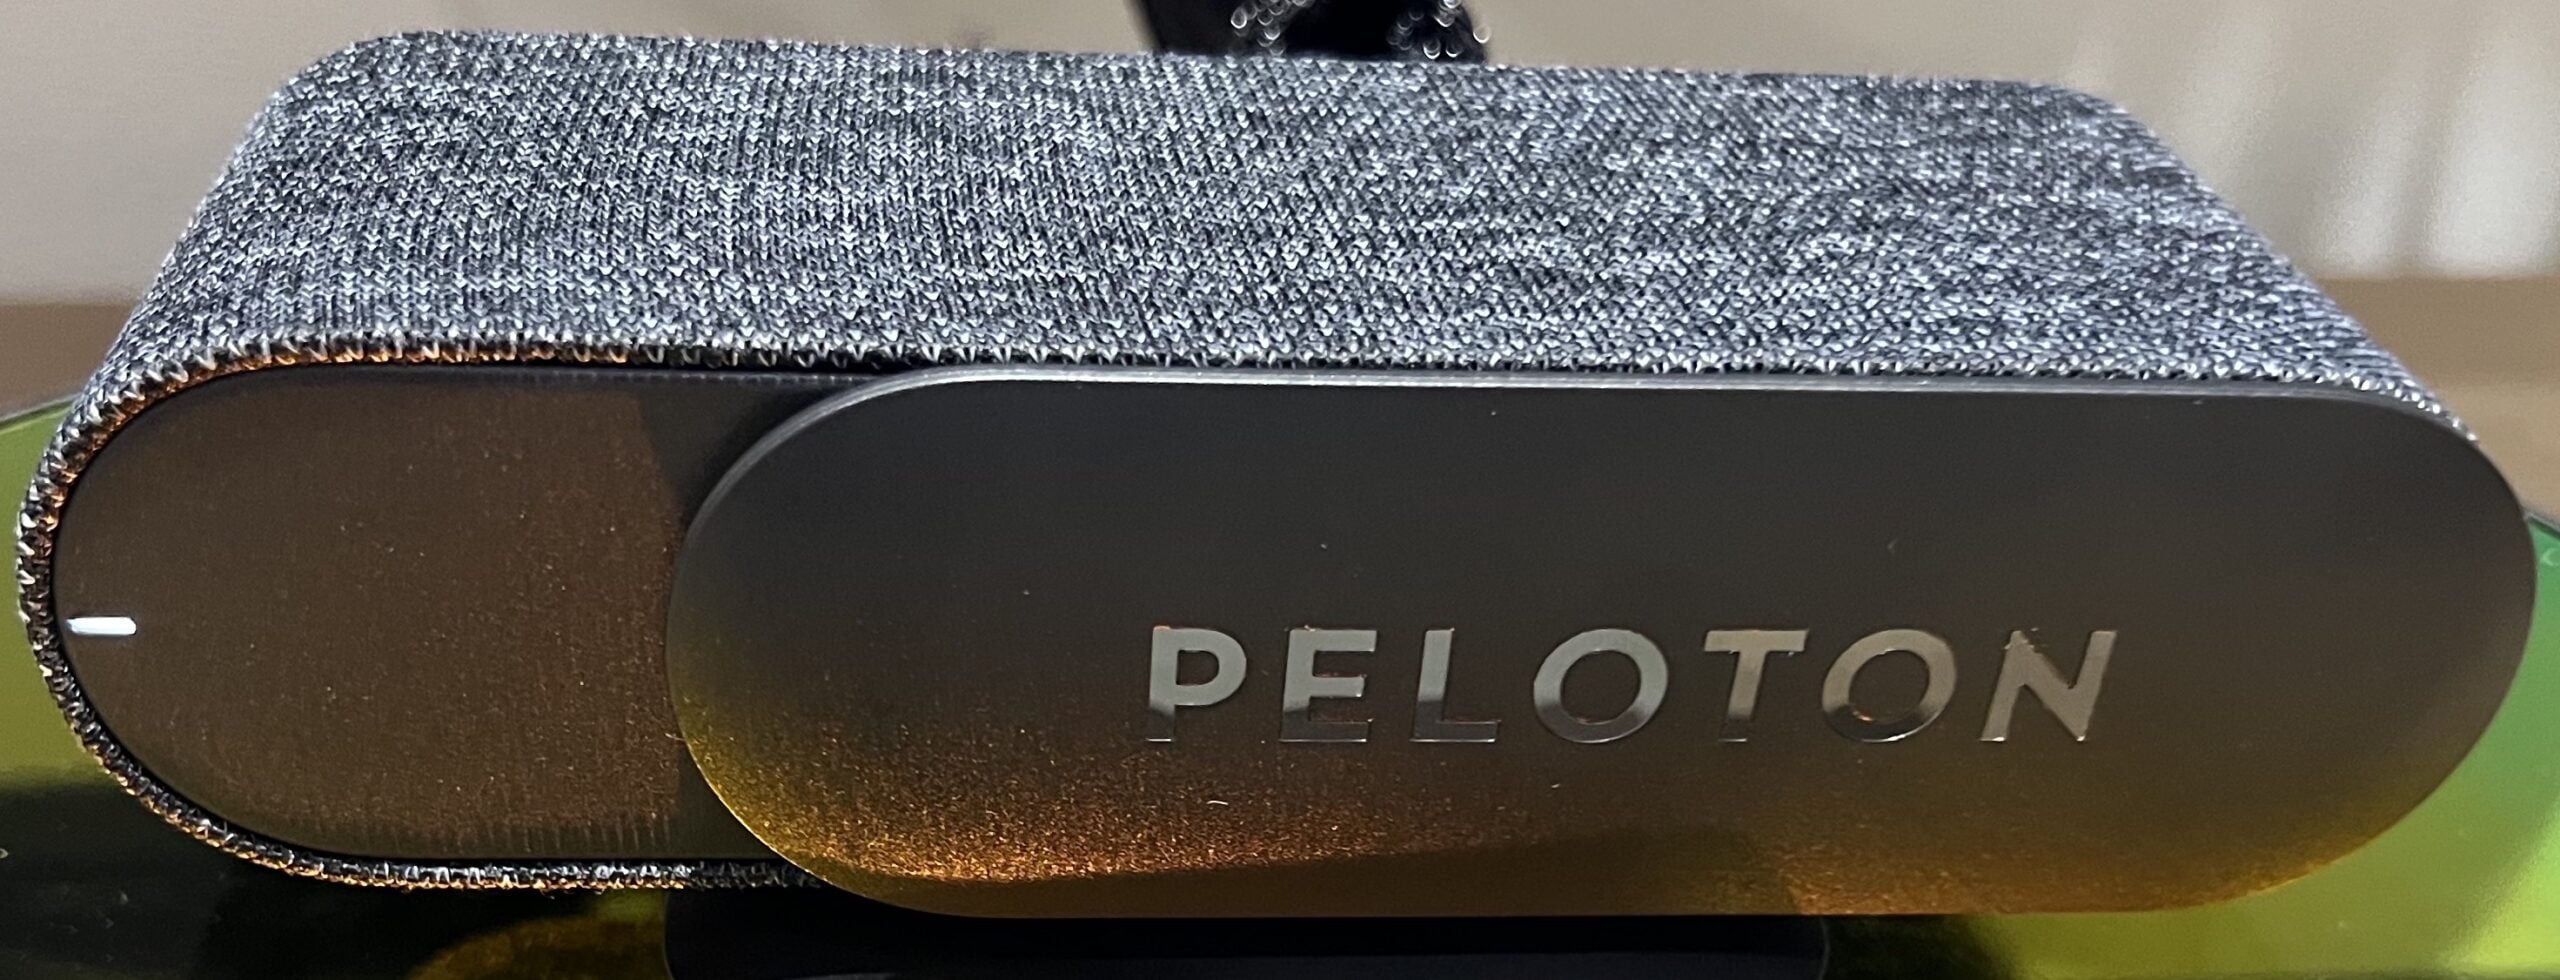
If this is the first you’re hearing about the Peloton Guide – it’s a small device (which looks like a webcam) with a camera you can plug into your TV (or computer screen if it has HDMI, or anything else with an HDMI input port). Peloton software runs on the device, and uses your TV to show classes and allow you to see yourself on the screen next to the the instructor (depending on your age, you might compare it to the Microsoft XBox Kinect). If you’re still wondering “What is the Peloton Guide”, Peloton has video explaining it (also embedded below).
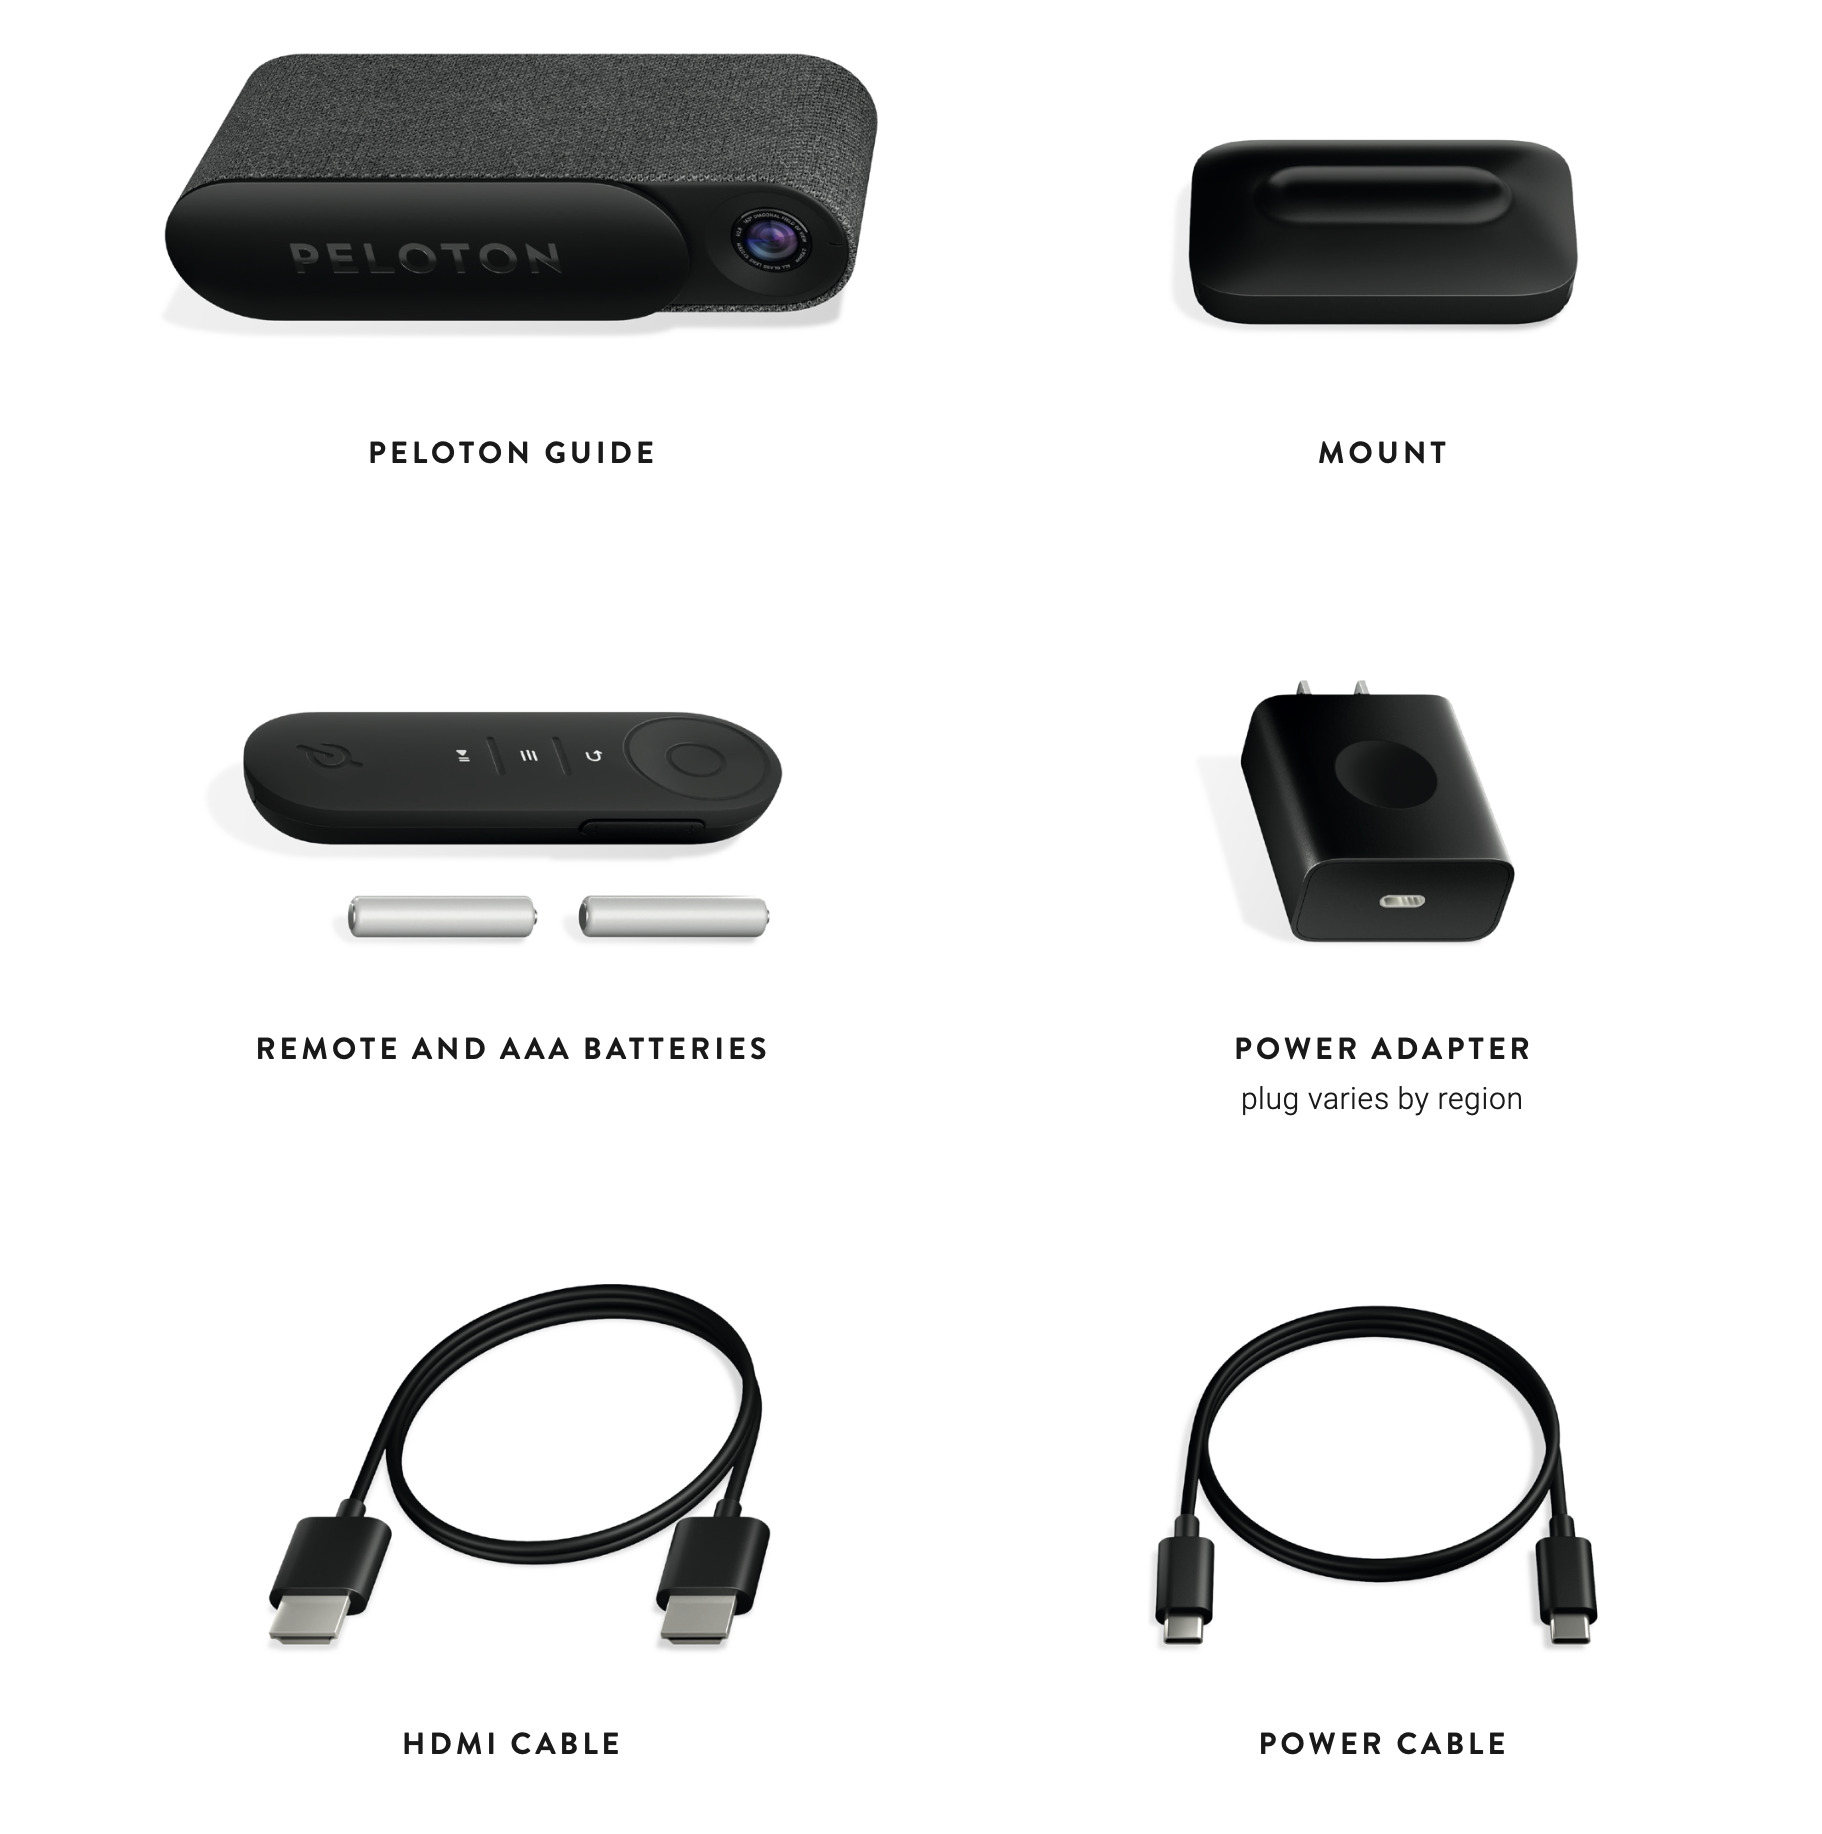
The Peloton Guide comes with everything you need in the box – the device itself, a HDMI cable, a USB-C power cord, a power brick to plug into the wall, the remote, and batteries. The base package is $295 USD, and there are two other packages that include various amounts of weights, a mat, and a Peloton Heart Rate Band.
The Peloton Guide is available to purchase both through Peloton’s website or through your local showroom. If you can, order from your local showroom as the employees will earn a commission for the sale (I’m sure they will be glad to take your order via phone too). Note that the showrooms have demo units to try out, but if you purchase from a store, it will still ship to you from a warehouse. Special thanks to the Peloton Atlanta showroom team for their hospitality today!
If you’d an unboxing video of the Peloton Guide, Peloton created this Peloton Guide unboxing video with Callie Gullickson (also embedded below):
If you currently own a Peloton Bike or Tread, and get a Peloton Guide, your monthly subscription will not cost anything extra or change – the Peloton Guide will work with your current subscription. If you are currently an app user, you will have to upgrade to a more expensive monthly plan (with an introductory price of $24 / month, but will go up to $39 / month next year).
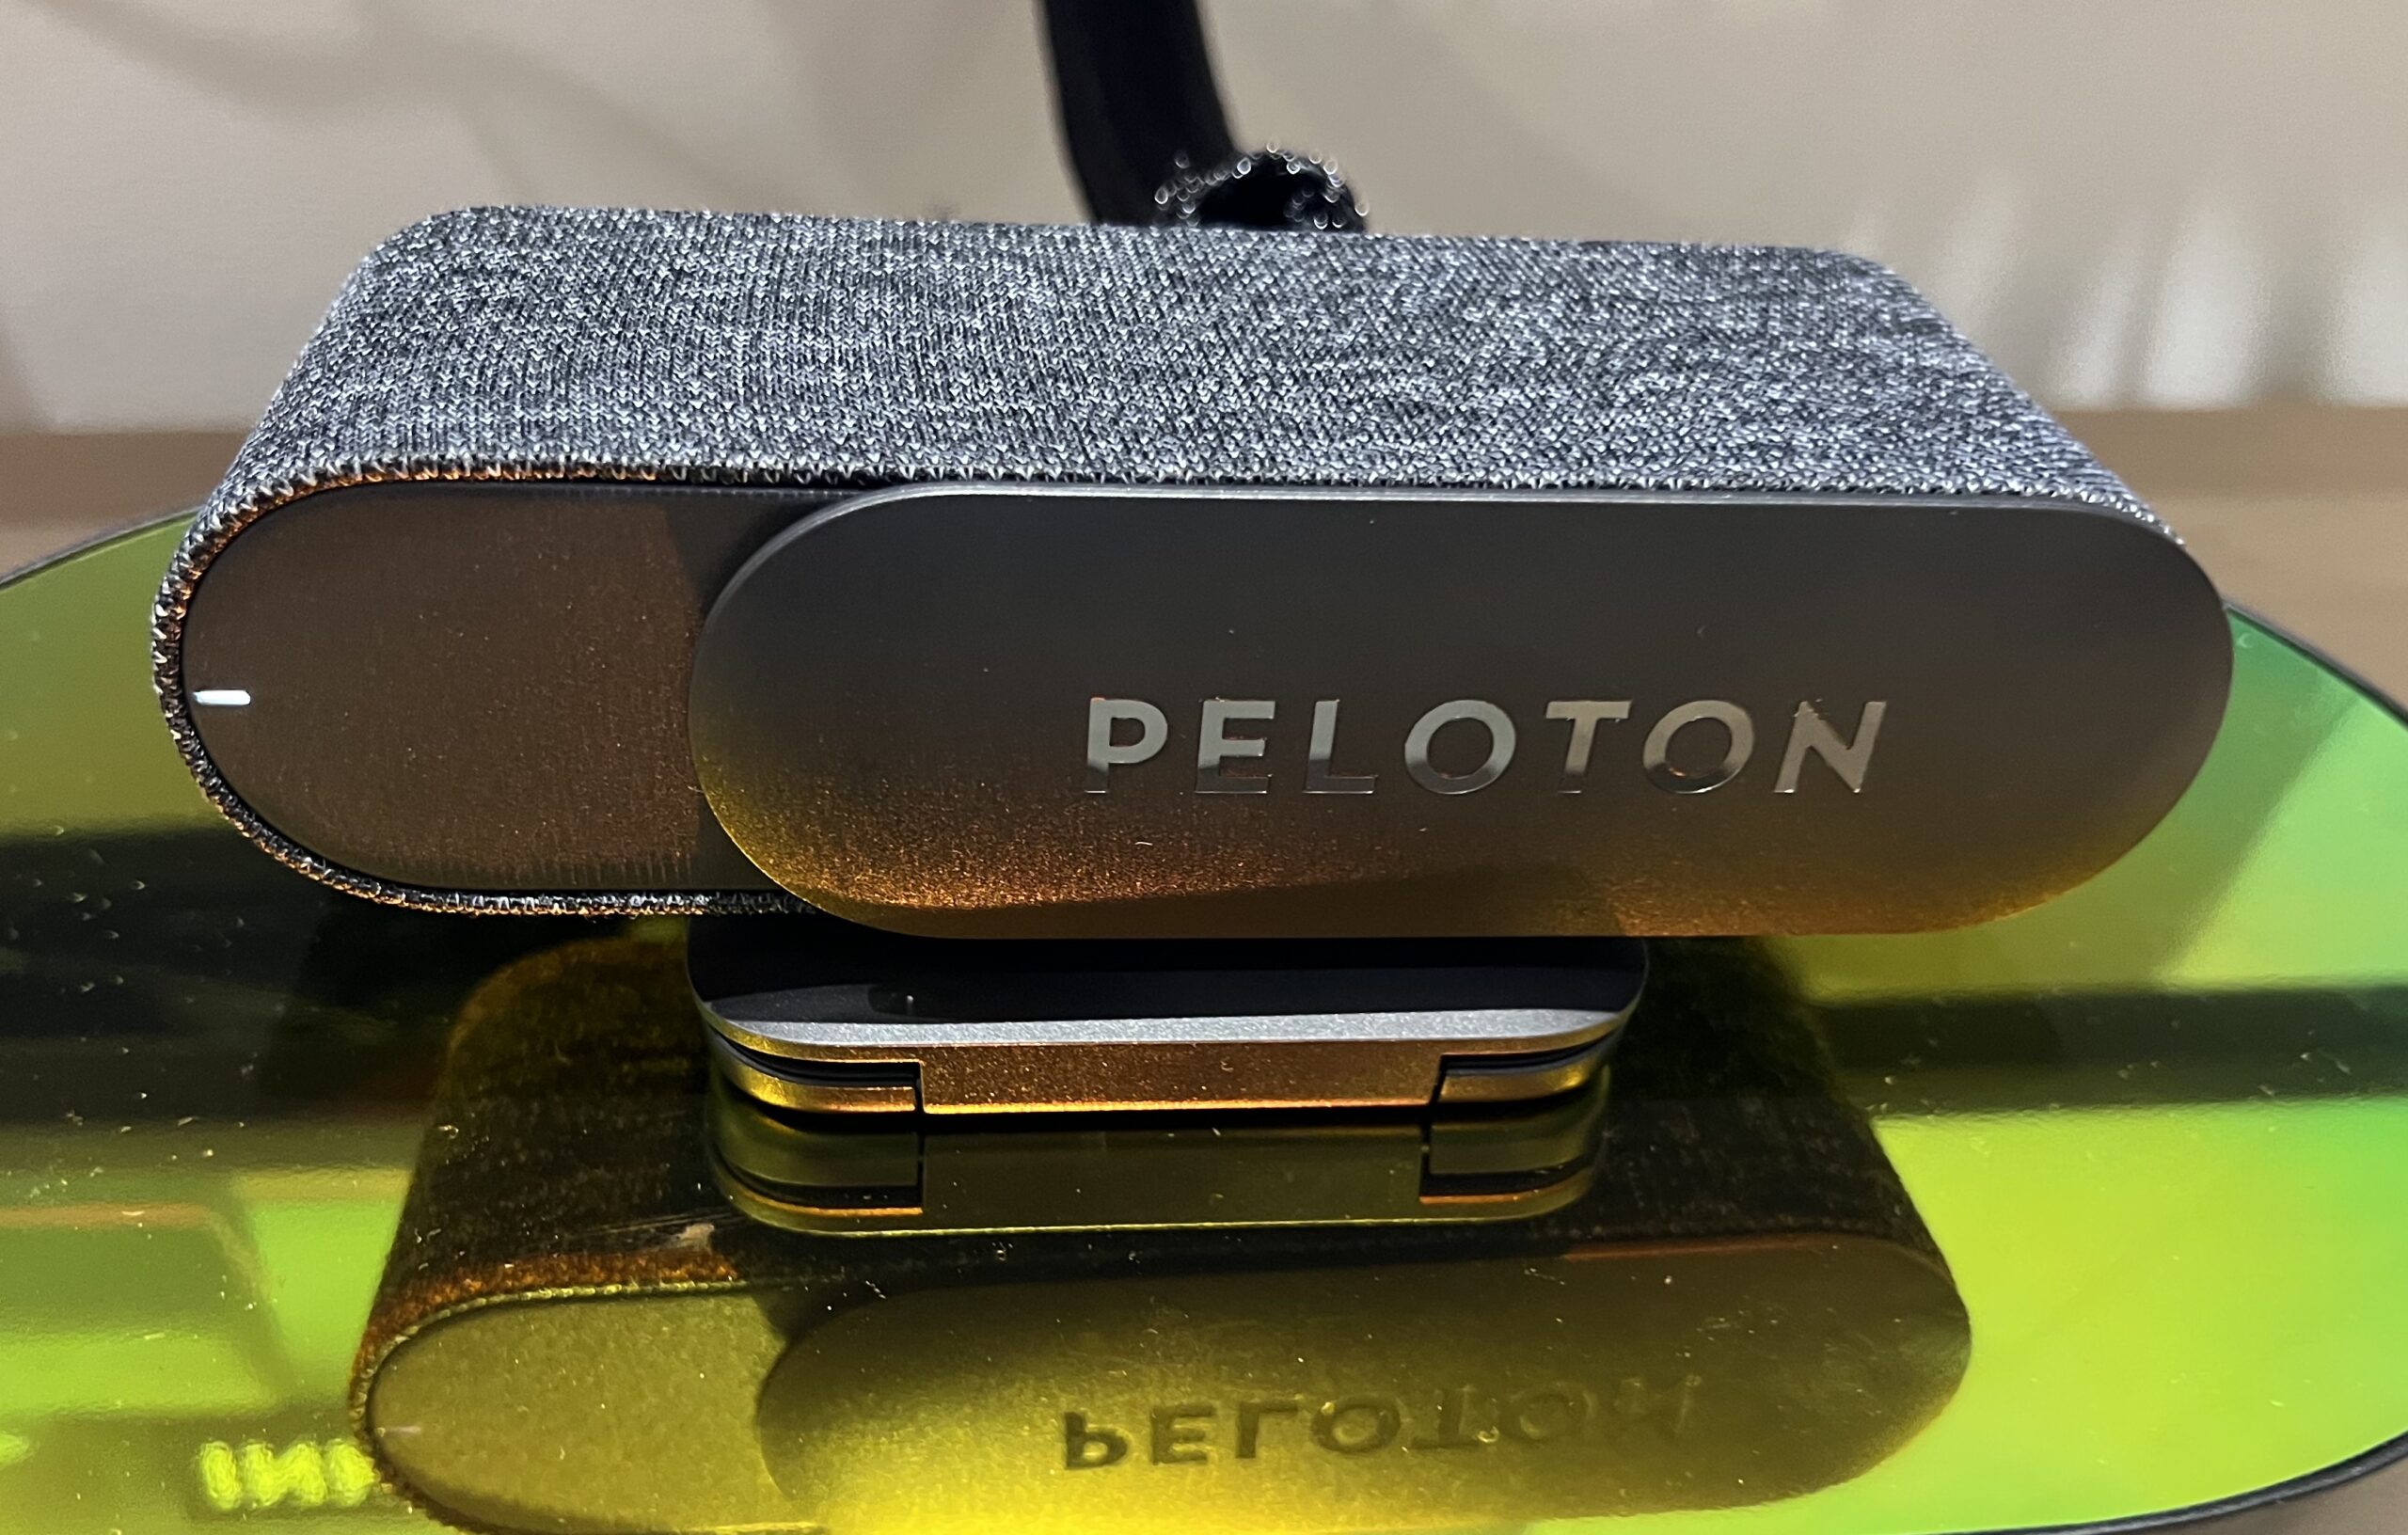
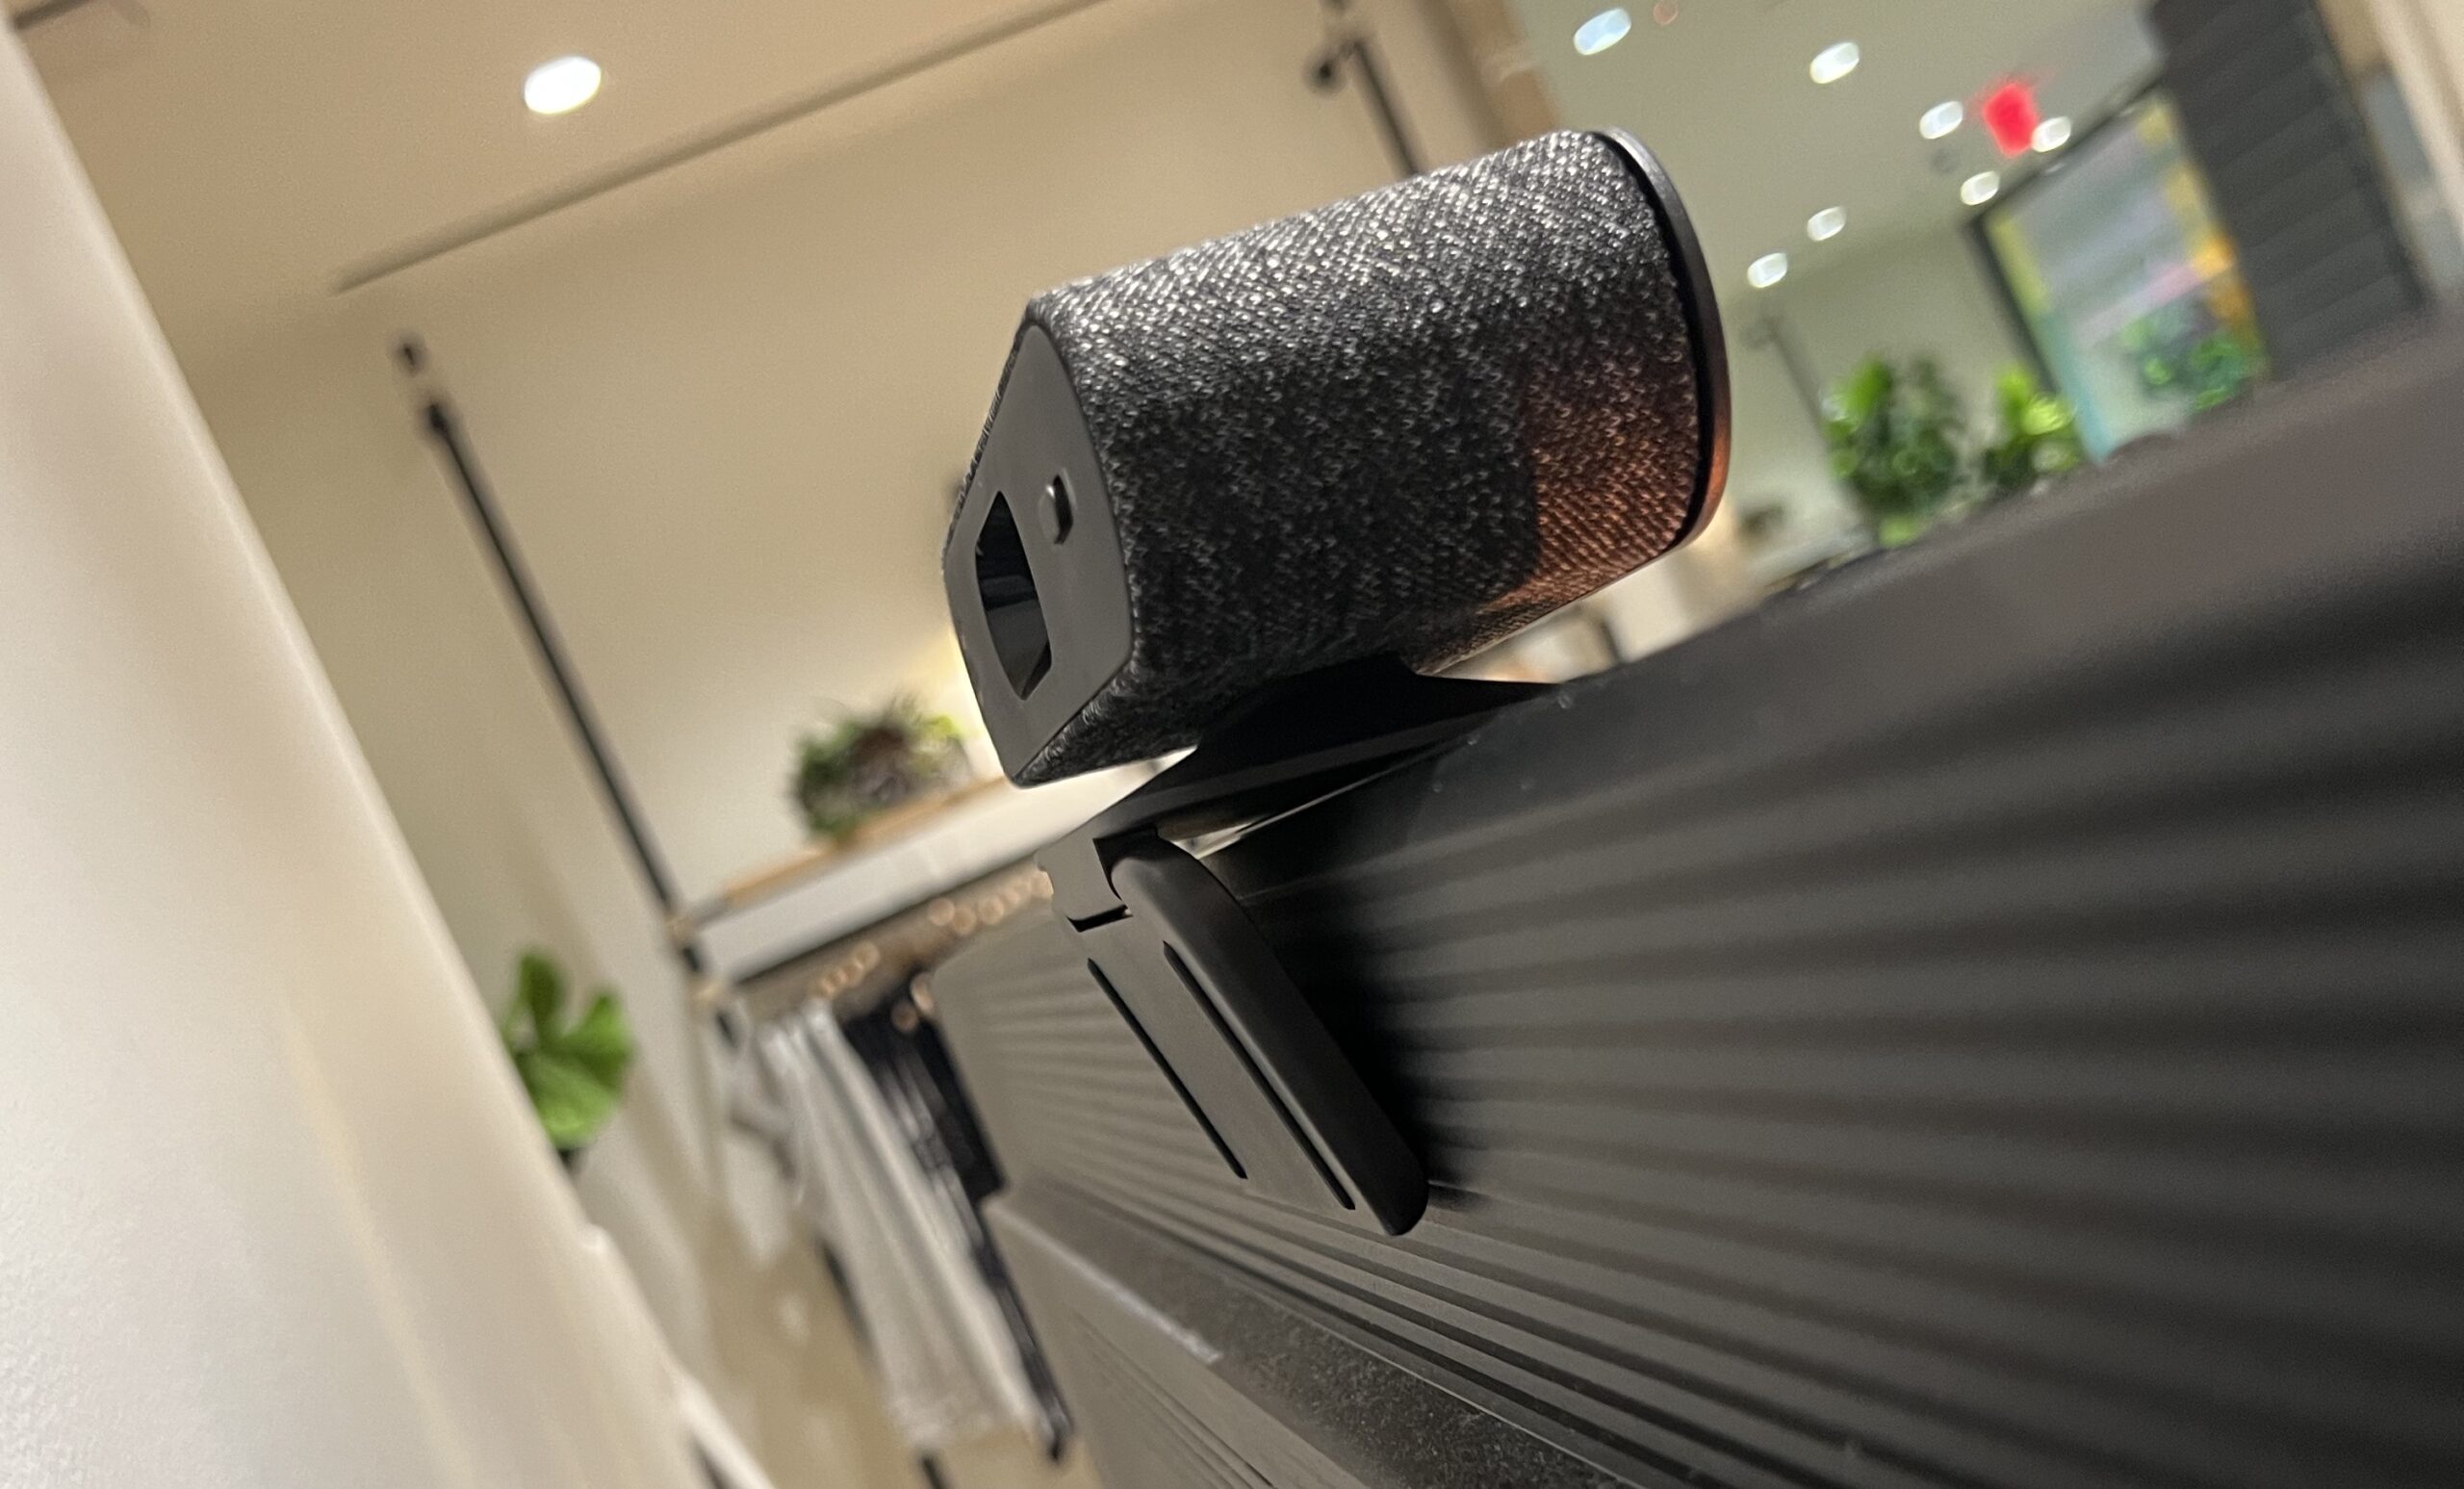
Peloton is stressing that even though there is a camera & microphone on the device, it won’t be spying on you. There is a physical cover on the front of the Peloton Guide, and it easily slides back and forth with a single finger from being covered to uncovered.
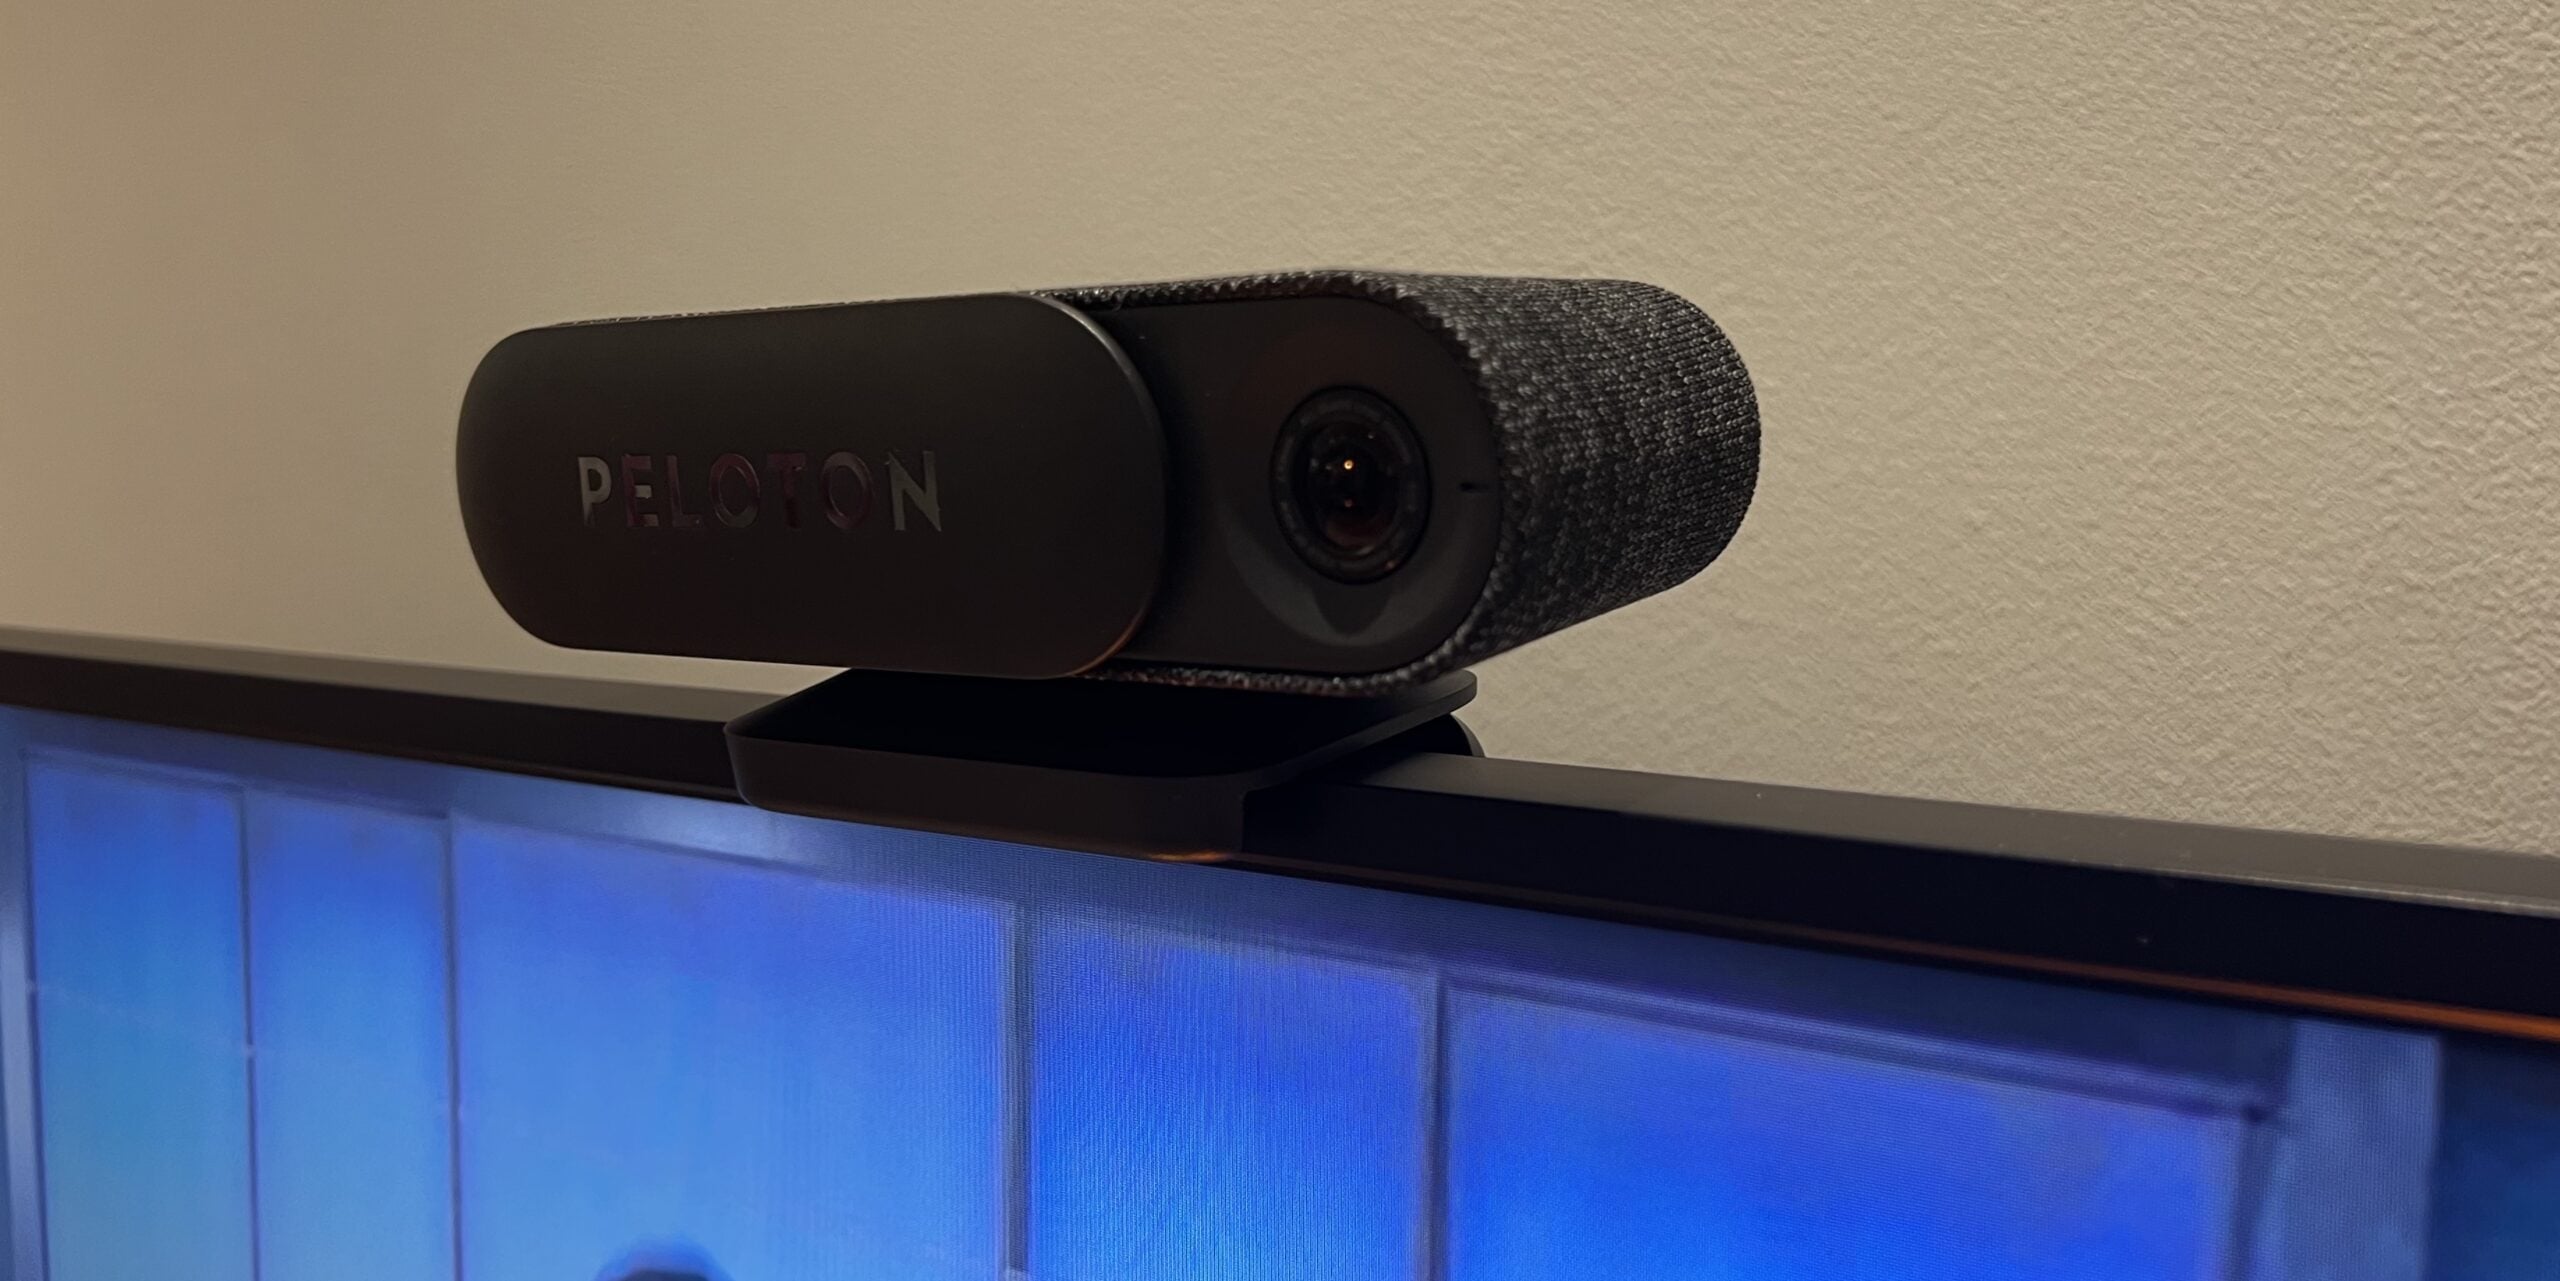
Below, the cover has been slid so the camera is no longer visible.
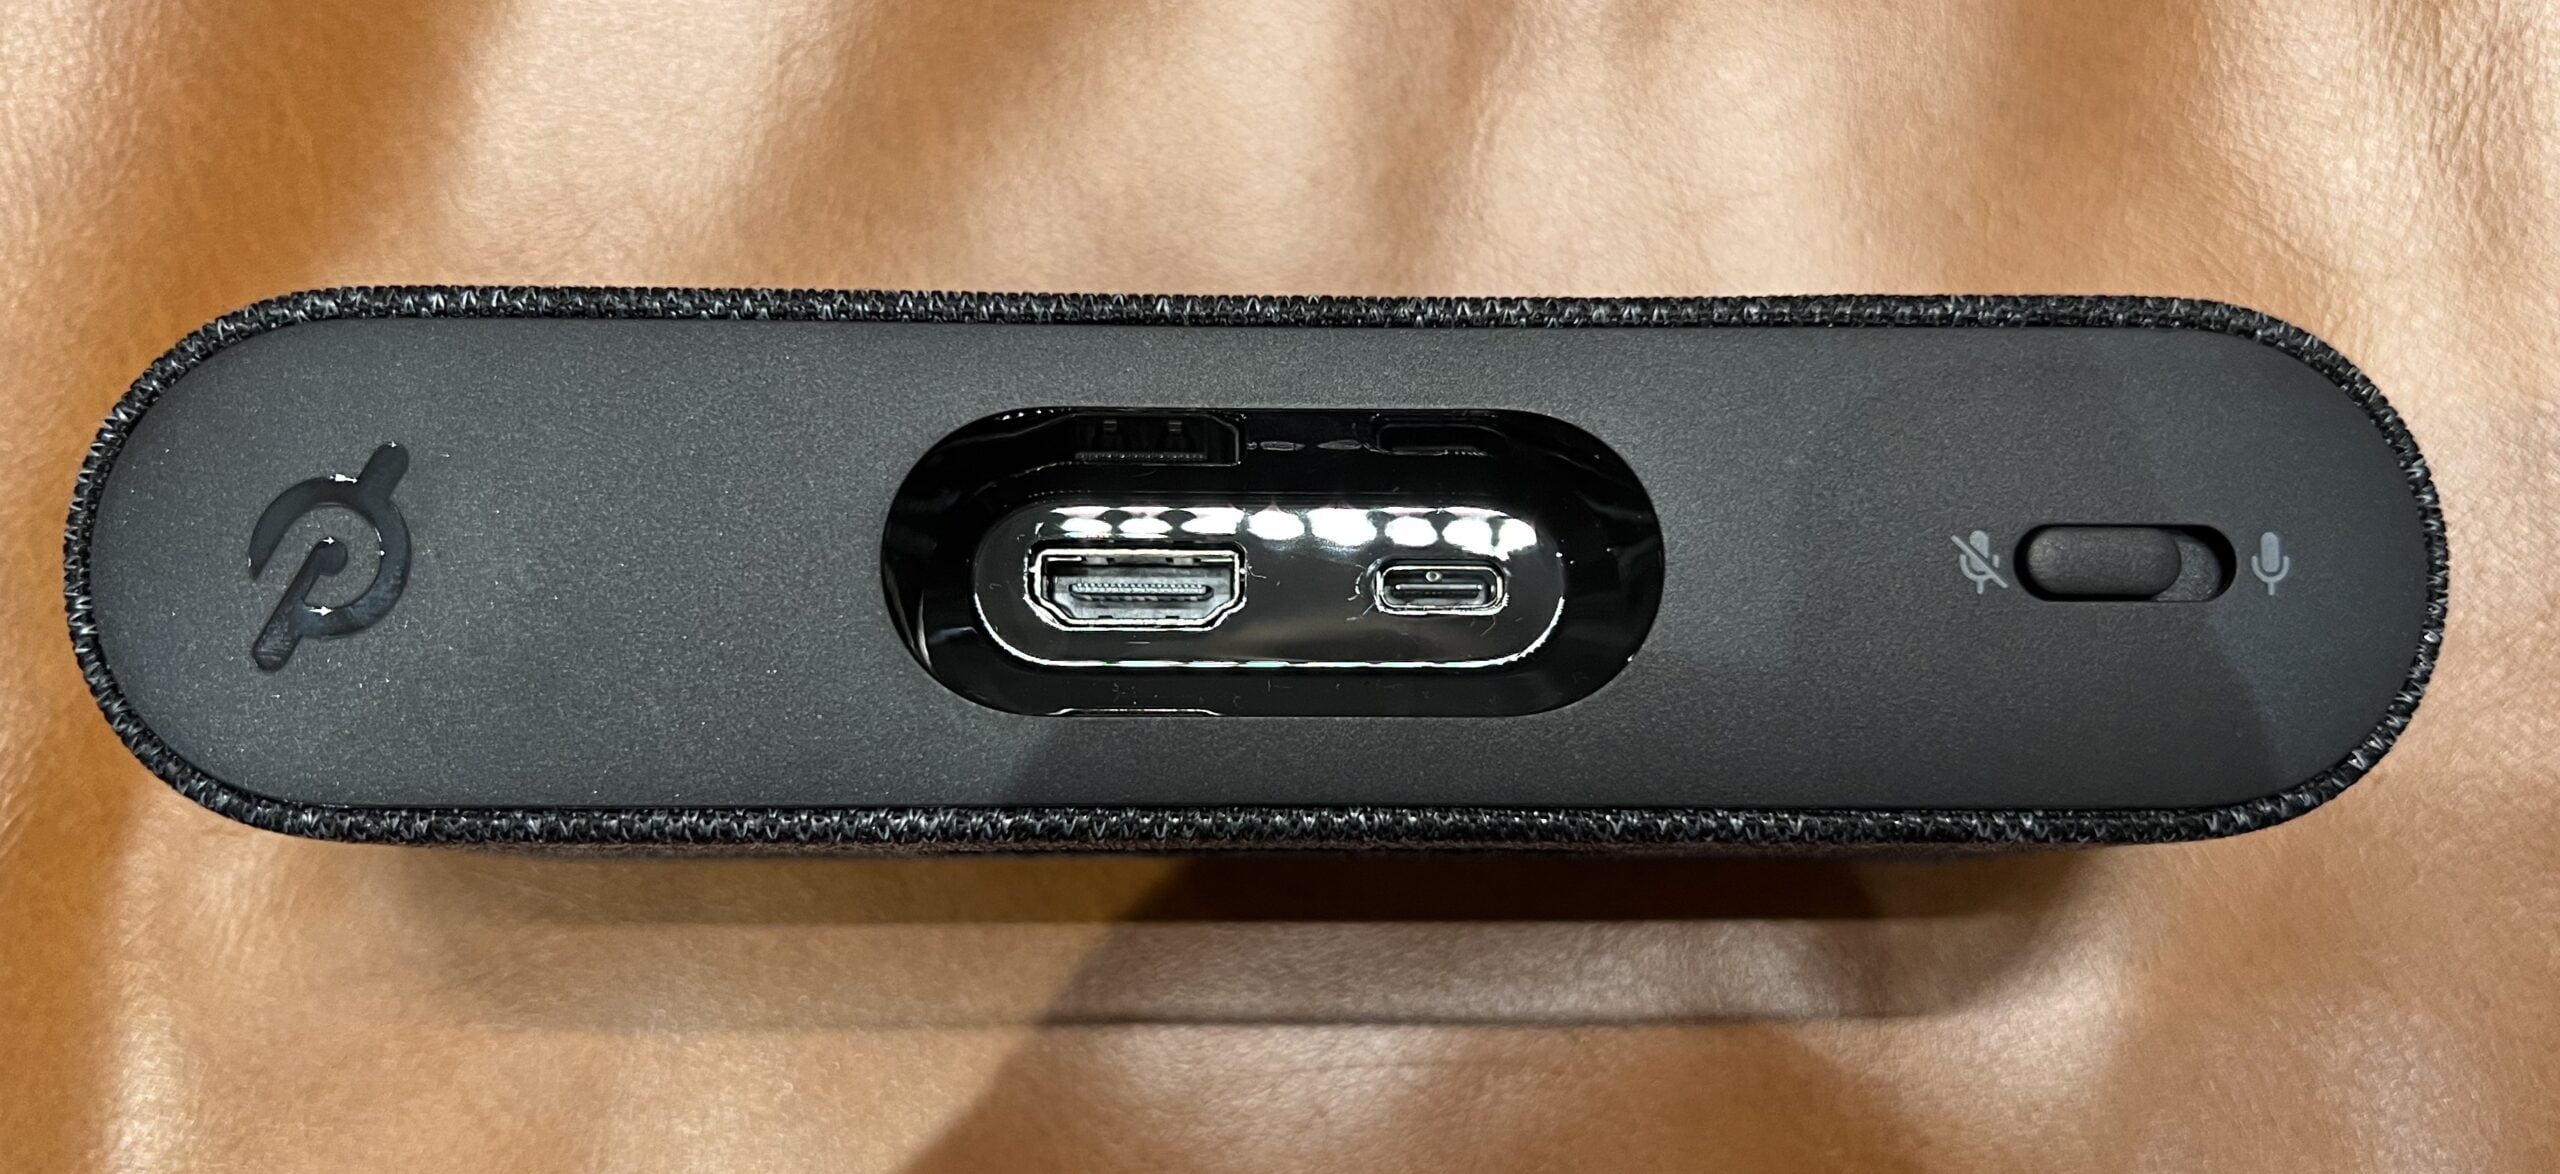
There is also a physical switch on the back of the device for disabling the microphone.
For those considering the privacy aspects of the Peloton Guide, Peloton has explicitly stated that “Peloton does not store or share any voice, image, or video data from Peloton Guide.” They do clarify that “Peloton uses and stores personal information to help you, such as by analyzing your performance and providing you with analytics about your progress over time or by providing you with workout recommendations.”
Once you have your Peloton Guide out of the box, the next step is figuring out how & where to mount it. The Peloton Guide user manual has exact guidelines & recommendations – but it boils down to you’ll either be setting it on a shelf, or mounting it on top of your TV.
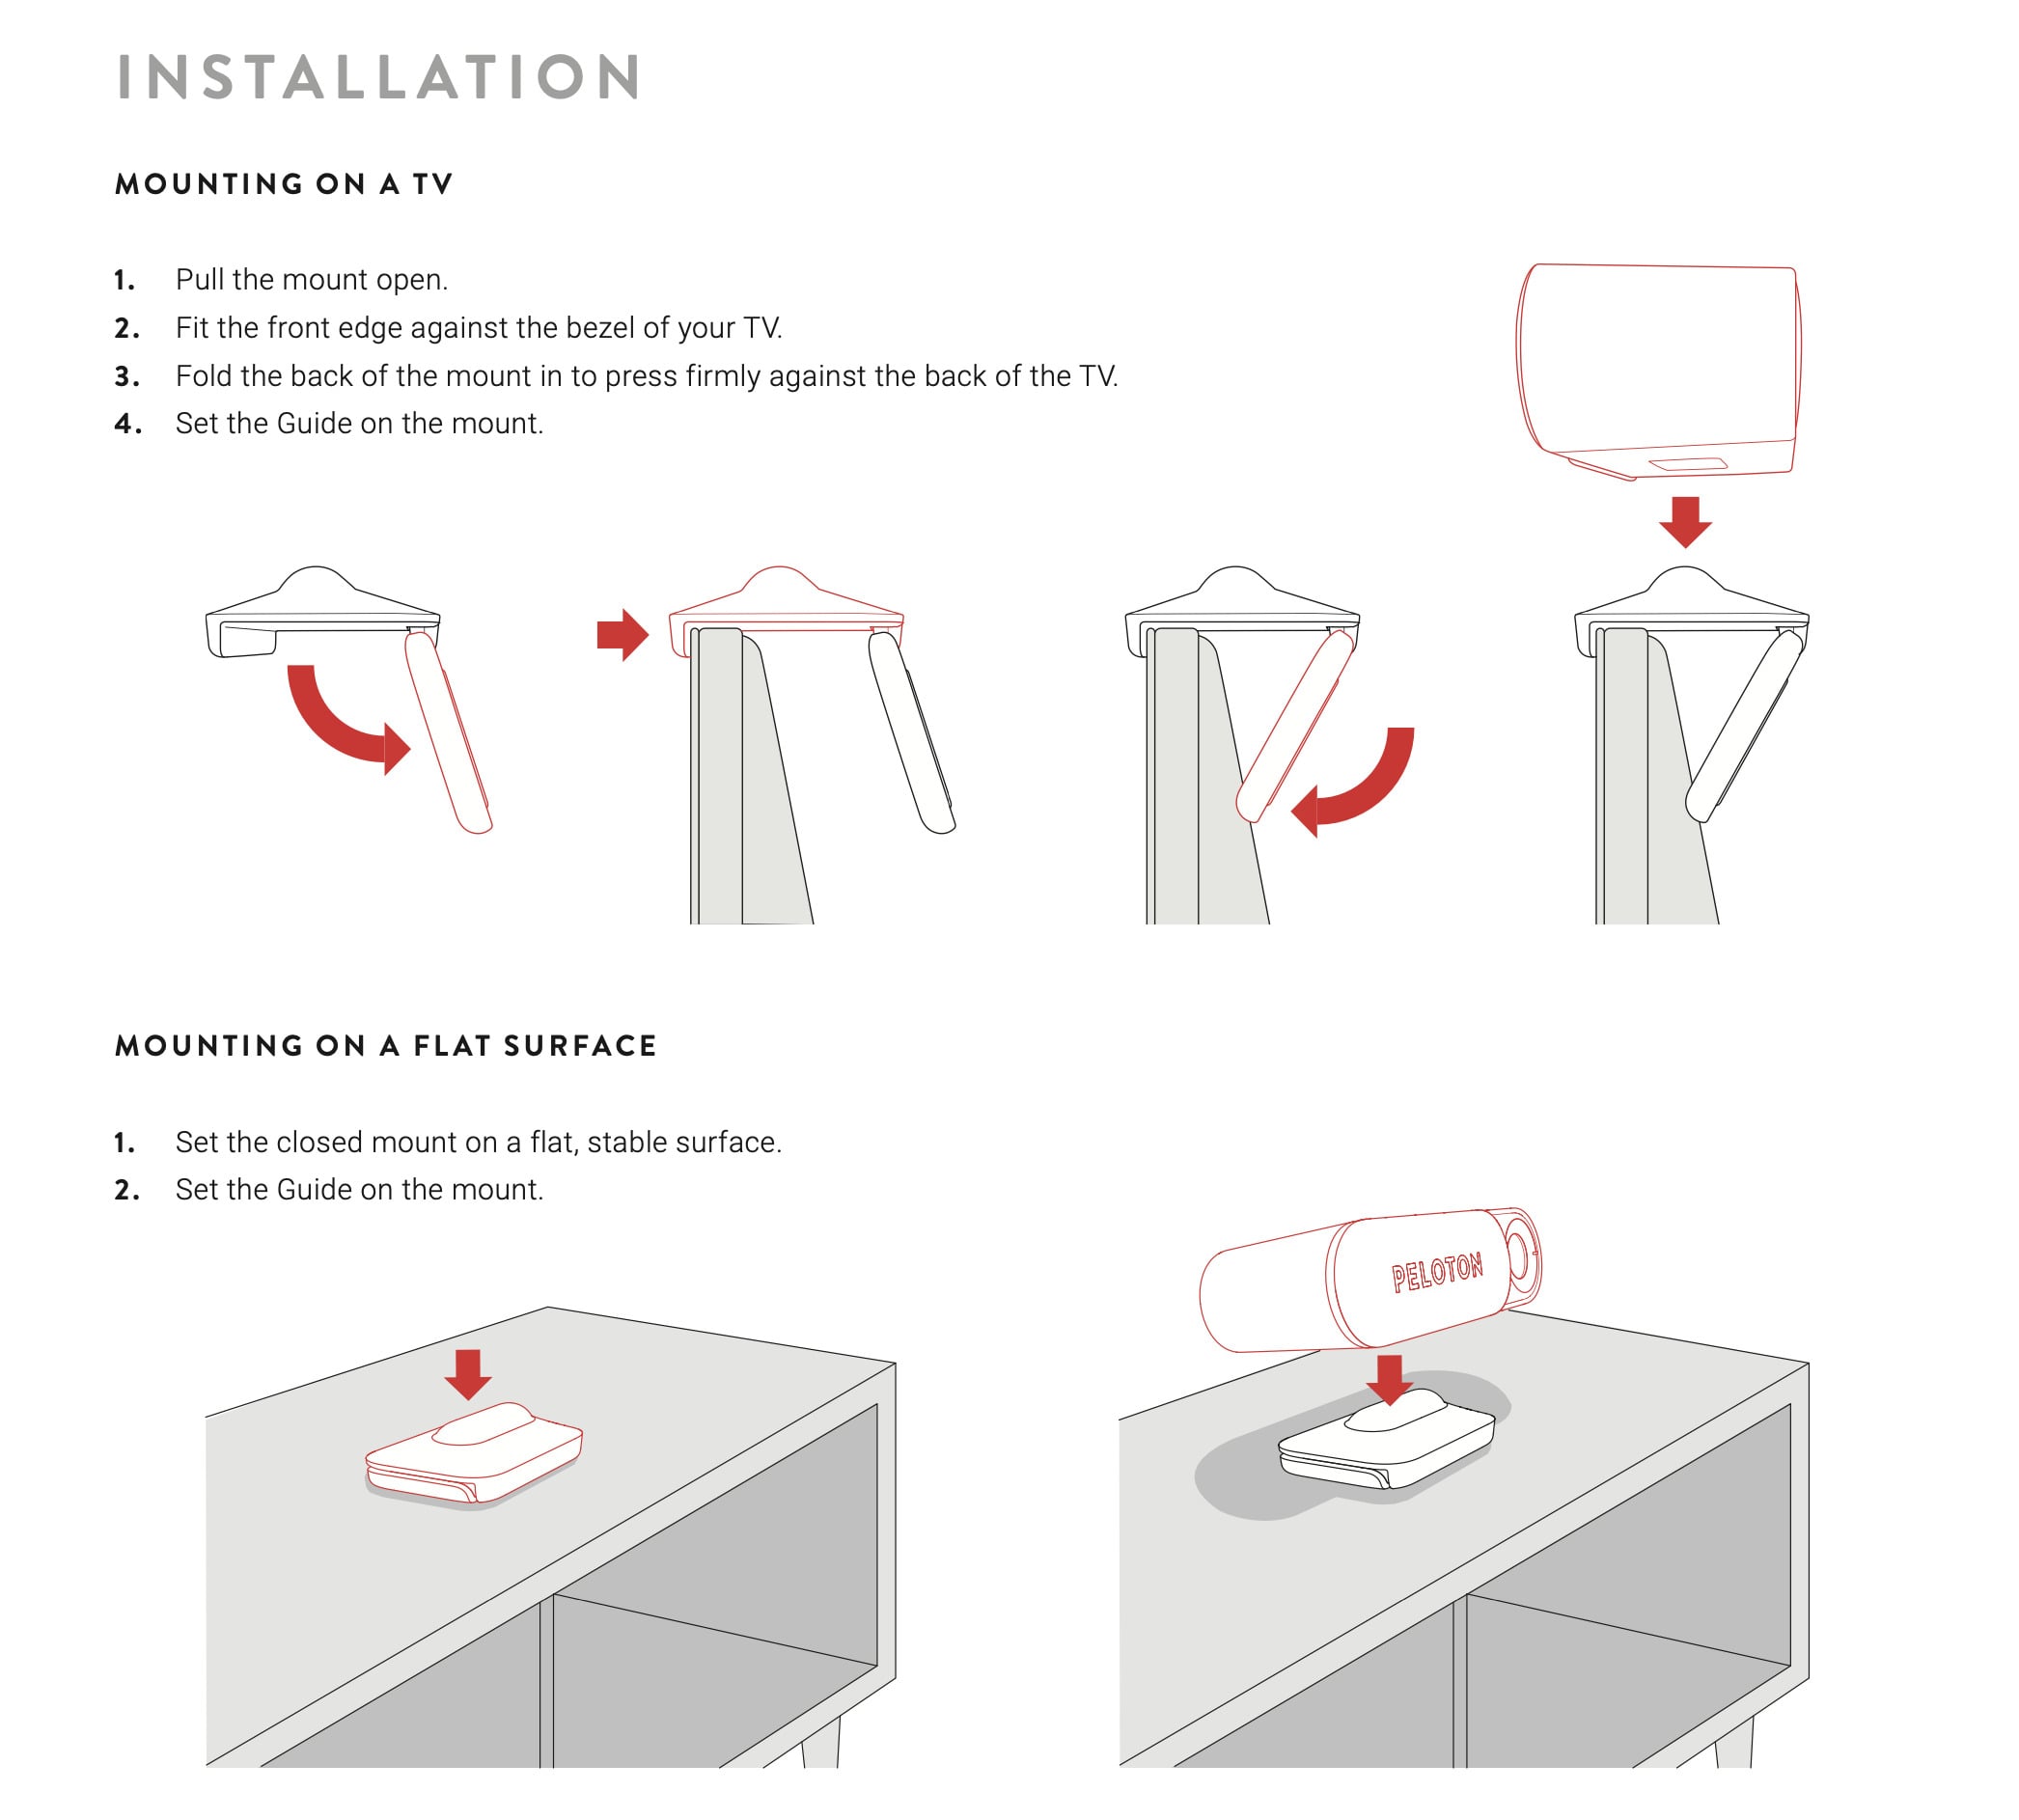
If you have a shelf or something you will be setting it on – just set the mount on your self, attach the Guide to the mount, and you’re ready to go.
Alternatively, you can mount the guide to the top of a TV. The mount folds out into a bracket, and can be placed on top of the TV. There is no adhesive used – it balances and folds over your TV.
With the Guide mounted or set on a shelf, you can jump into your Peloton Guide. We didn’t have the chance to do the setup up, but were told it takes around 10-15 minutes (possibly longer depending on your internet speed and how many software updates are available). The Peloton Guide comes with a remote you can use to navigate around and control your classes – and there is some voice controls as well (that is still considered beta).
One question we’ve seen is whether there are any extra apps you need to use the Peloton Guide – and you do not. You simply plug the included HDMI cable from the Peloton Guide into your TV, change your TV to the HDMI port you just plugged the cable into – and the Peloton Guide will pop up. Everything runs on the device itself, and displays via HDMI to your TV.
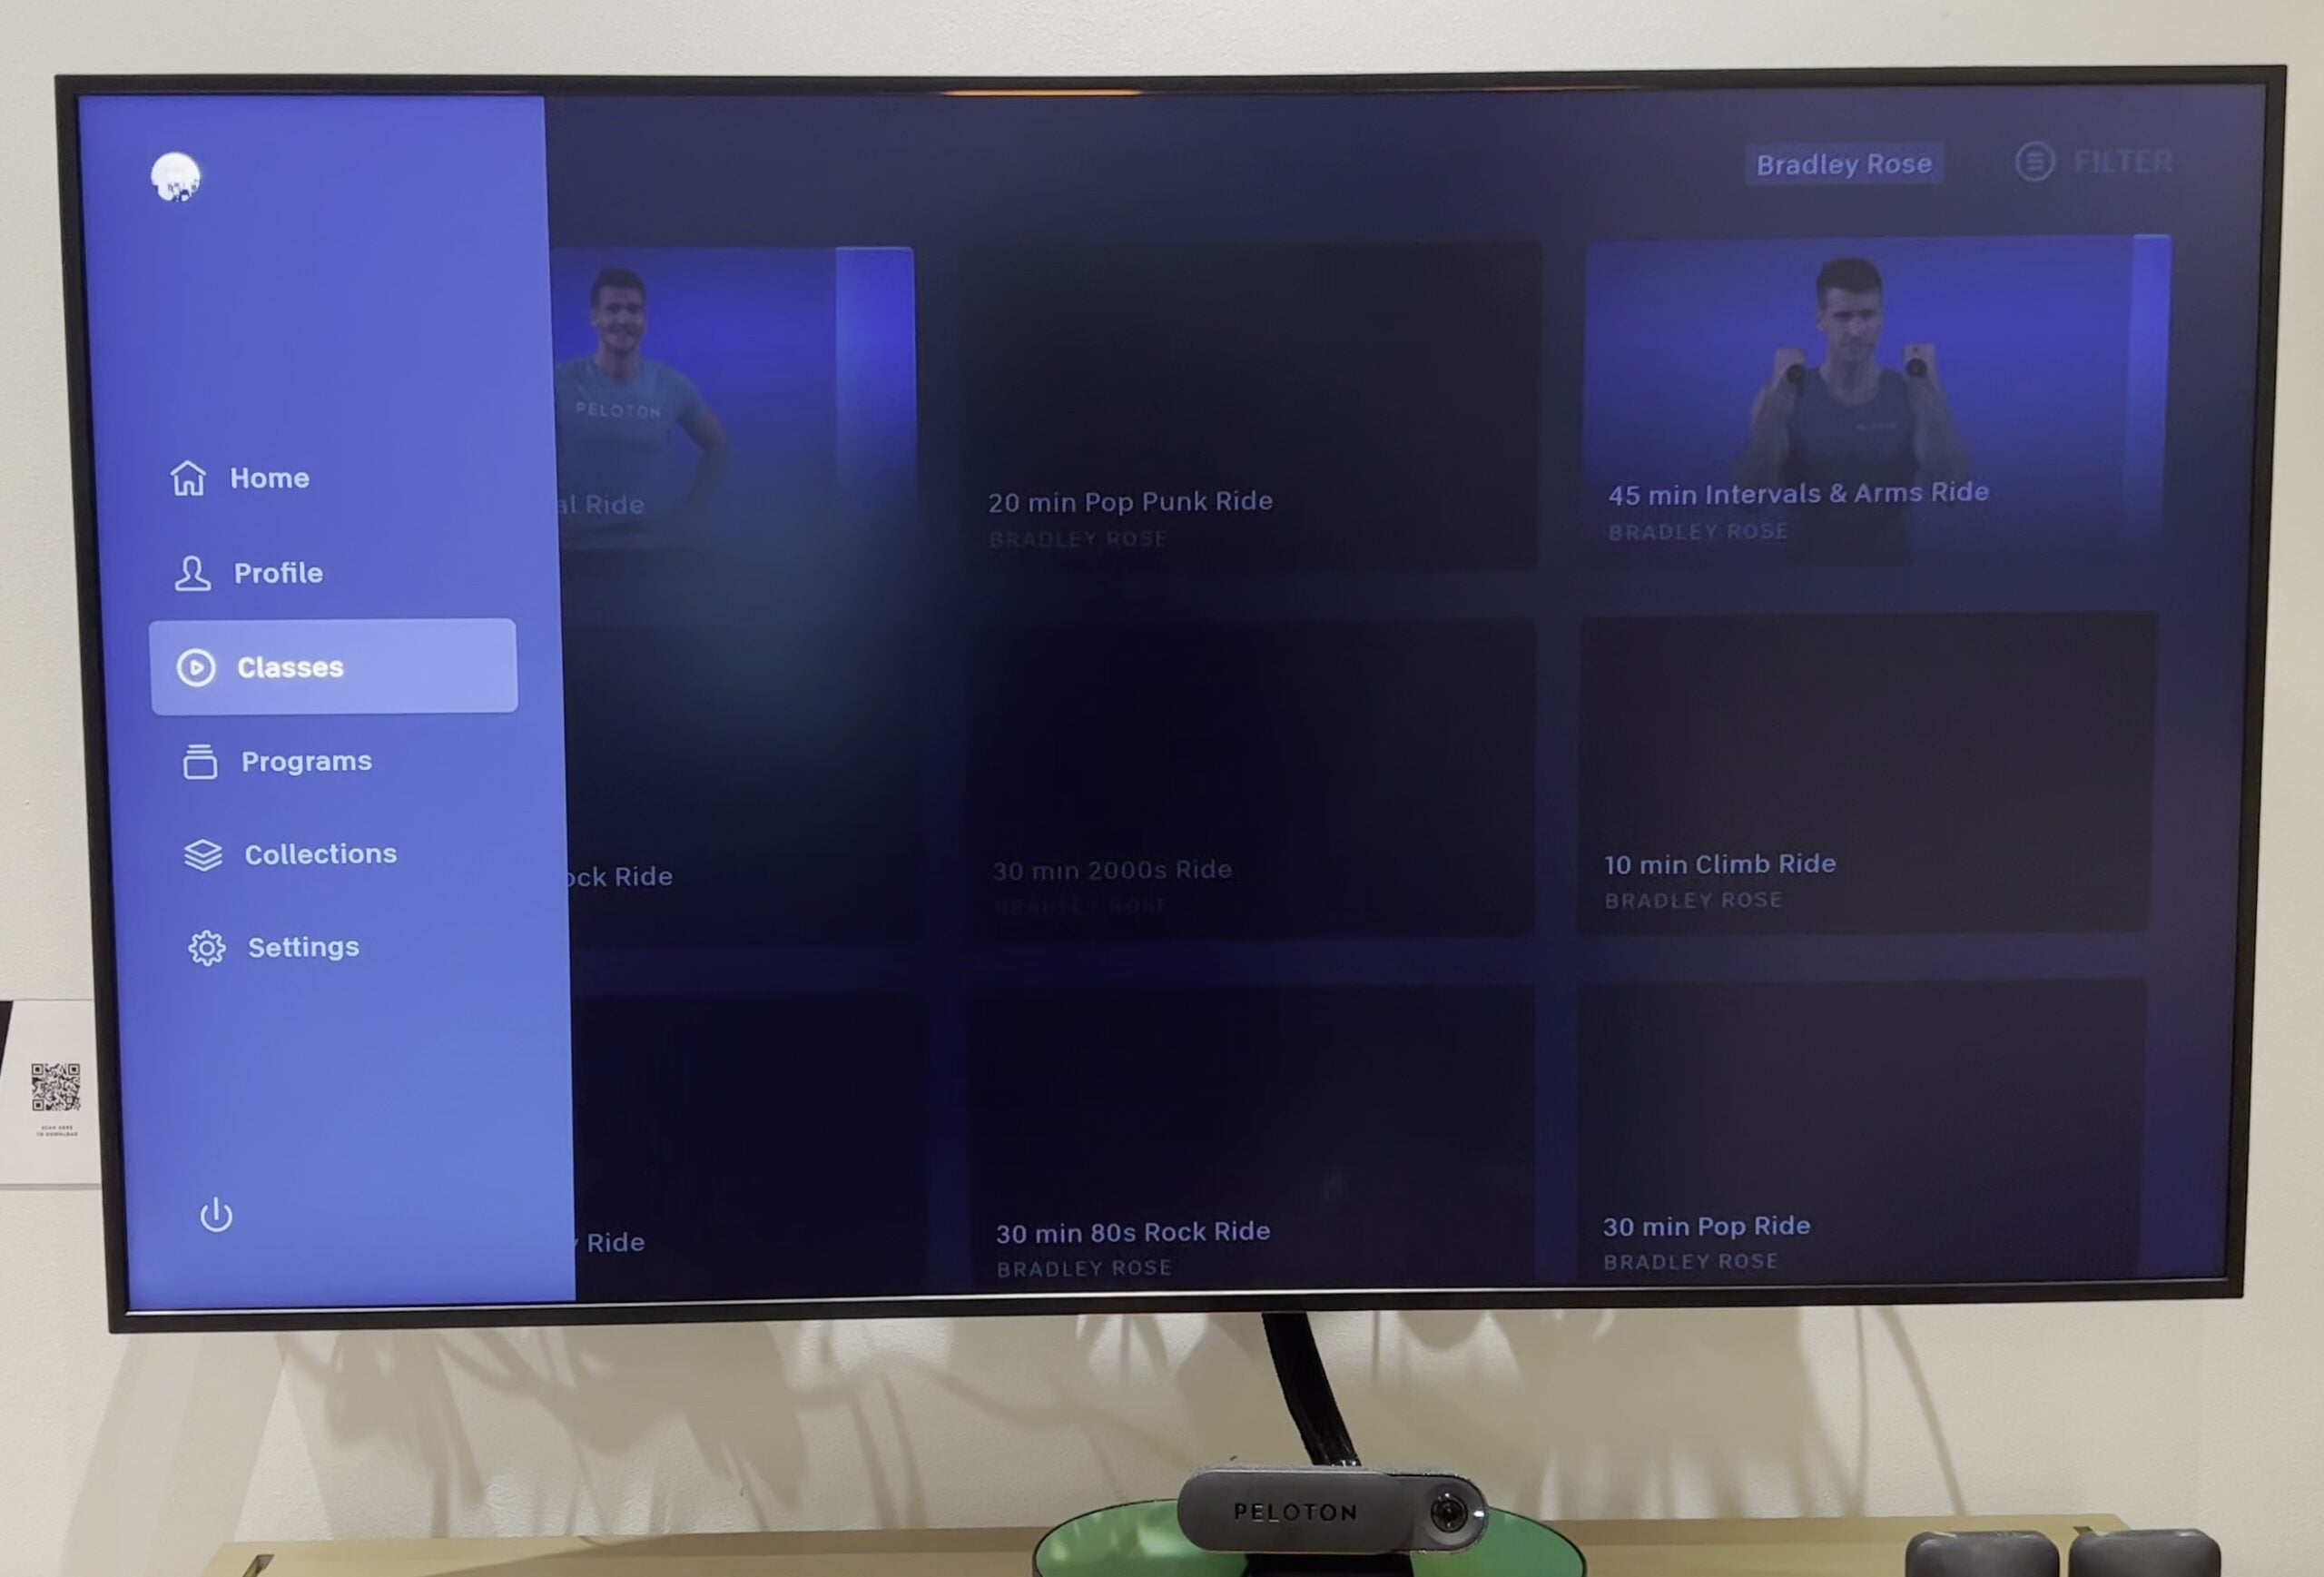
The new user interface for the Peloton Guide looks like an Apple TV interface (and we say that in a good way). It’s fairly intuitive and easy to use, and we were able to find everything we wanted our first time using it.
You navigate around the Peloton Guide by using a menu bar that is on the left side of the screen. There are menu options for the Home, Profile, Classes, Programs, Collections, Setting, and a Power Button.
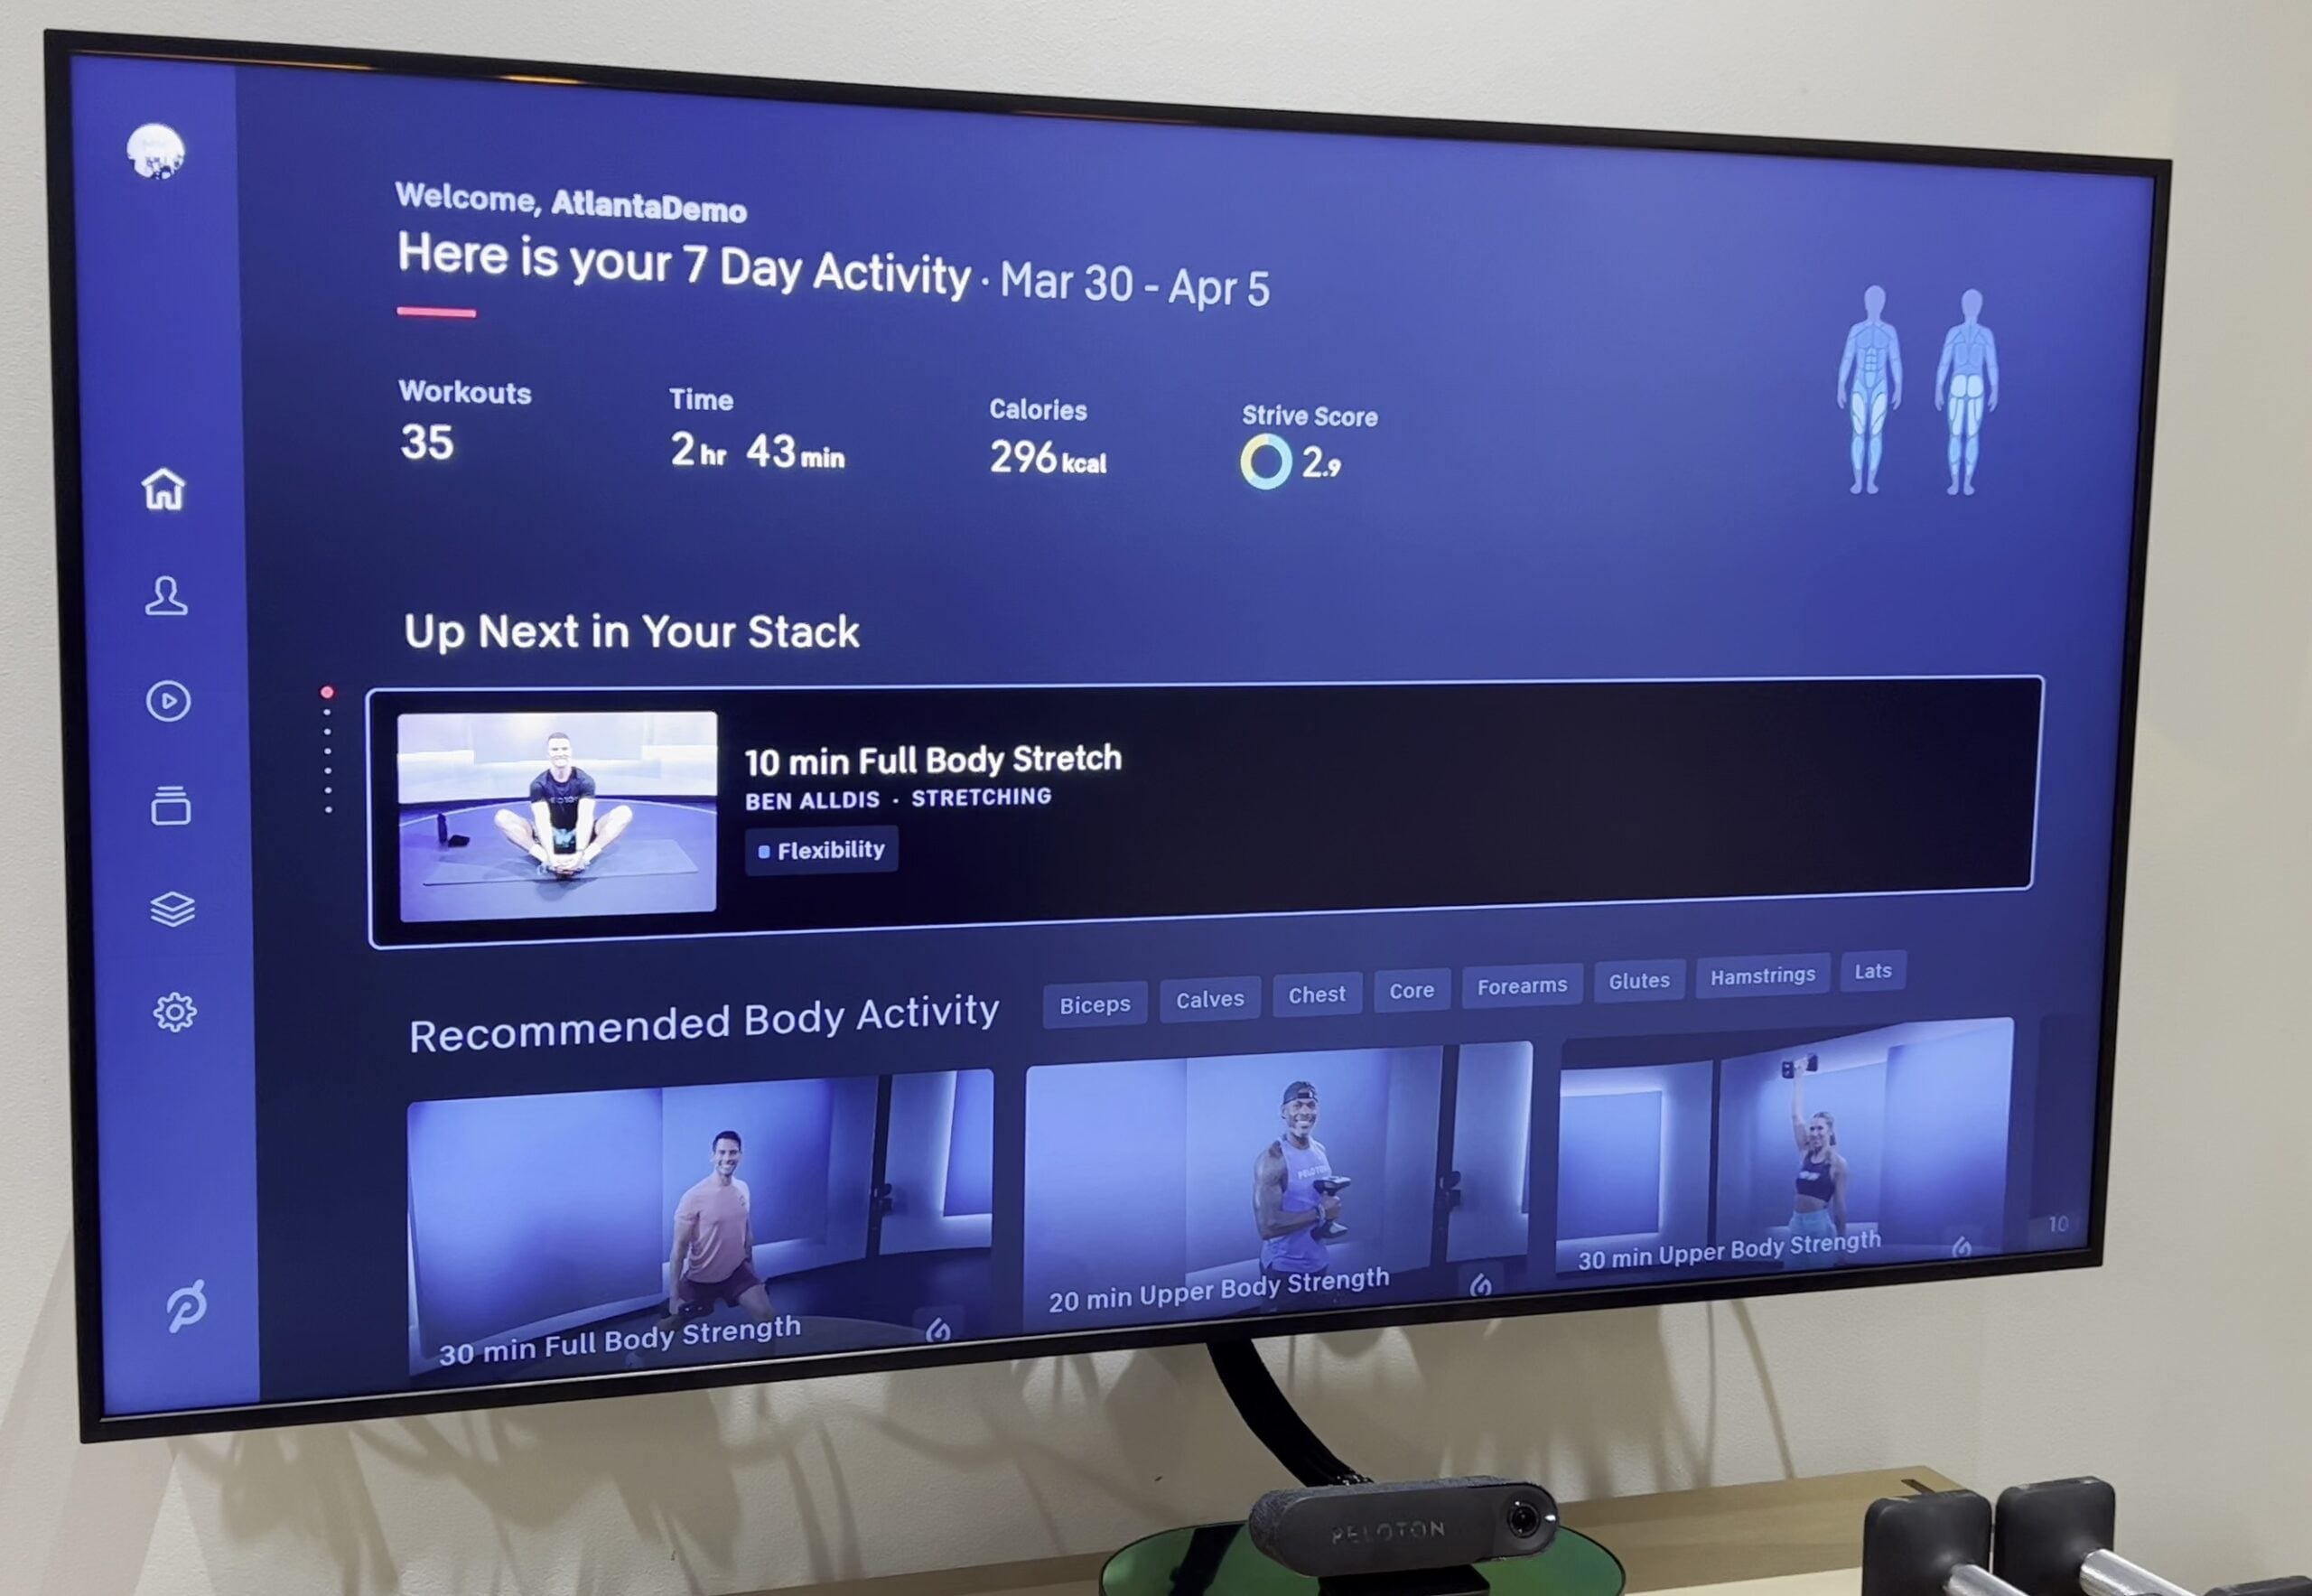
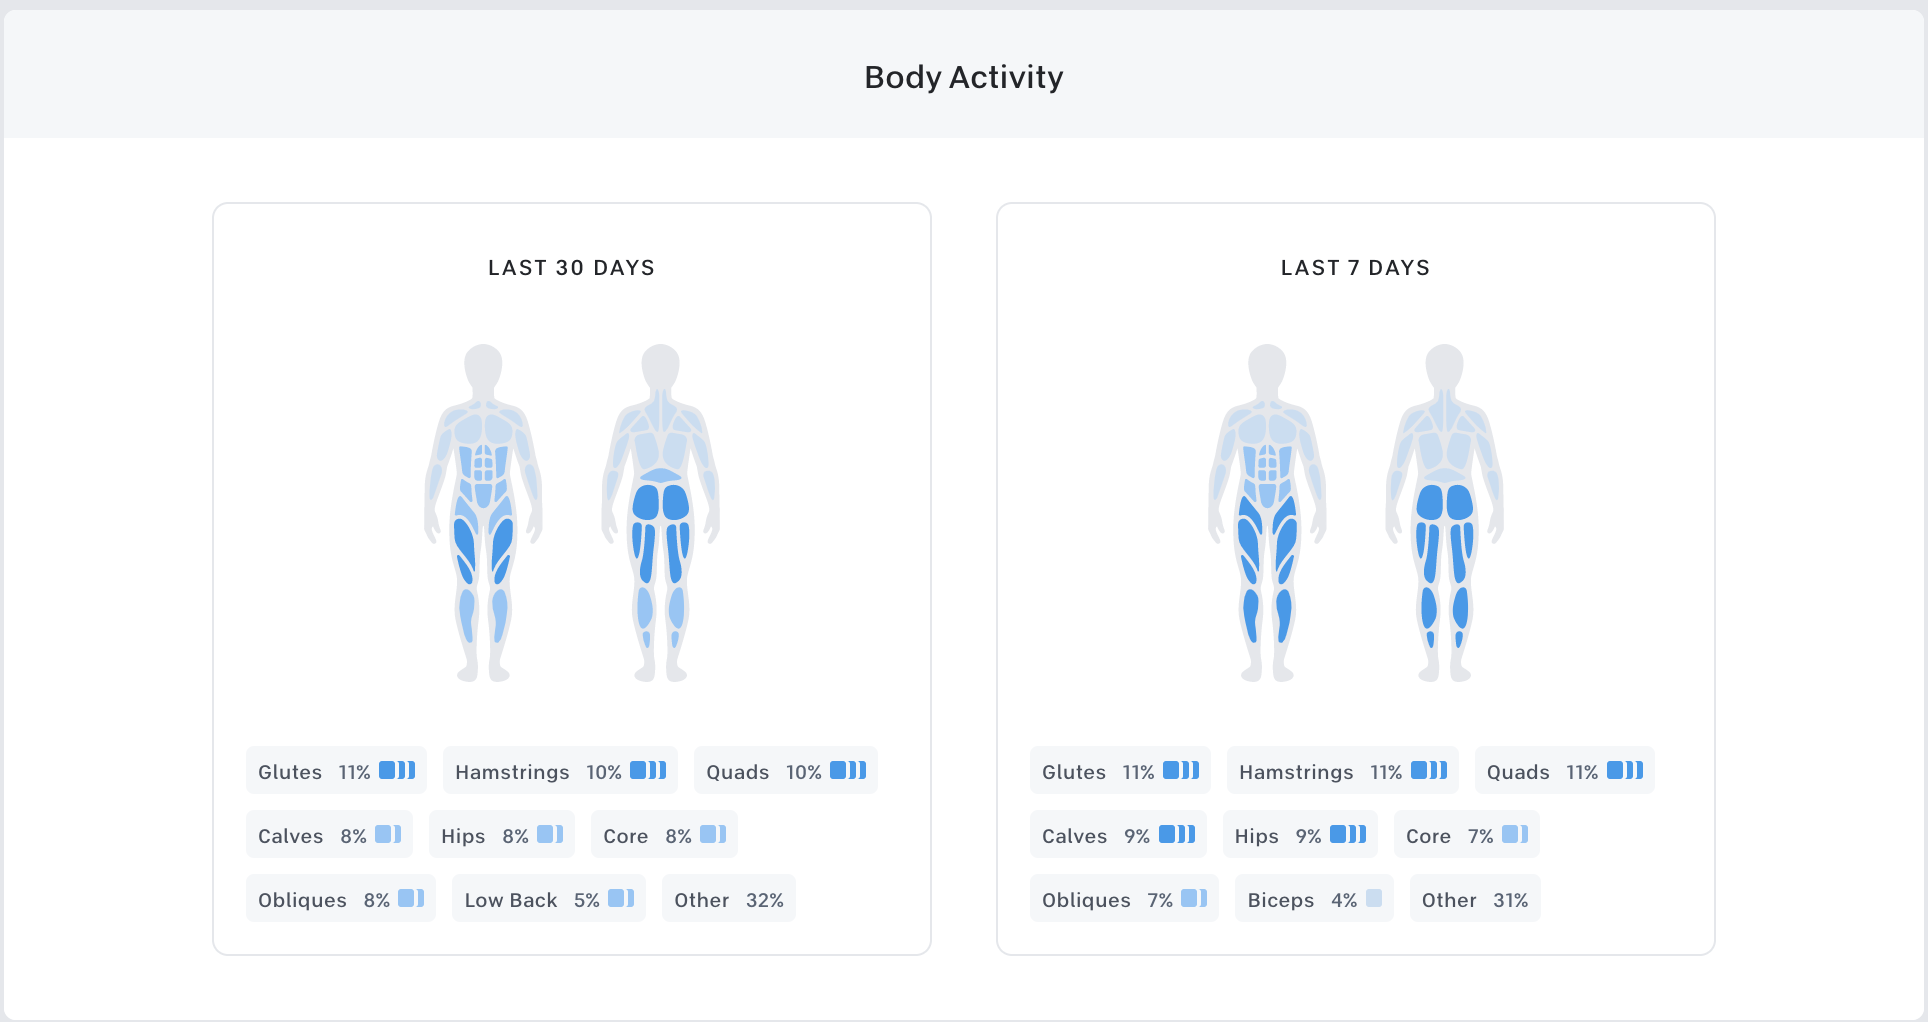
On the home screen, you are presented with an overview of your stats for the last month, and a small image of your Body Activity. You’ll also find that if you have a class in your stack, Peloton will present it to you on the home screen so you can jump right into it easily.
While you can take classes already in your stack on the Peloton Guide, there is not currently a way to add new classes to your stack from the Guide – you’ll have to build your stack using one of the apps, or a bike or Tread. However, when viewing the class library, you are able to bookmark classes.
The Peloton Guide will also recommend classes to you based on other classes you have taken – this is shown in the “Recommended Body Activity” section. It looks at your previous workouts for the last 7/30 days, and based on what muscles have been worked most recently, will recommended classes to focus on different muscle groups.
From the Home screen, you can also jump into any live class (of any type) if one is about to start.
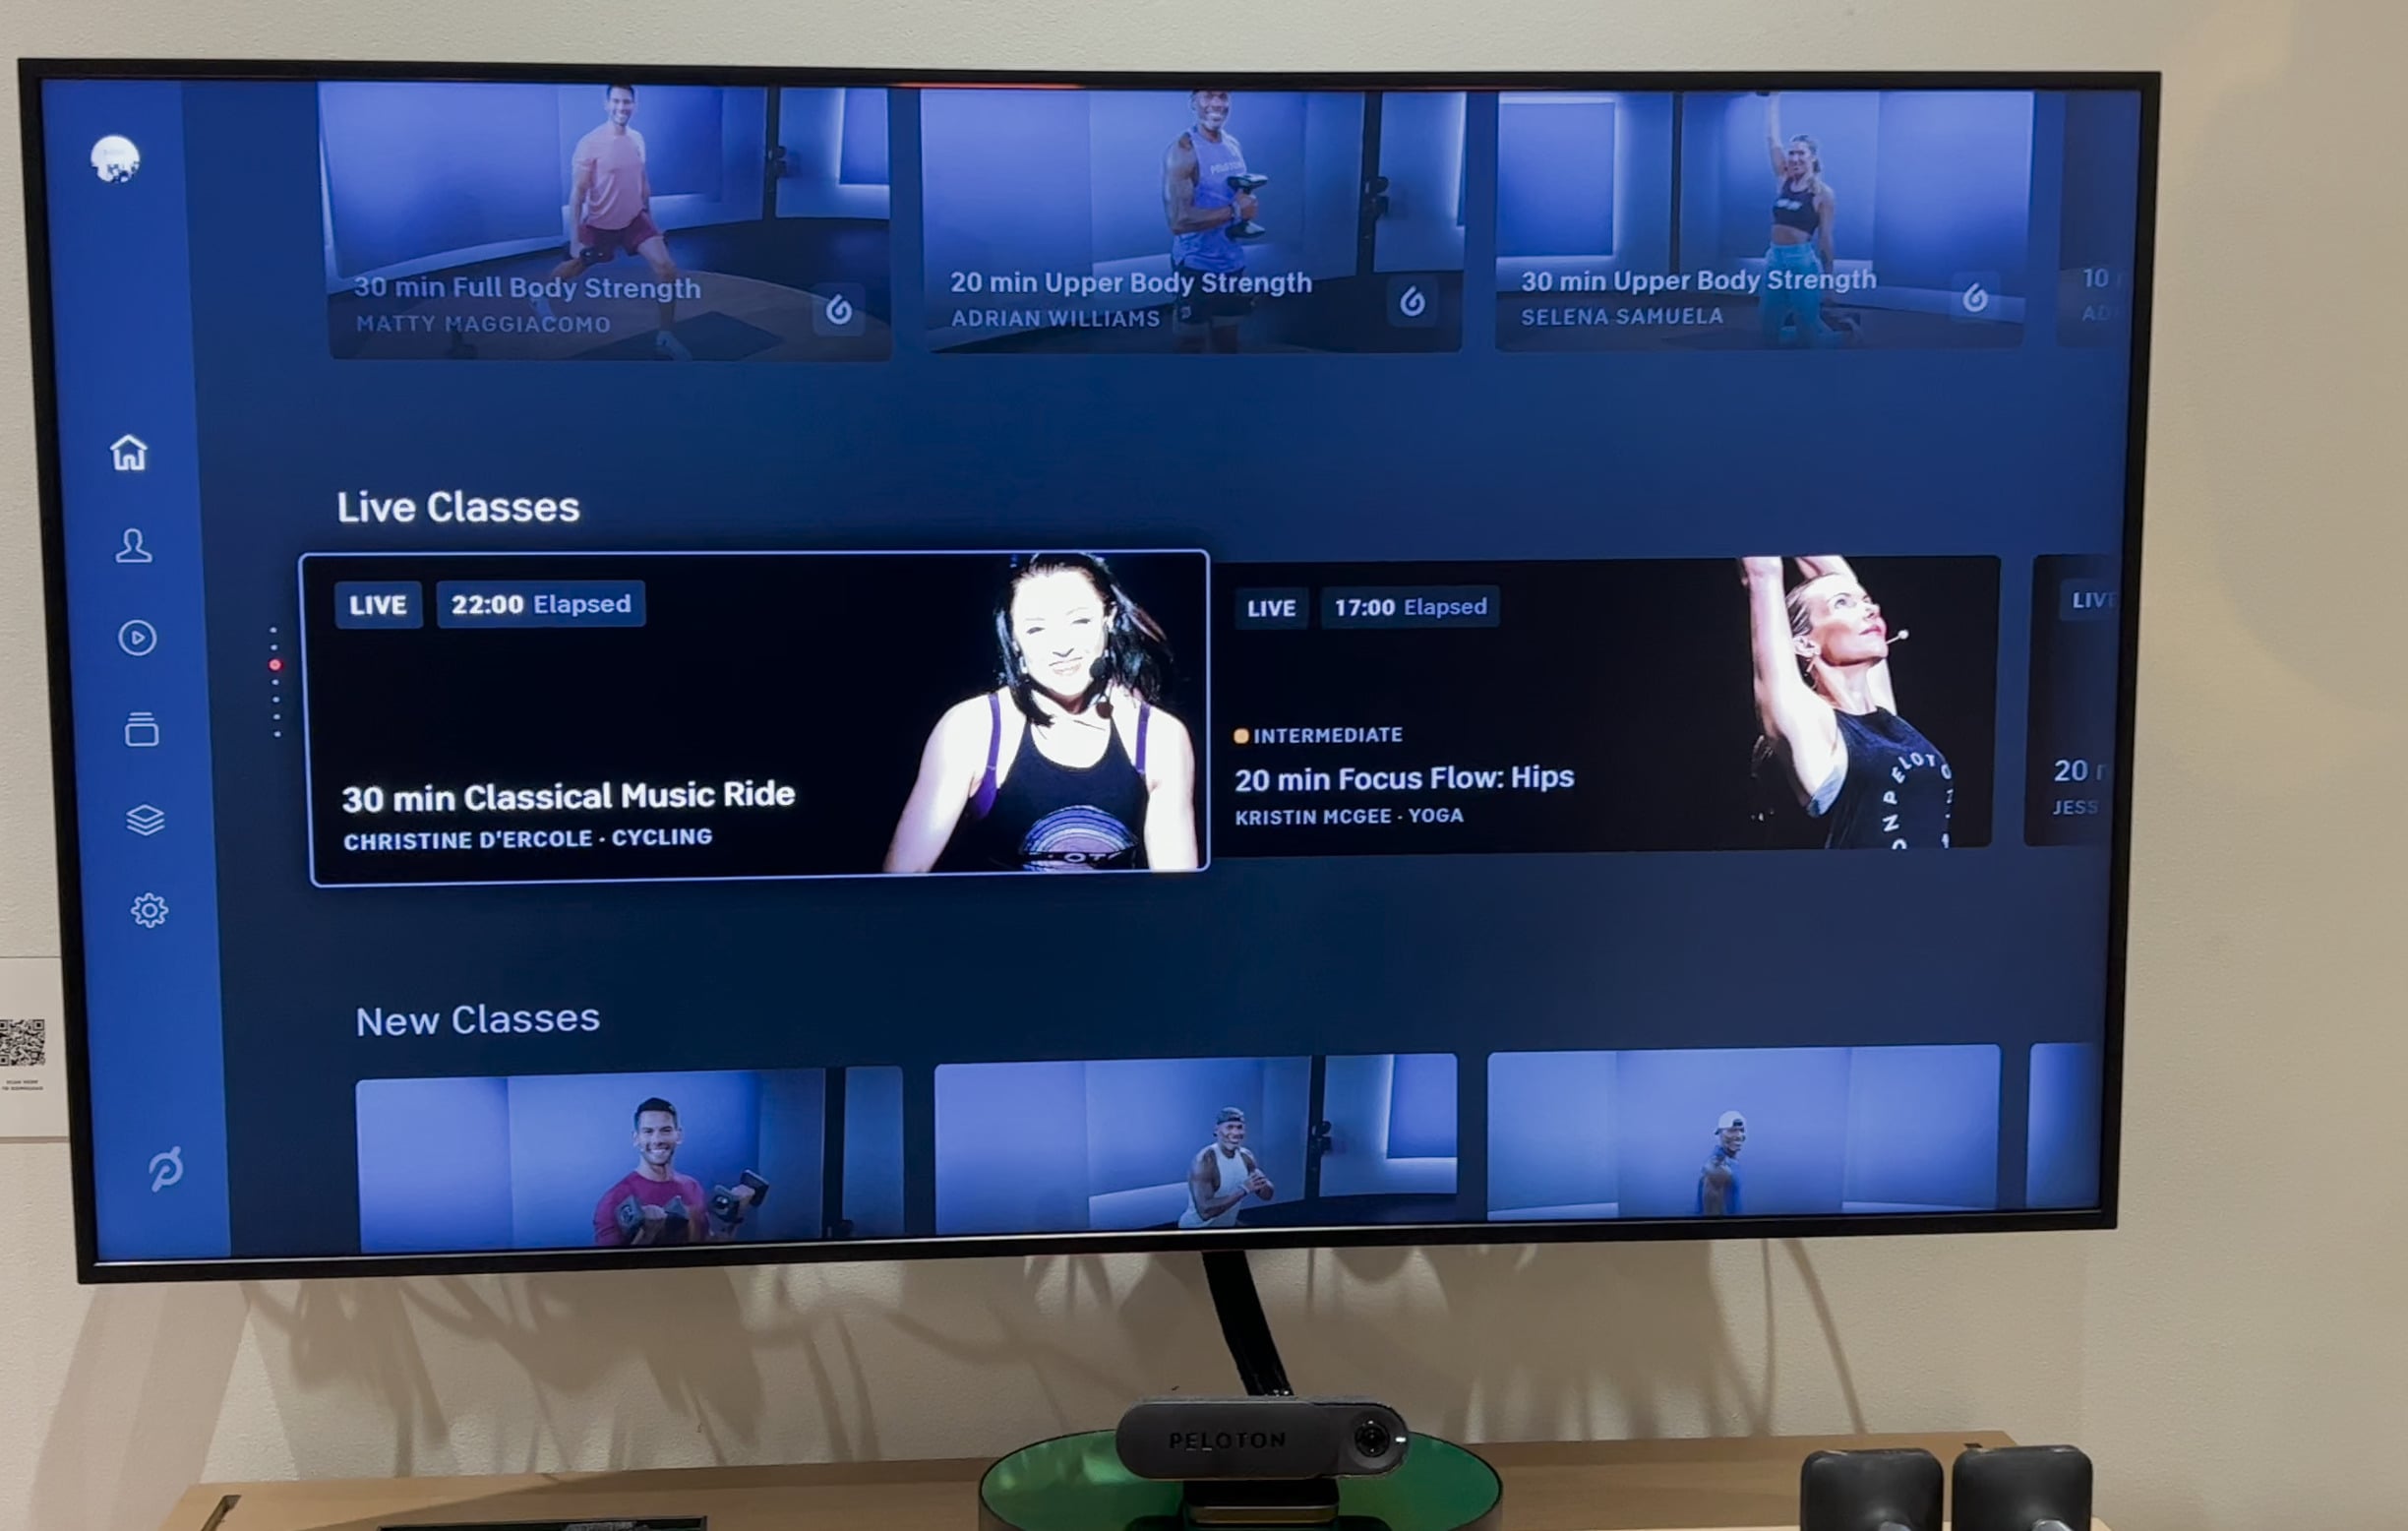
Below is an image from a live Christine D’Ercole ride we were able to join from the Peloton Guide.
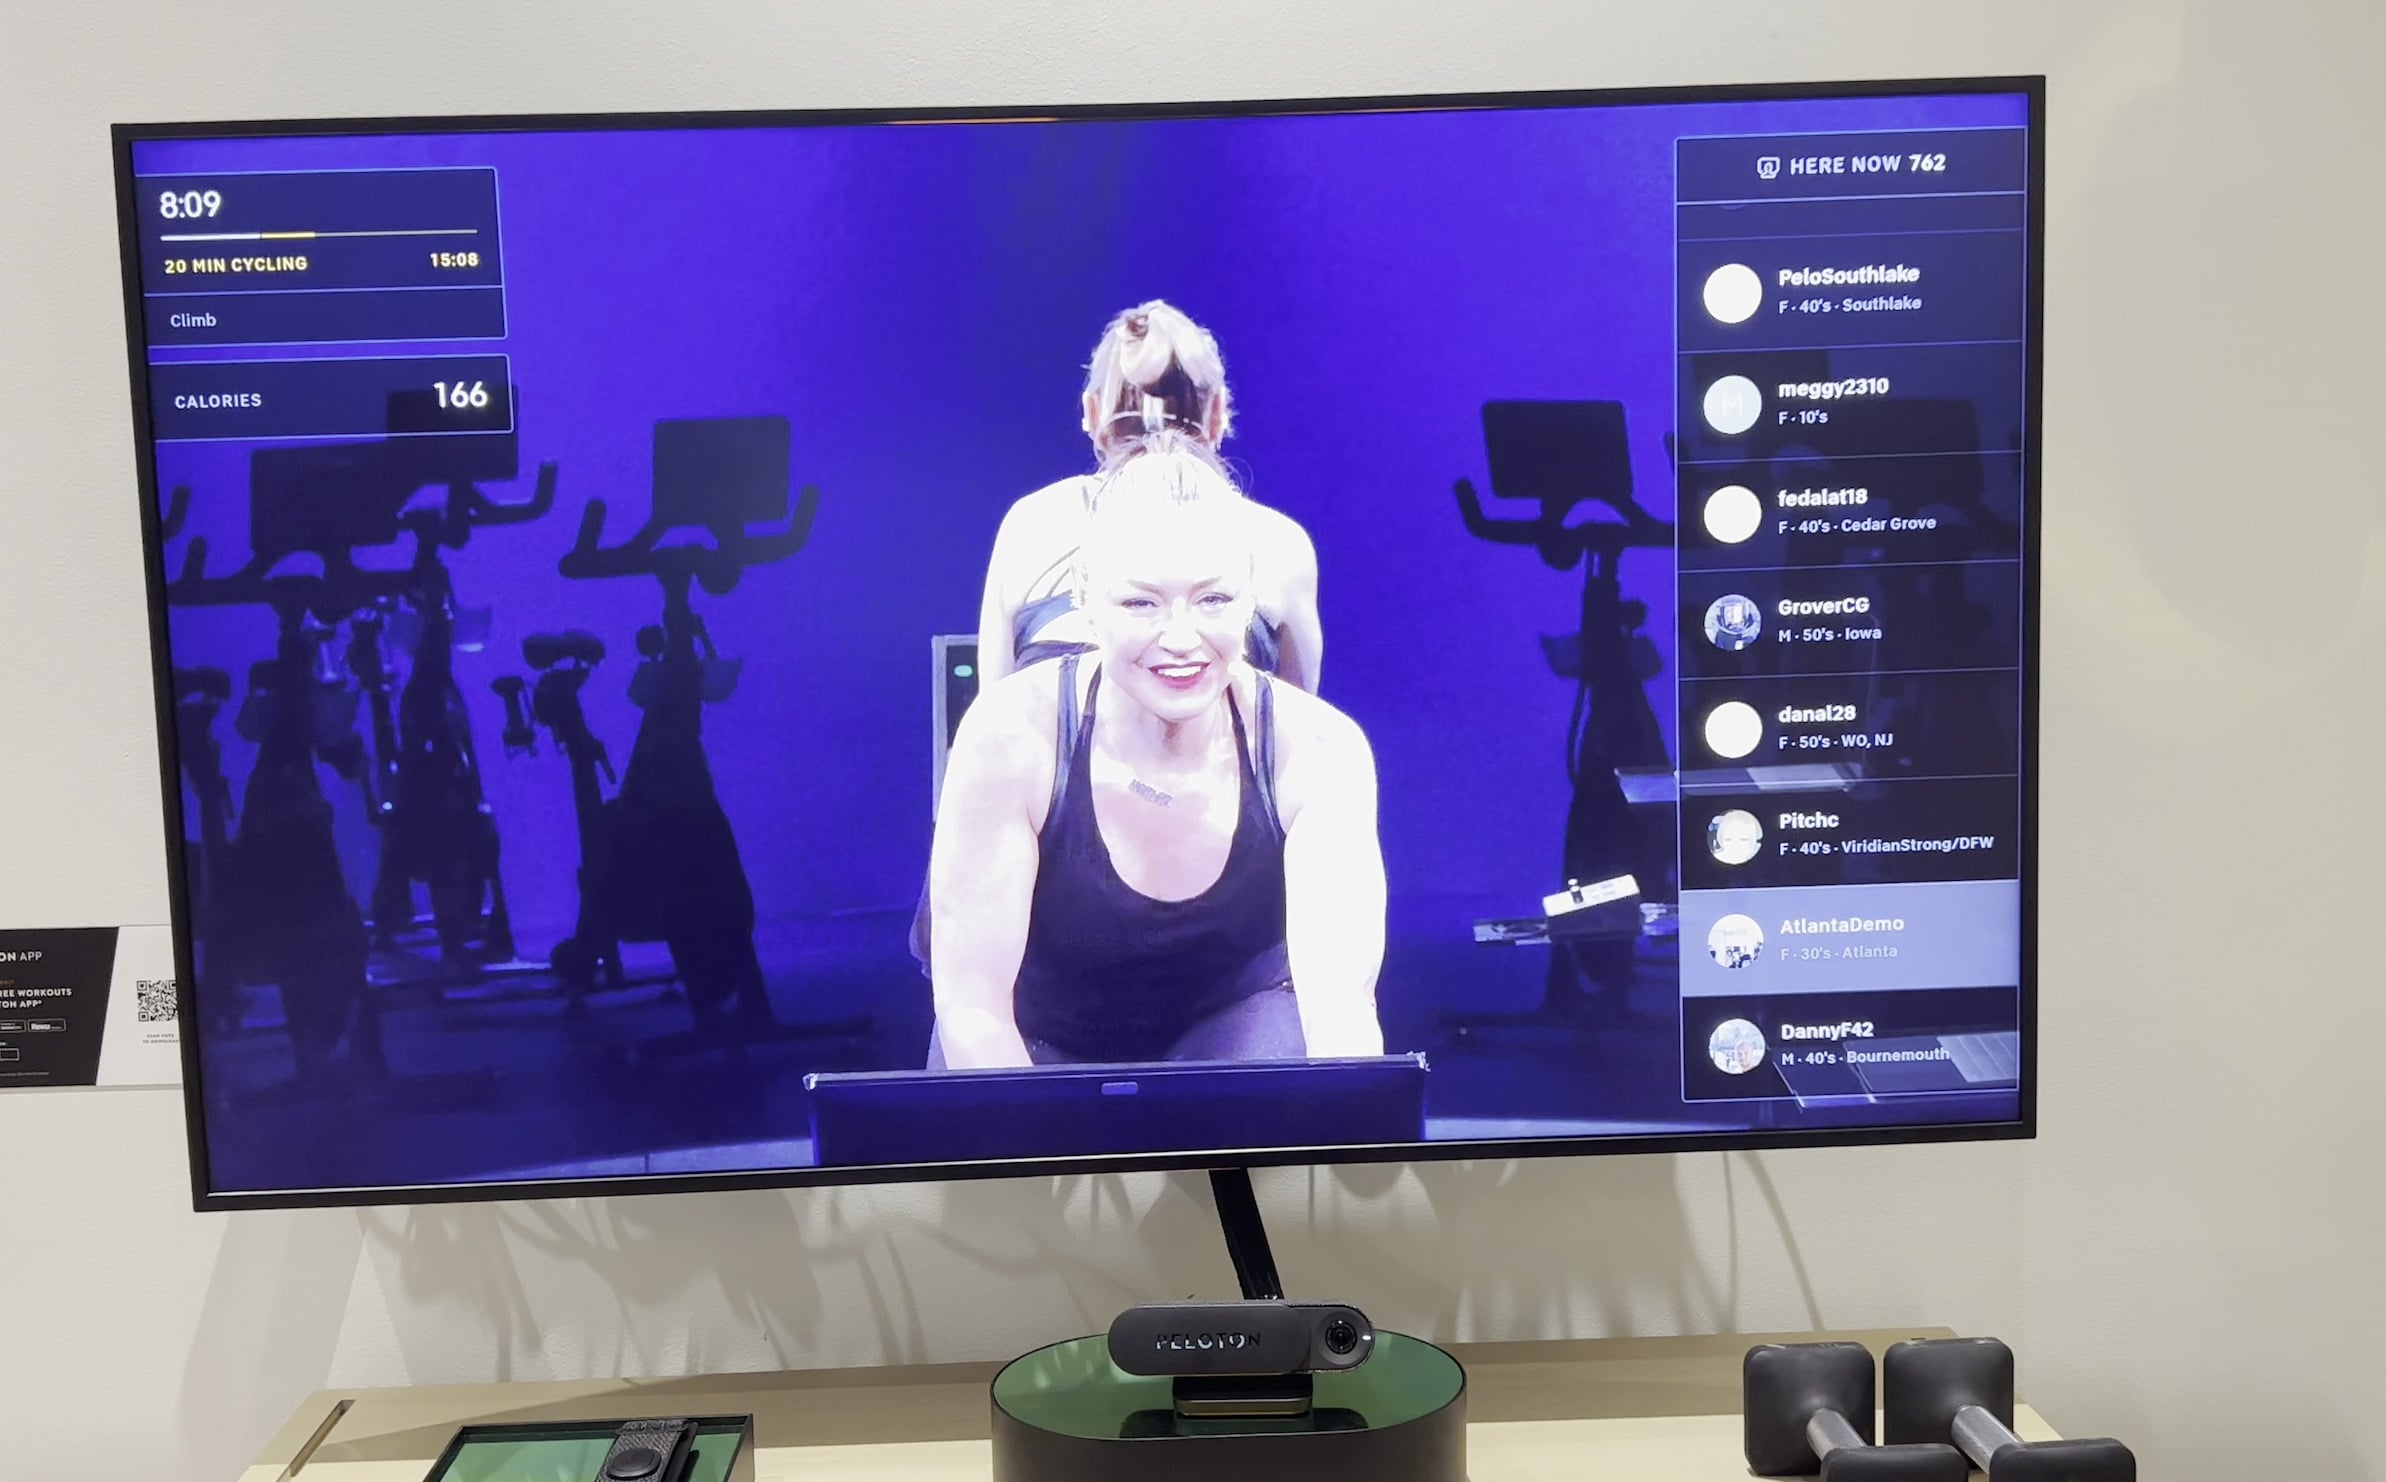
Even in other class types, you have the option to change the layout (we’ll cover this more later). In the image above, we picked the view that had our image hidden – however, we could have had us shown side by side Christine, or us in a small picture in picture window, or us full size and Christine picture in picture, or any other view available.
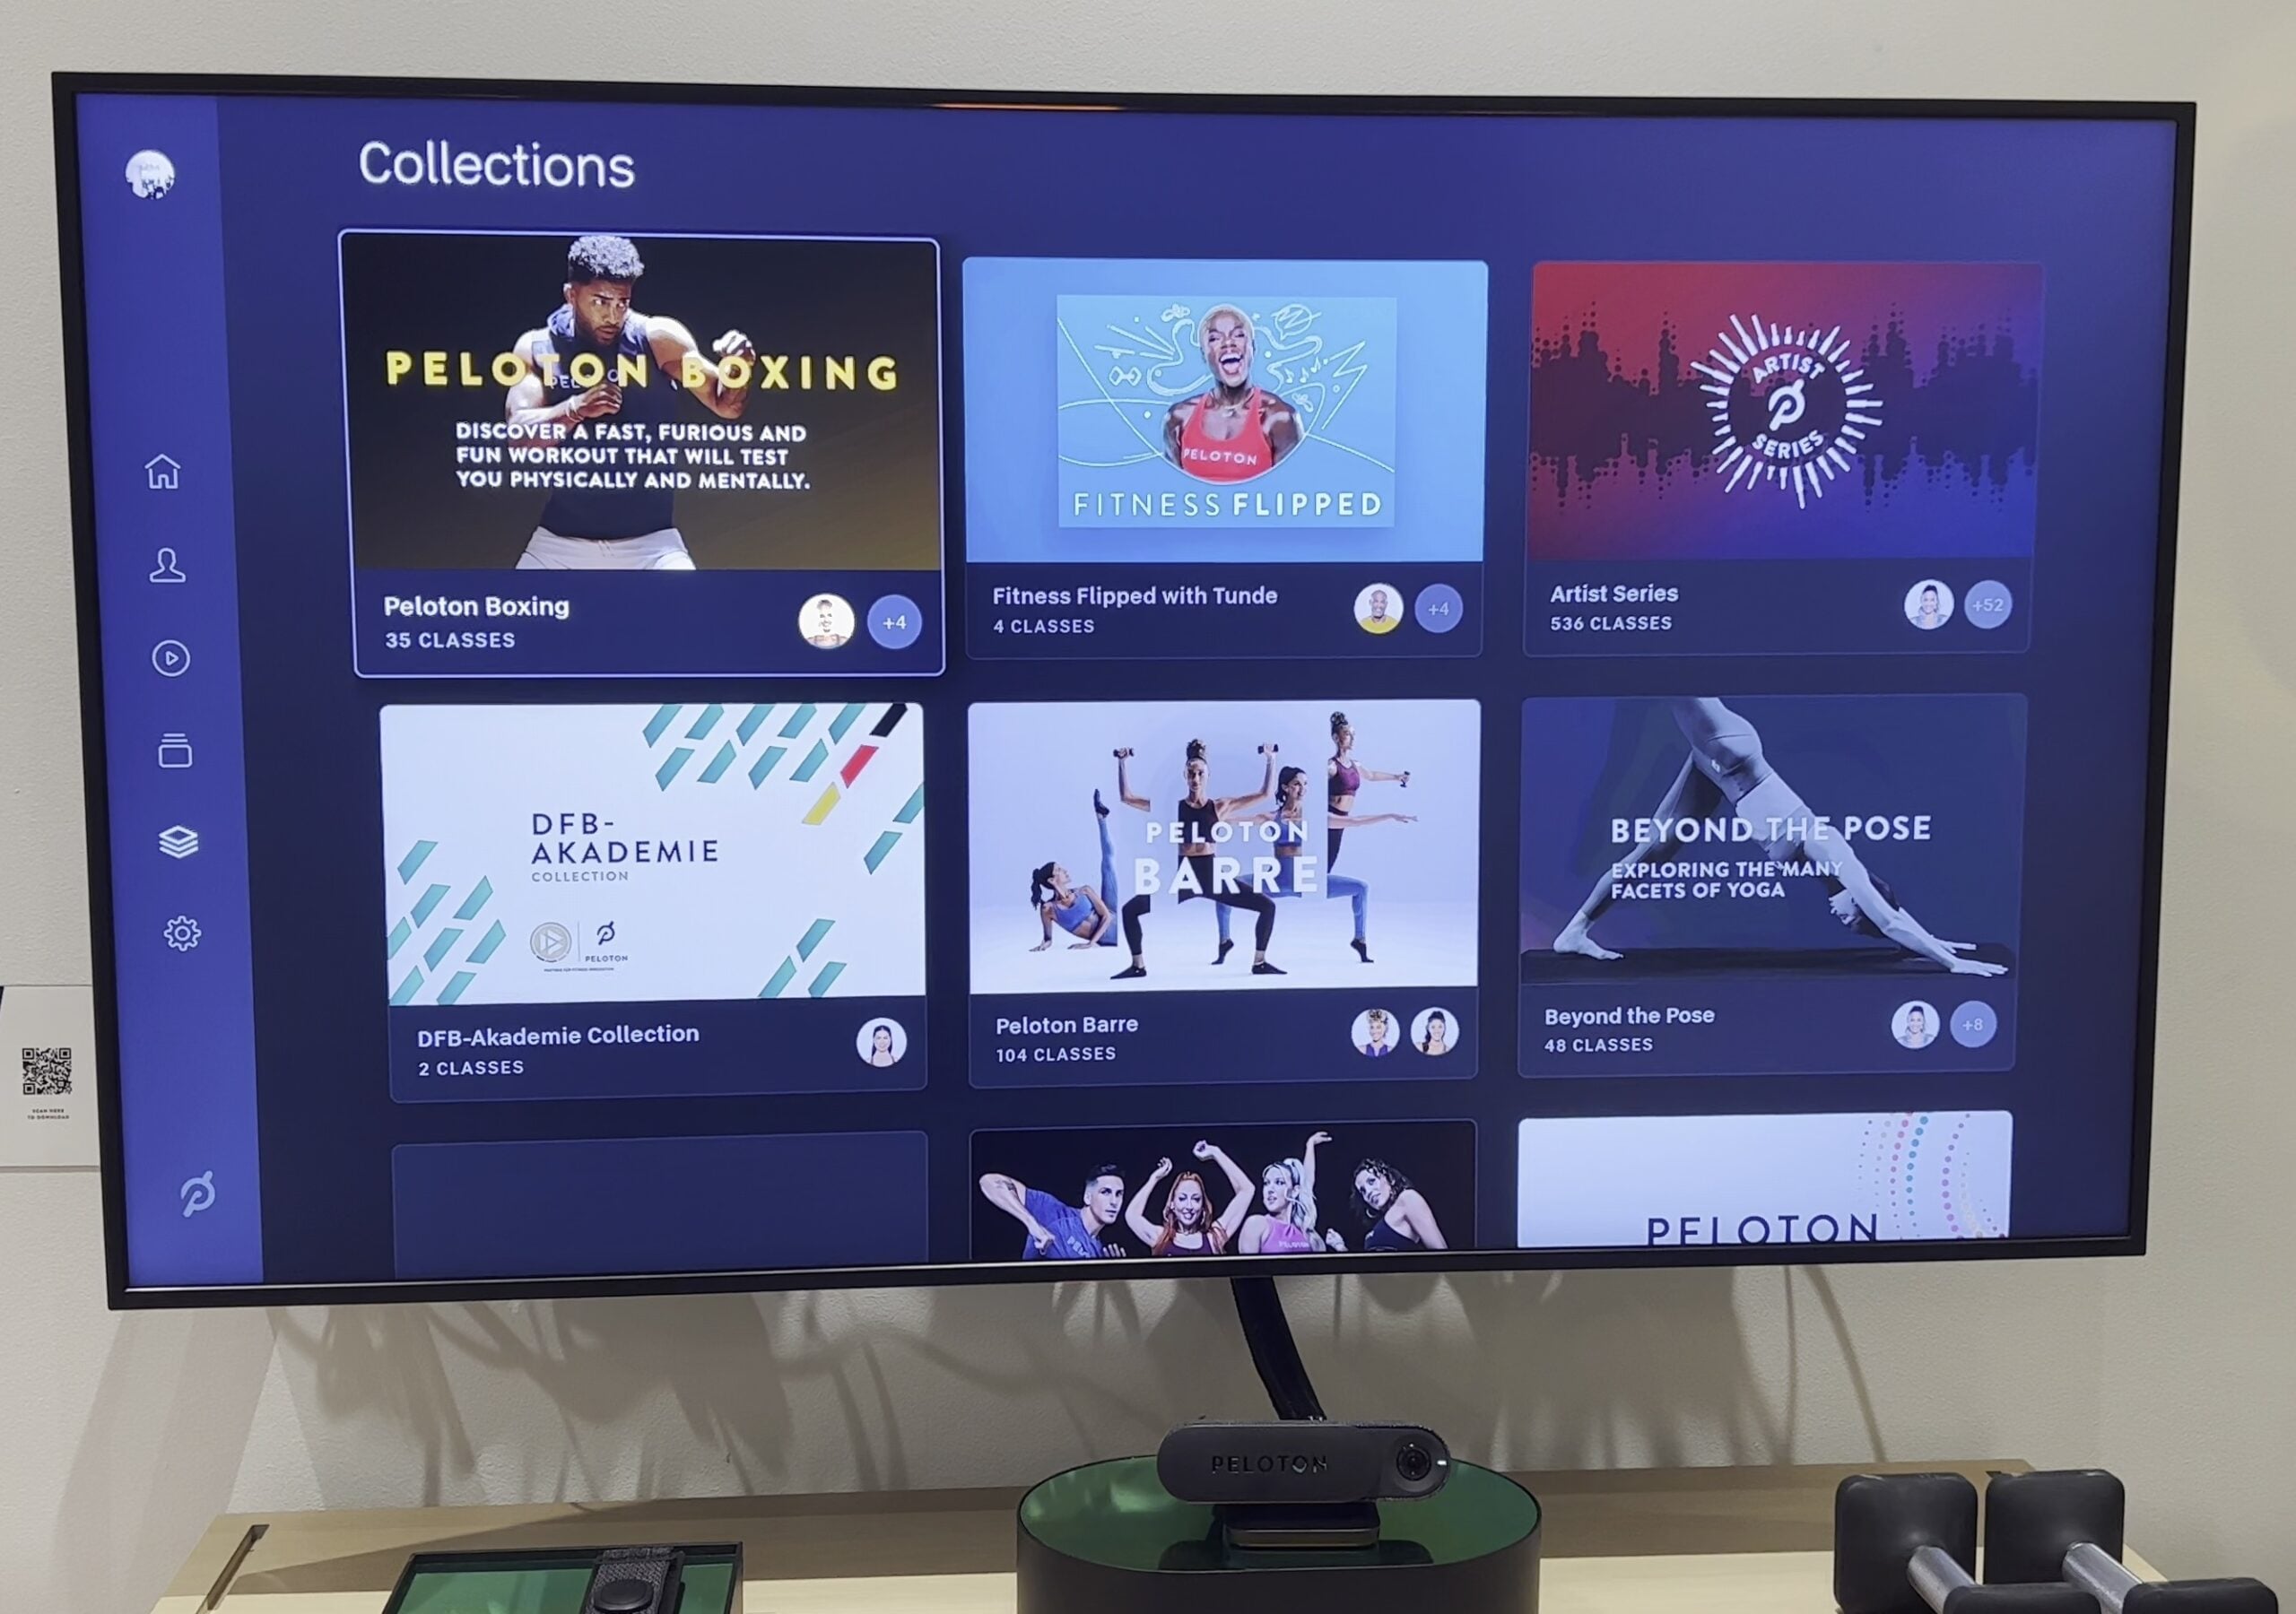
Both the Collections & Programs page function exactly like you’d expect them to – with a list of all the ones available to you that you can then click into and take.
On the Classes page, strength classes get the most focus – with a large banner at the top prompting you to jump into strength. This promotes a “Movement Tracker” feature, which is the ability for Peloton to track how much of each movement of a workout you complete, using the camera.
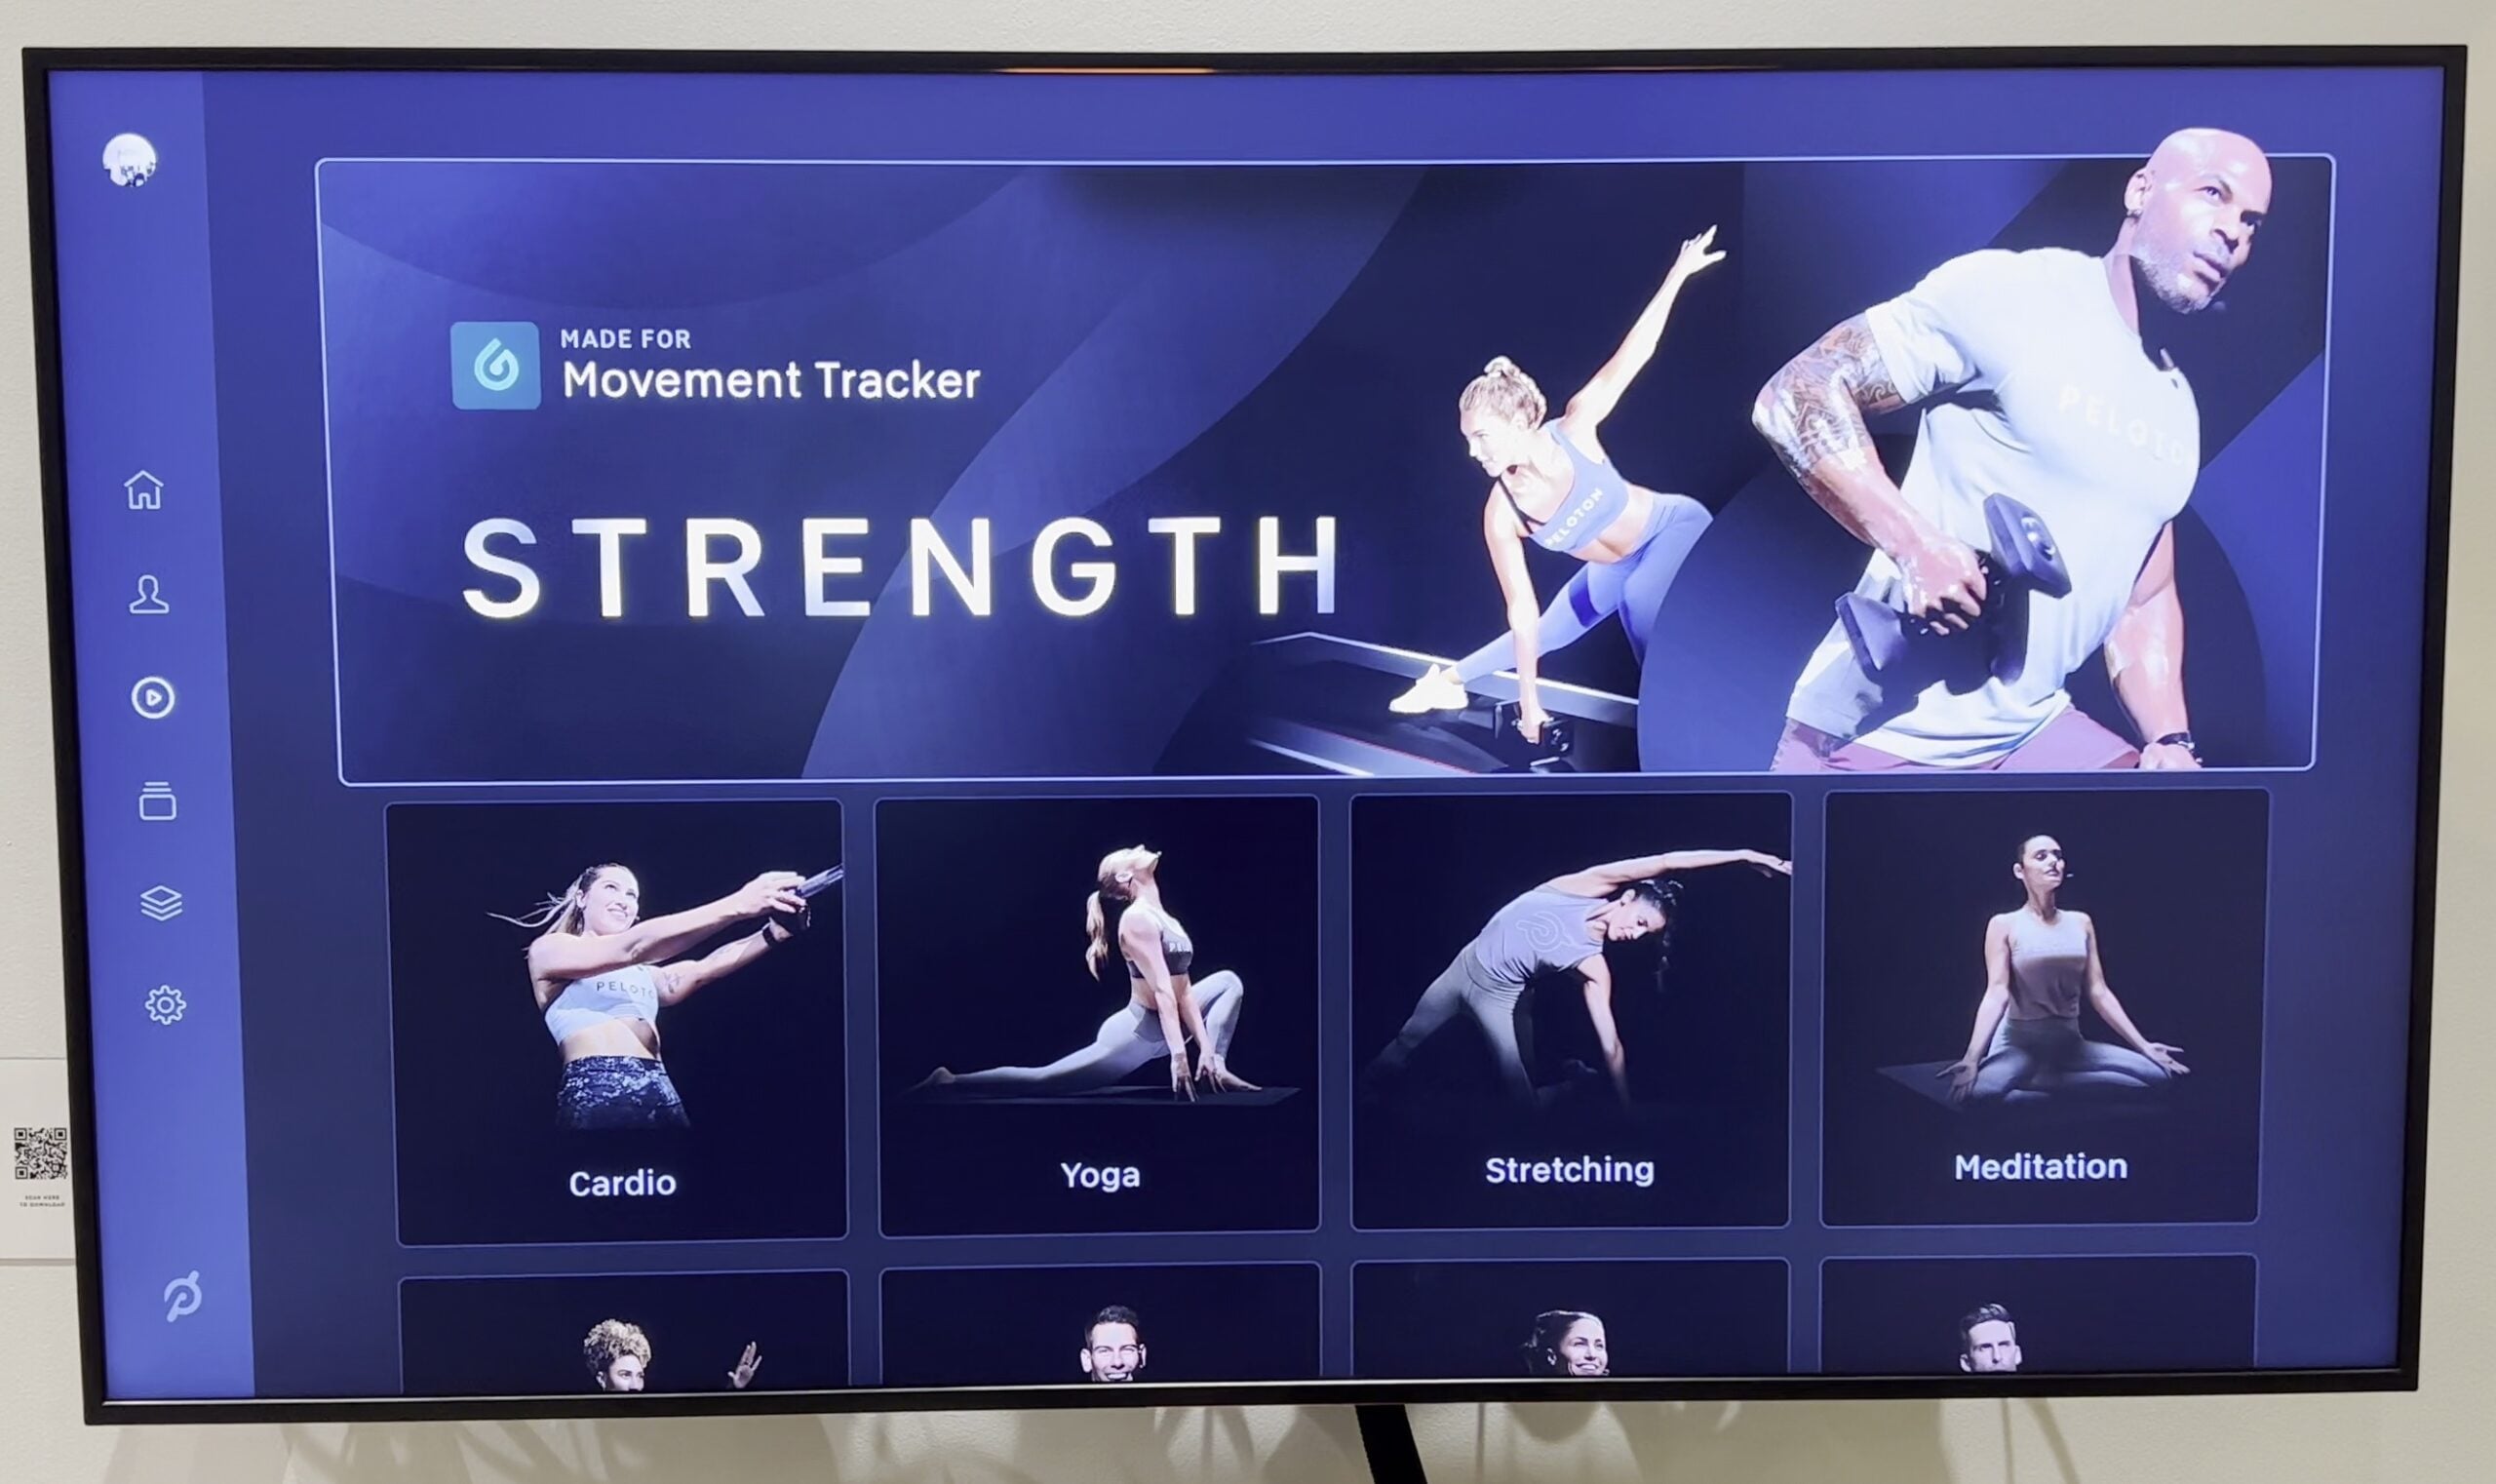
Strength is (currently) the only class type that works with the Movement Tracker feature. We’re told that Peloton hopes to bring the Movement Tracker feature to Cardio, Yoga, and even Boxing in the future. In fact, last September a class accidentally dropped on-demand that specifically mentioned the Peloton Guide being compatible with yoga.
If you take an older class, or a newer one without Movement Tracker, it will still play and work as a class, and you can see yourself side by side – you just won’t get a Movement Tracker score.
This seems to be a common theme with the Peloton Guide right now – things it might do in the future. The good news is, Peloton can quietly update the software on the Peloton Guide behind the scenes and bring new features to the platform – including compatibility with more classes. However, some features that users have been hoping and expecting for with the Peloton Guide since it was first announced aren’t there as of today (for example: rep counting in classes).
Again – you can view the on-demand library for any class type.
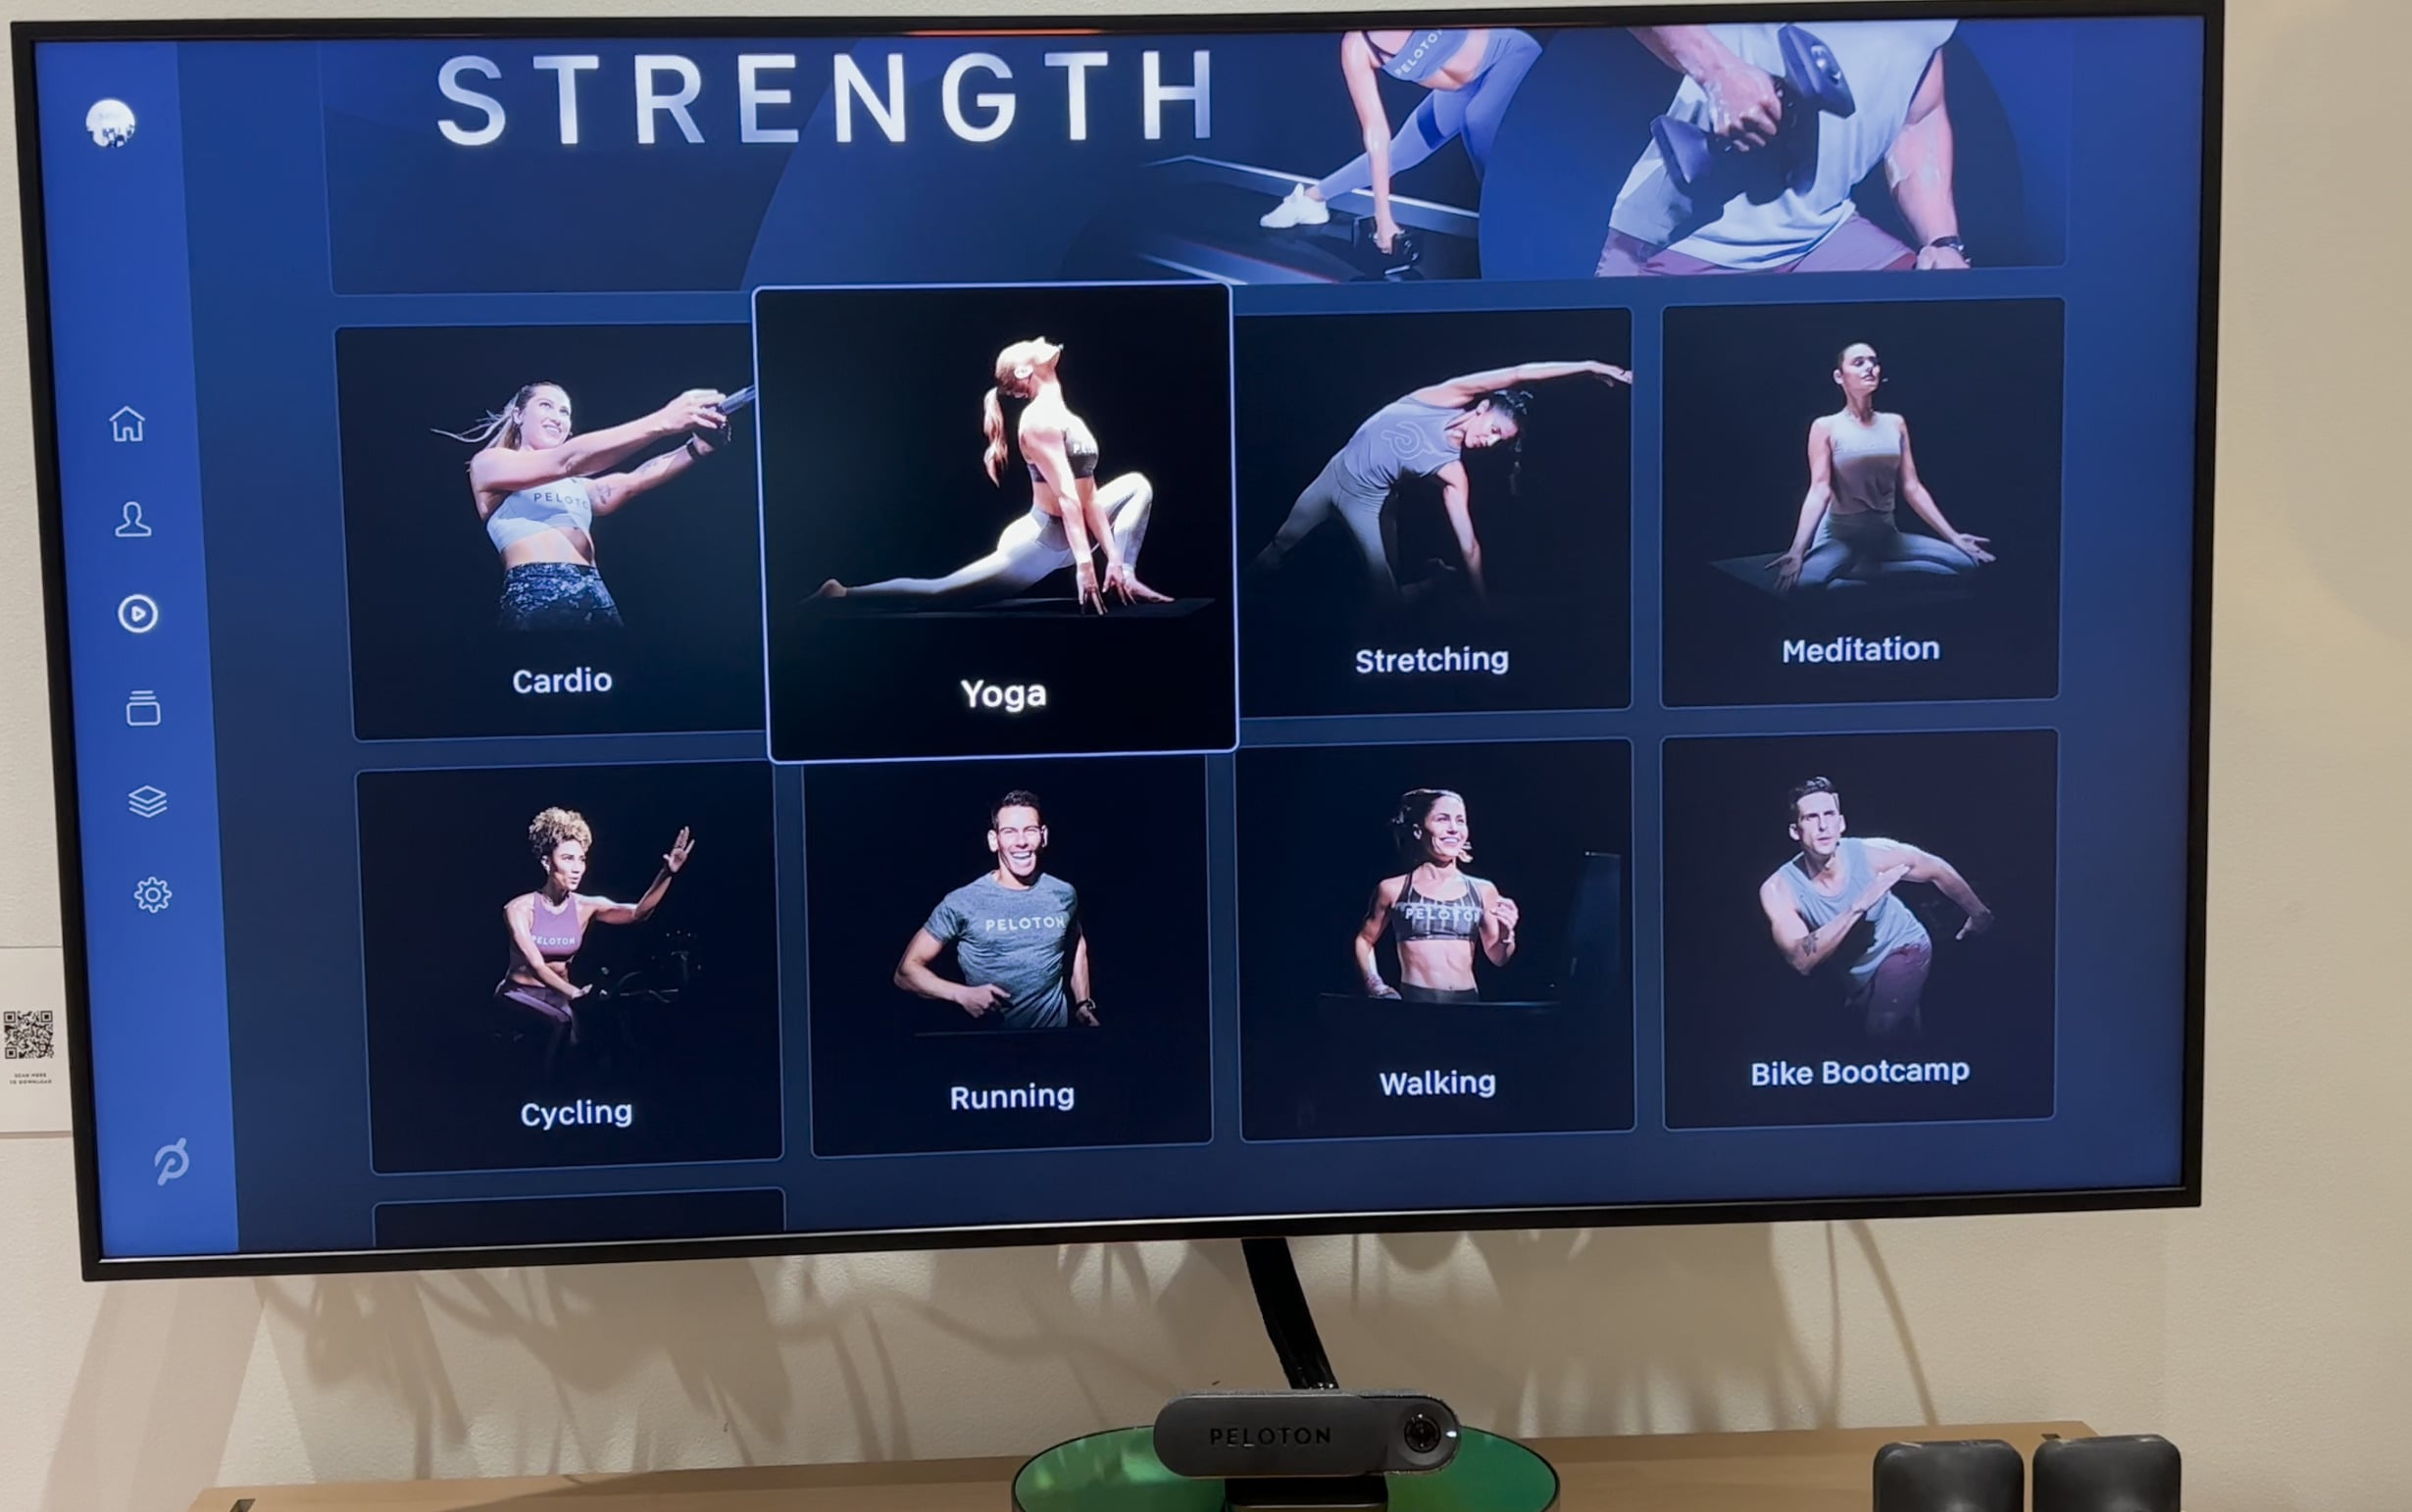
We were able to open the Yoga section and view all on-demand Yoga classes. Some of the preview images were slow to load as we browsed the library. It’s not clear whether this was due to internet speed/issues, or something else.
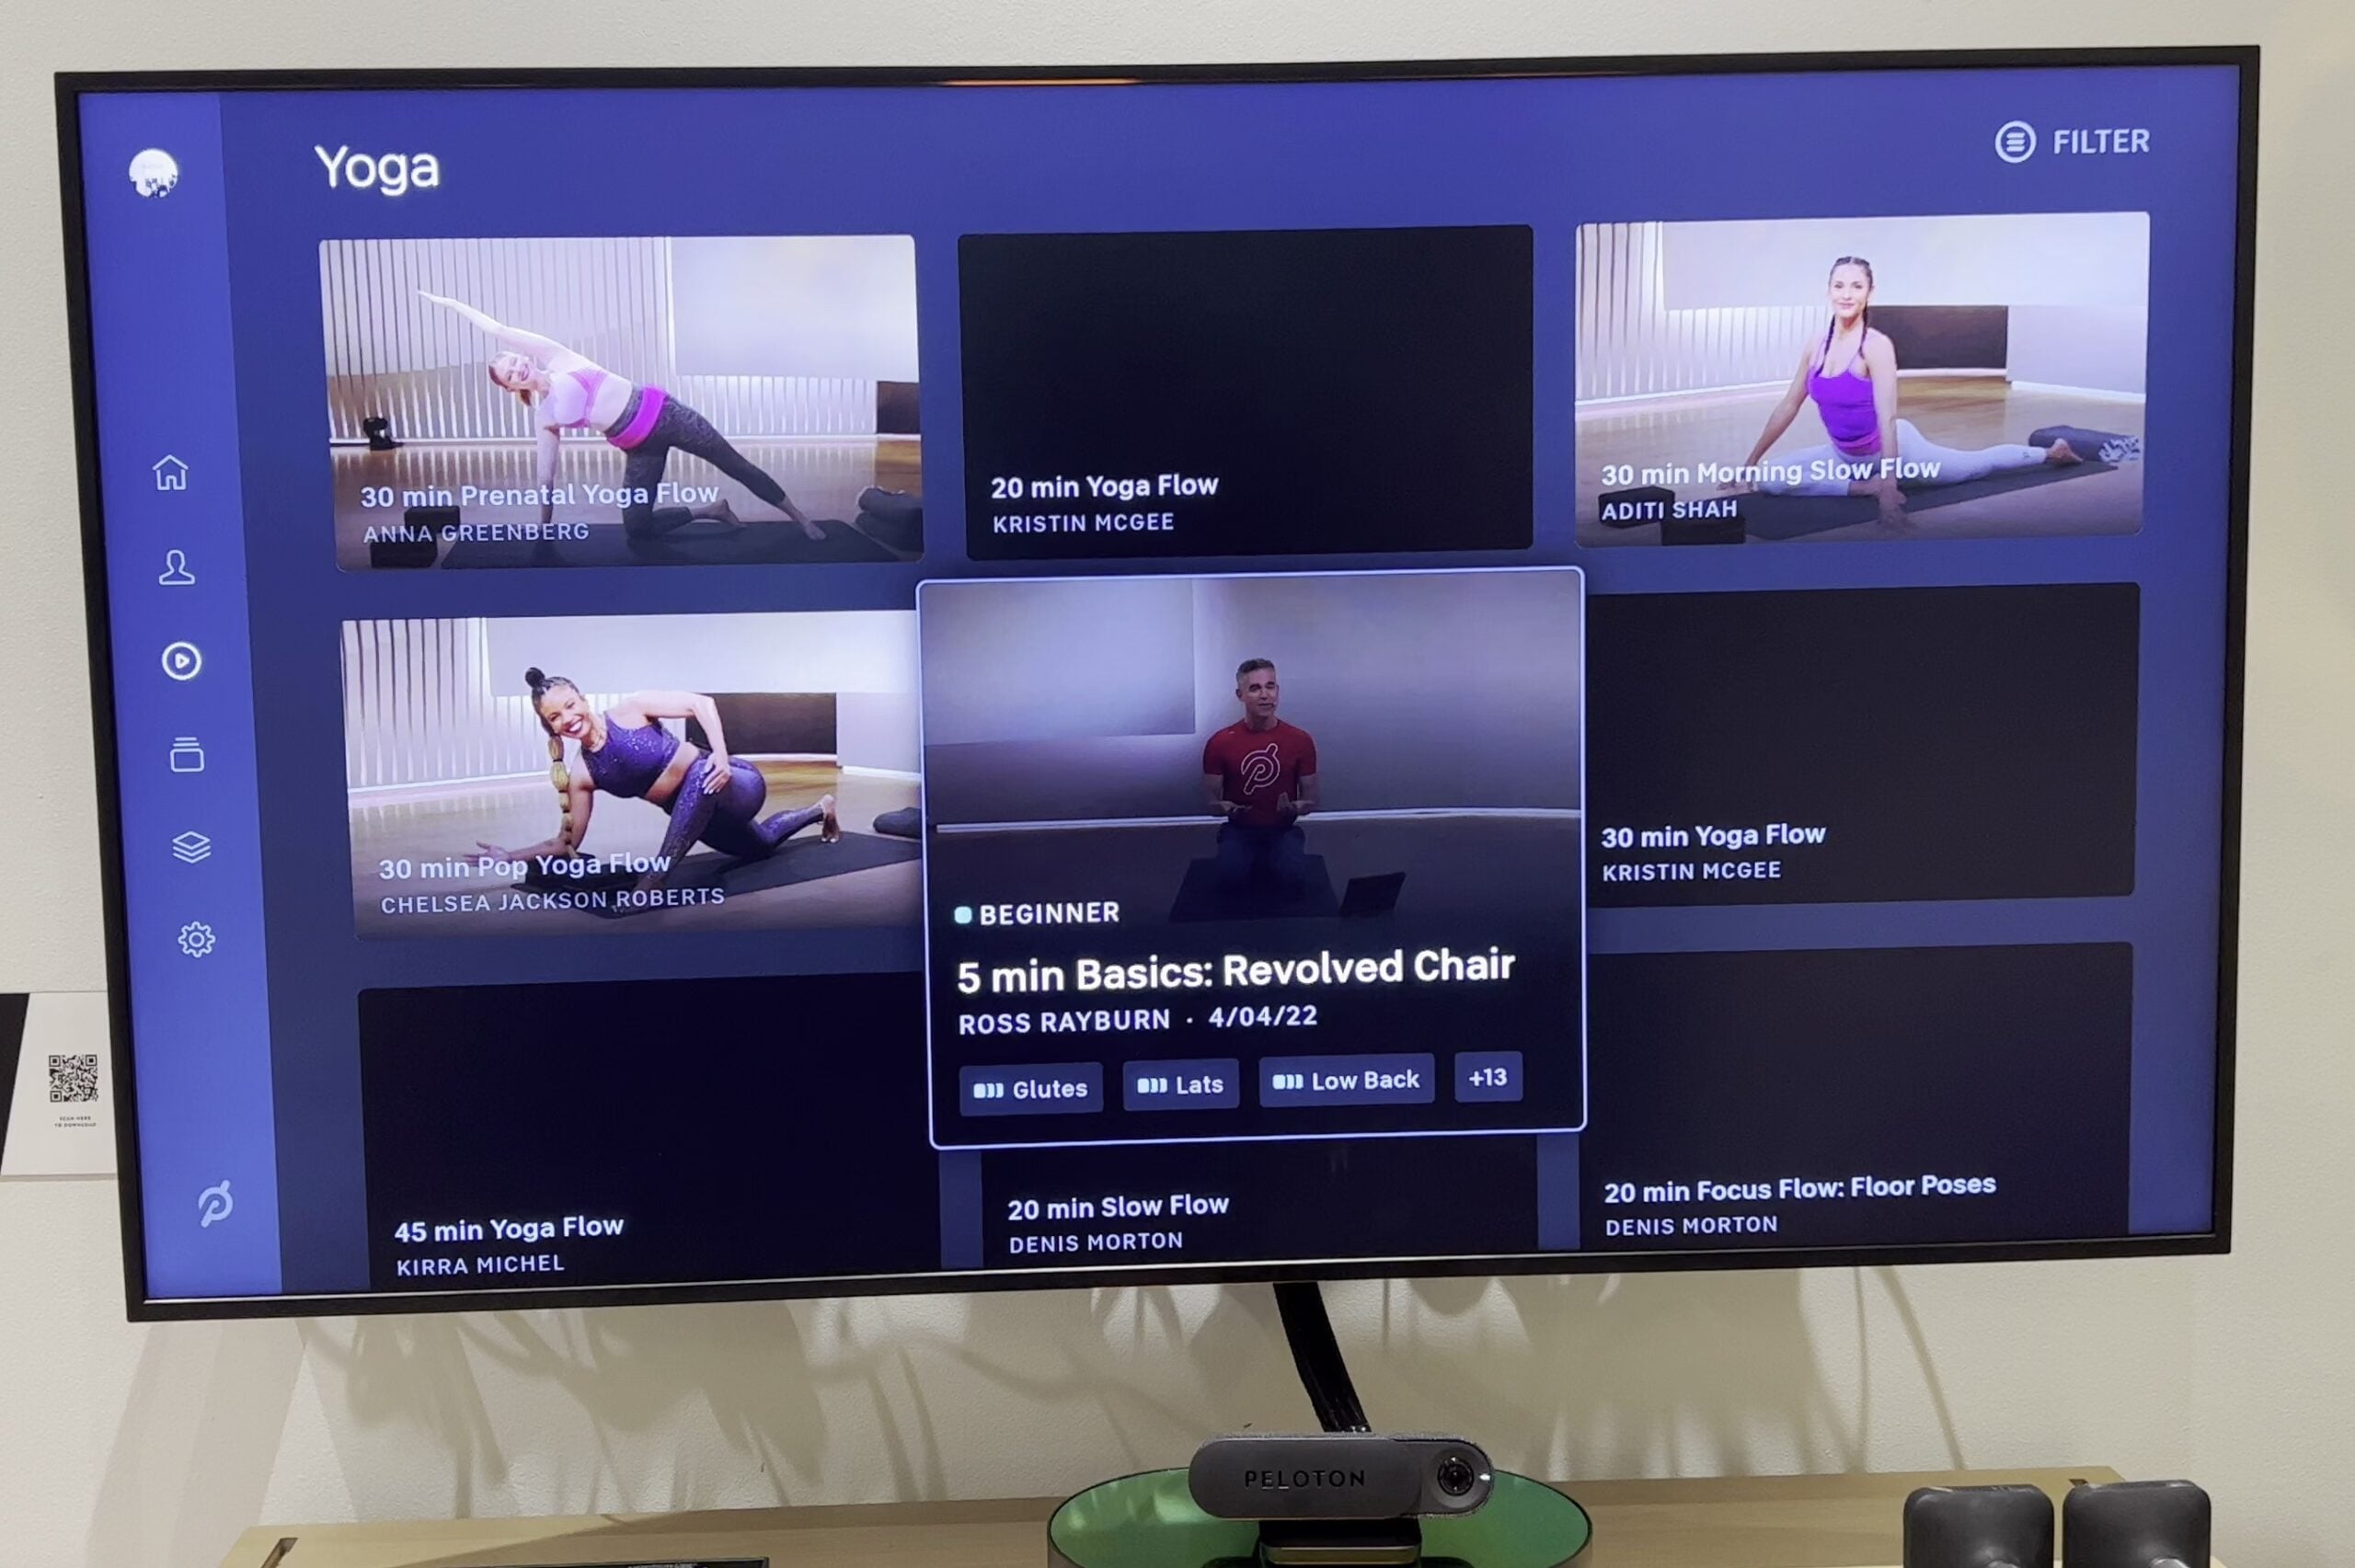
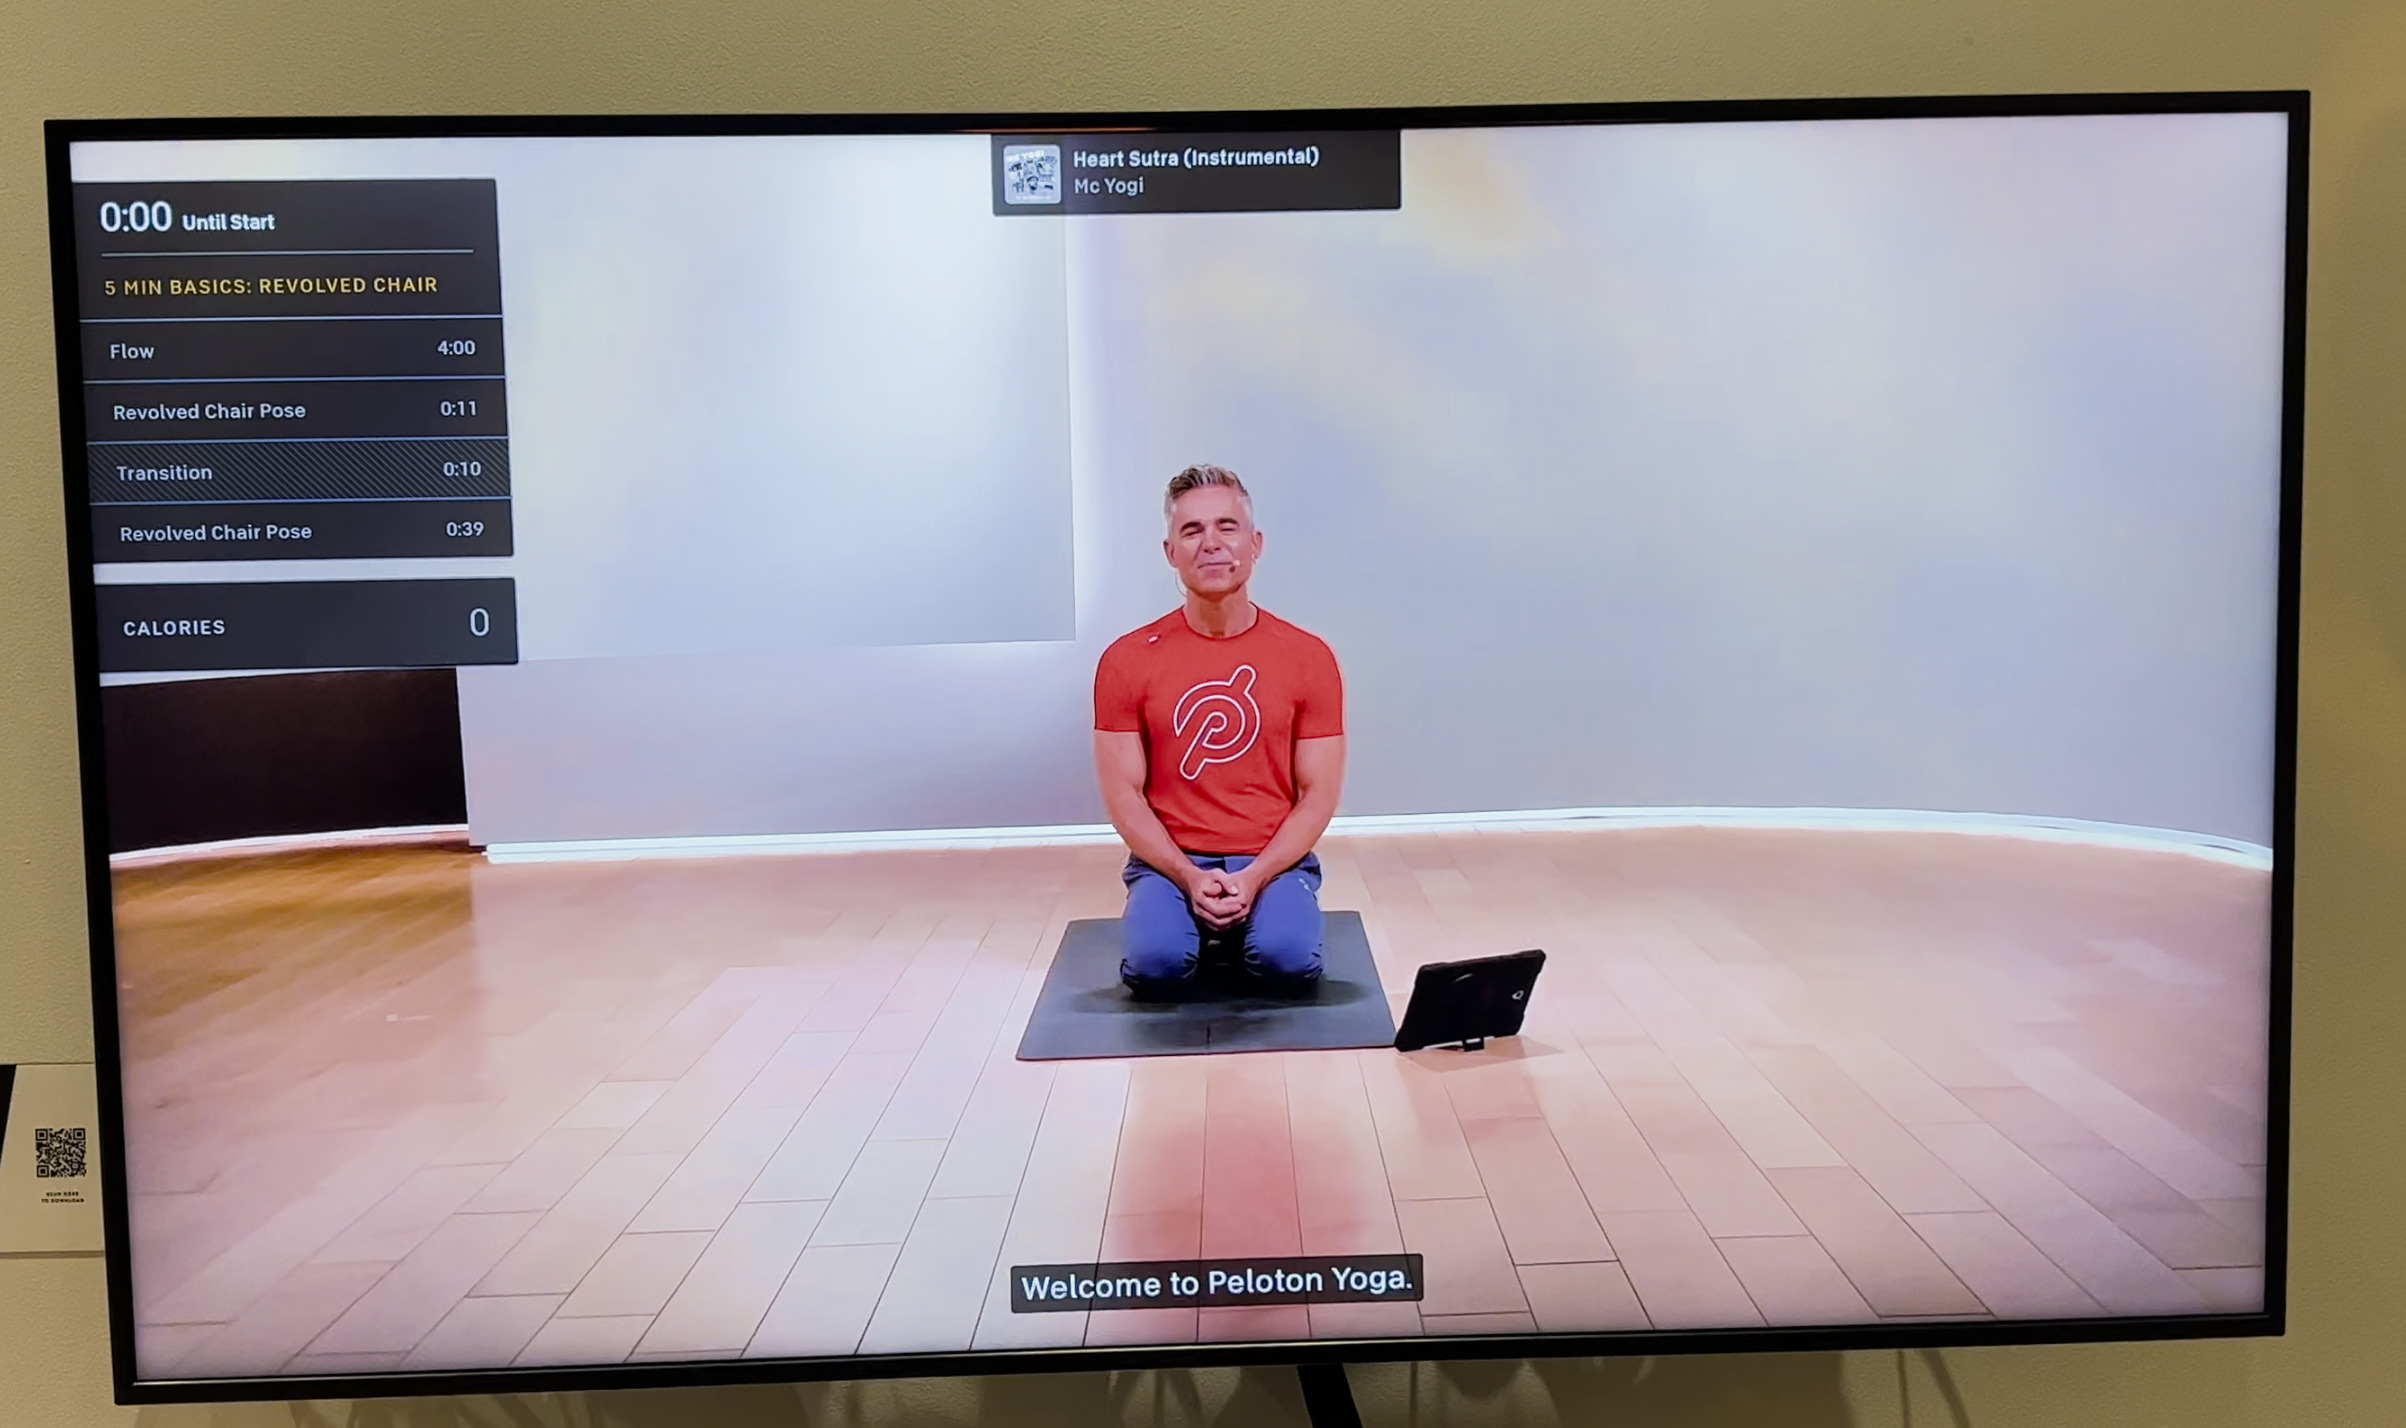
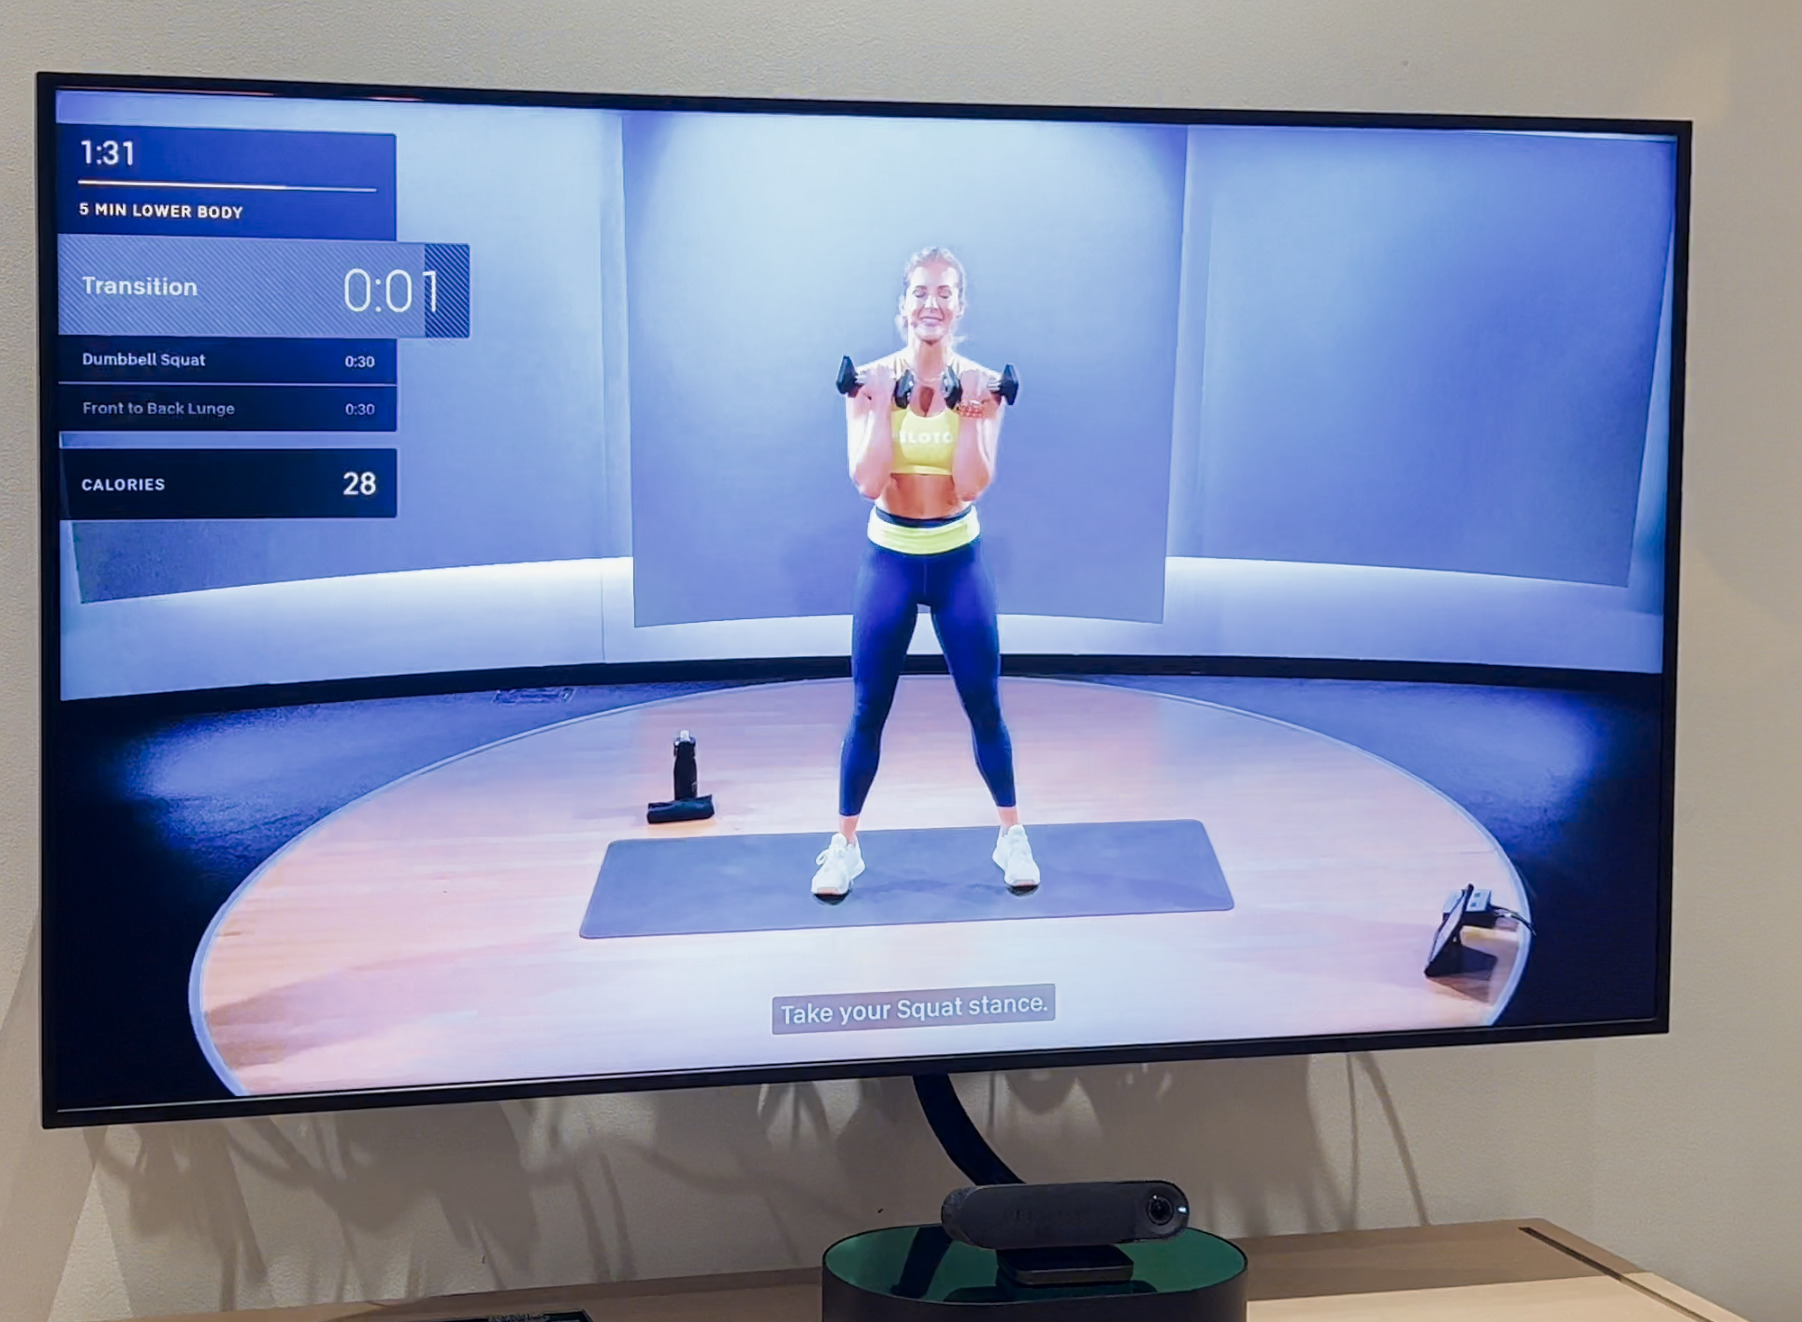
Even though the Movement Tracker isn’t enabled for anything besides Strength, the Peloton Guide will still show the new detailed class plans as you take a class through the Guide – these are the same class plans that were just made visible on the website & Peloton apps as well today. You can see the class plan and upcoming movements in the upper left hand part of the screen below.
Peloton has also expanded the search capability of their library. In the strength section, you are now able to filter for workouts that target specific muscle groups / body activities. You can search for combinations of these as well. We did not test whether you can filter by muscle groups on other class types besides strength, so can’t confirm that it’s available for anything besides strength.
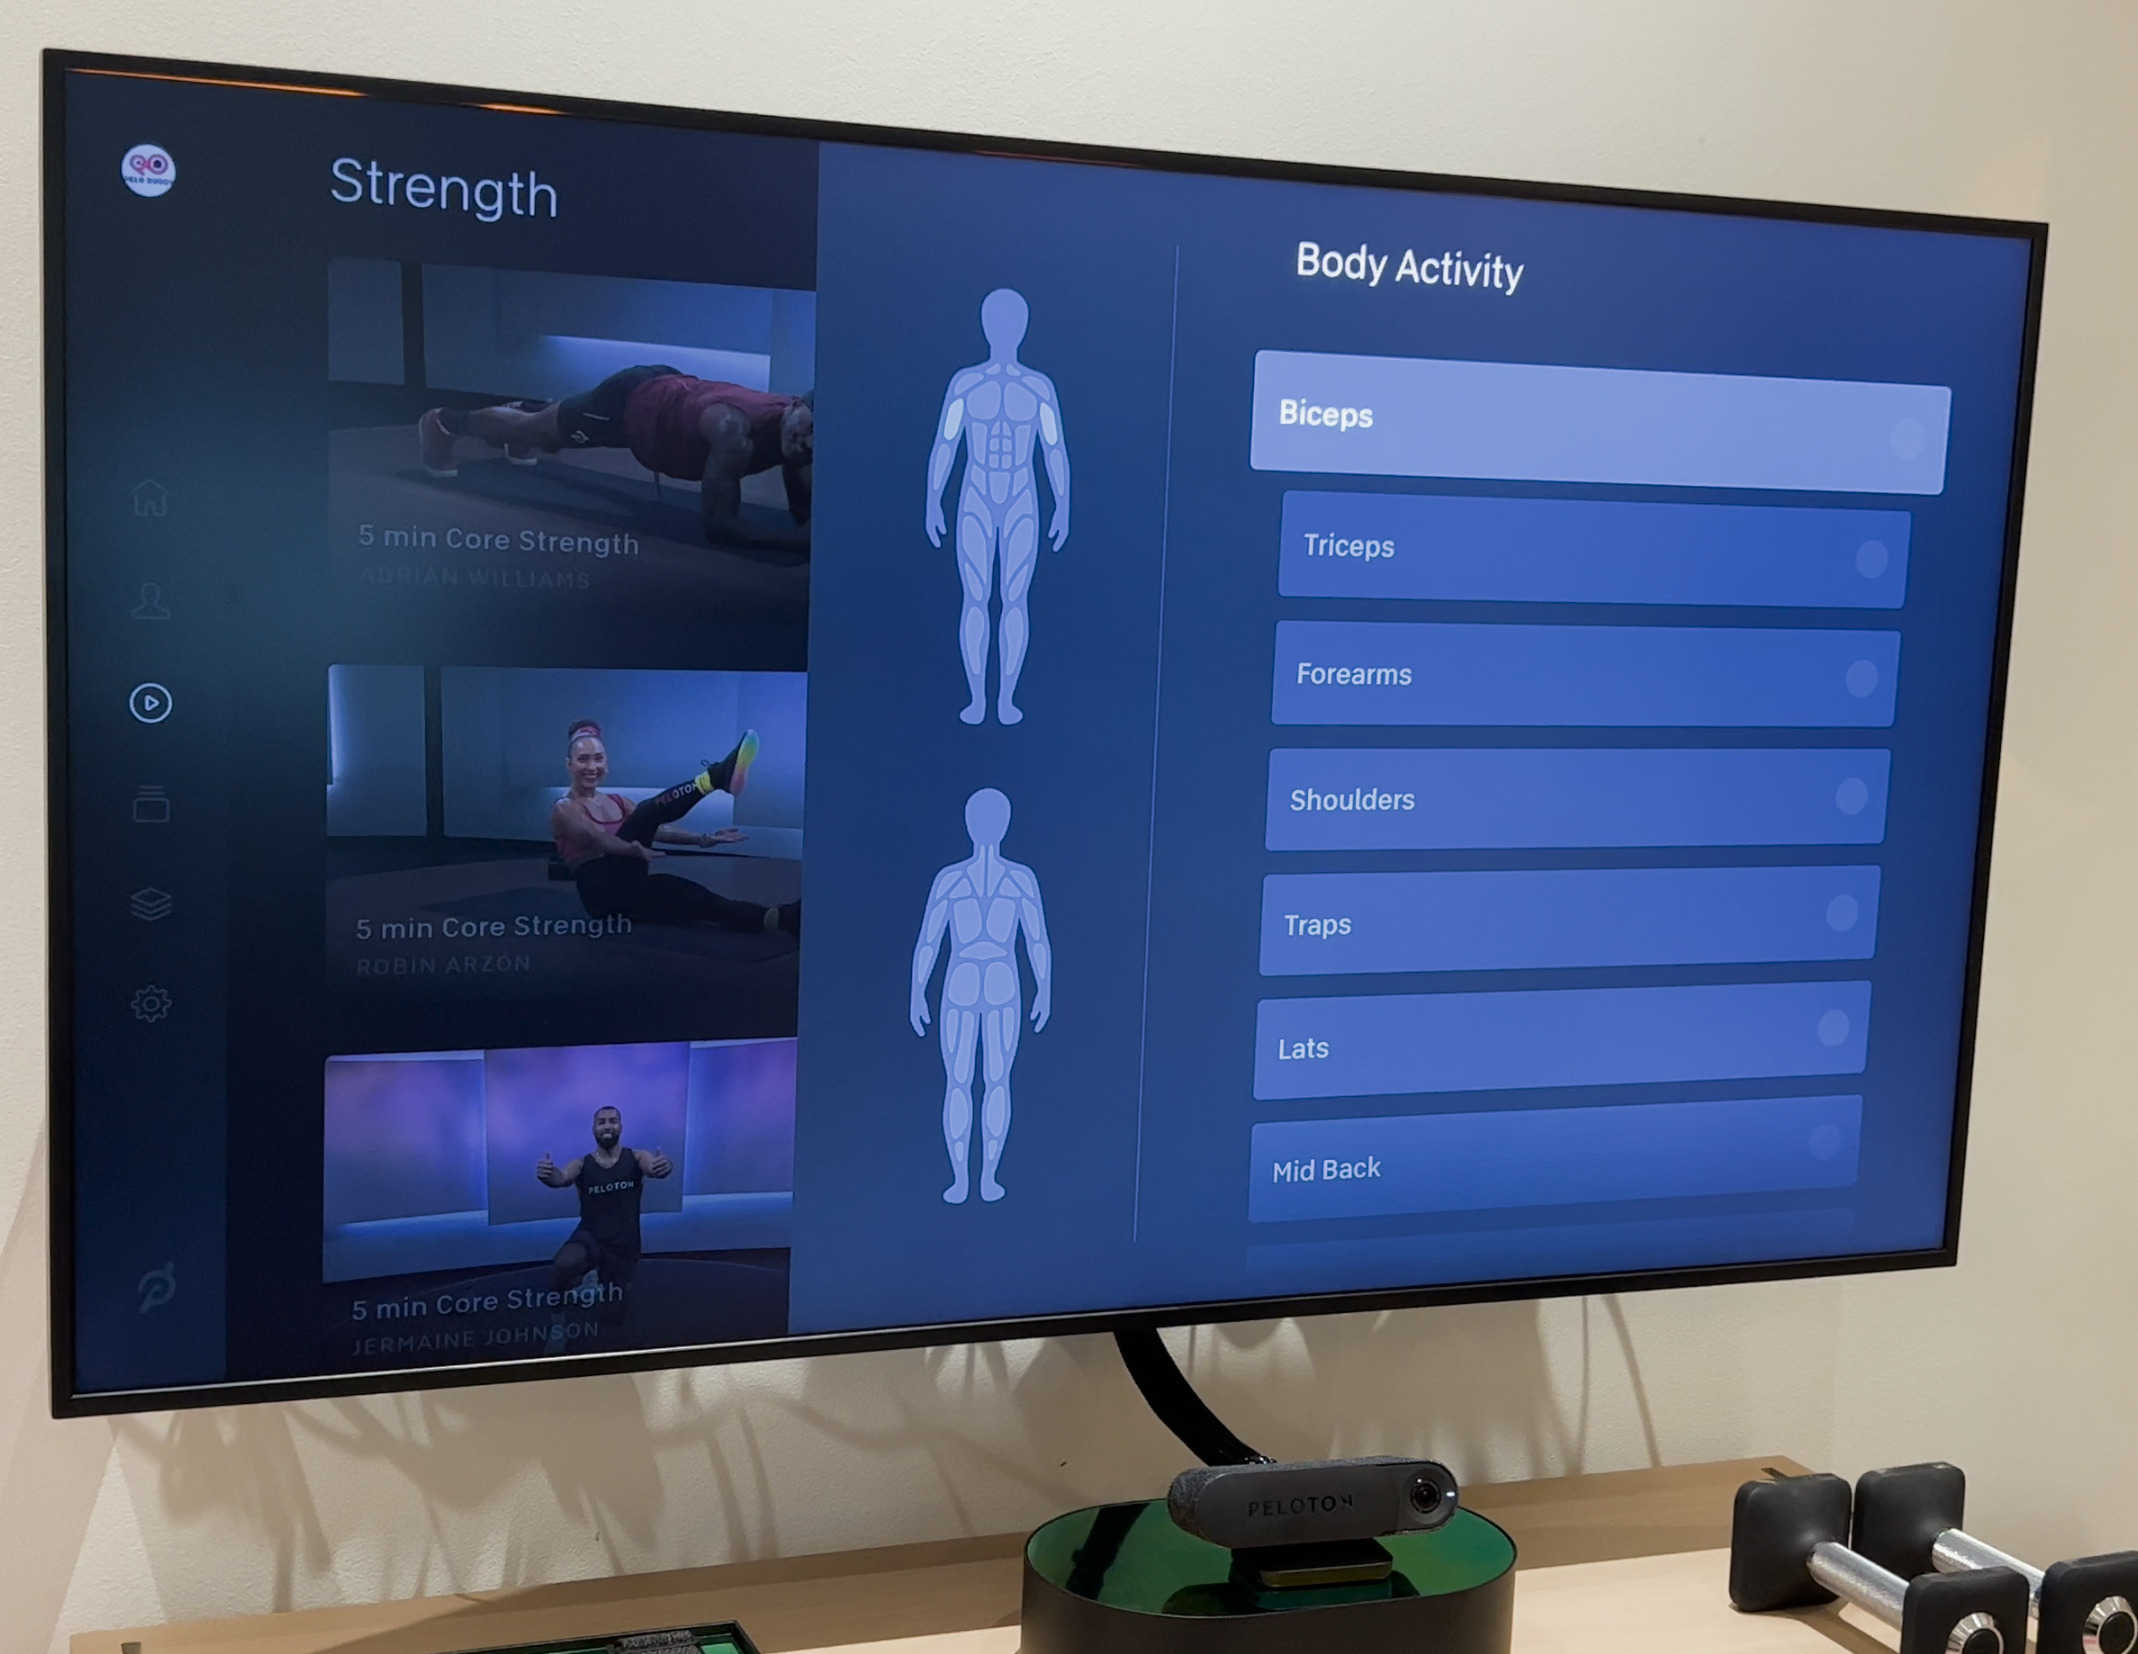
You also still have the traditional filters you might expect, like class length, language, instructor, and more.
When you actually open a class – you get a new splash screen.
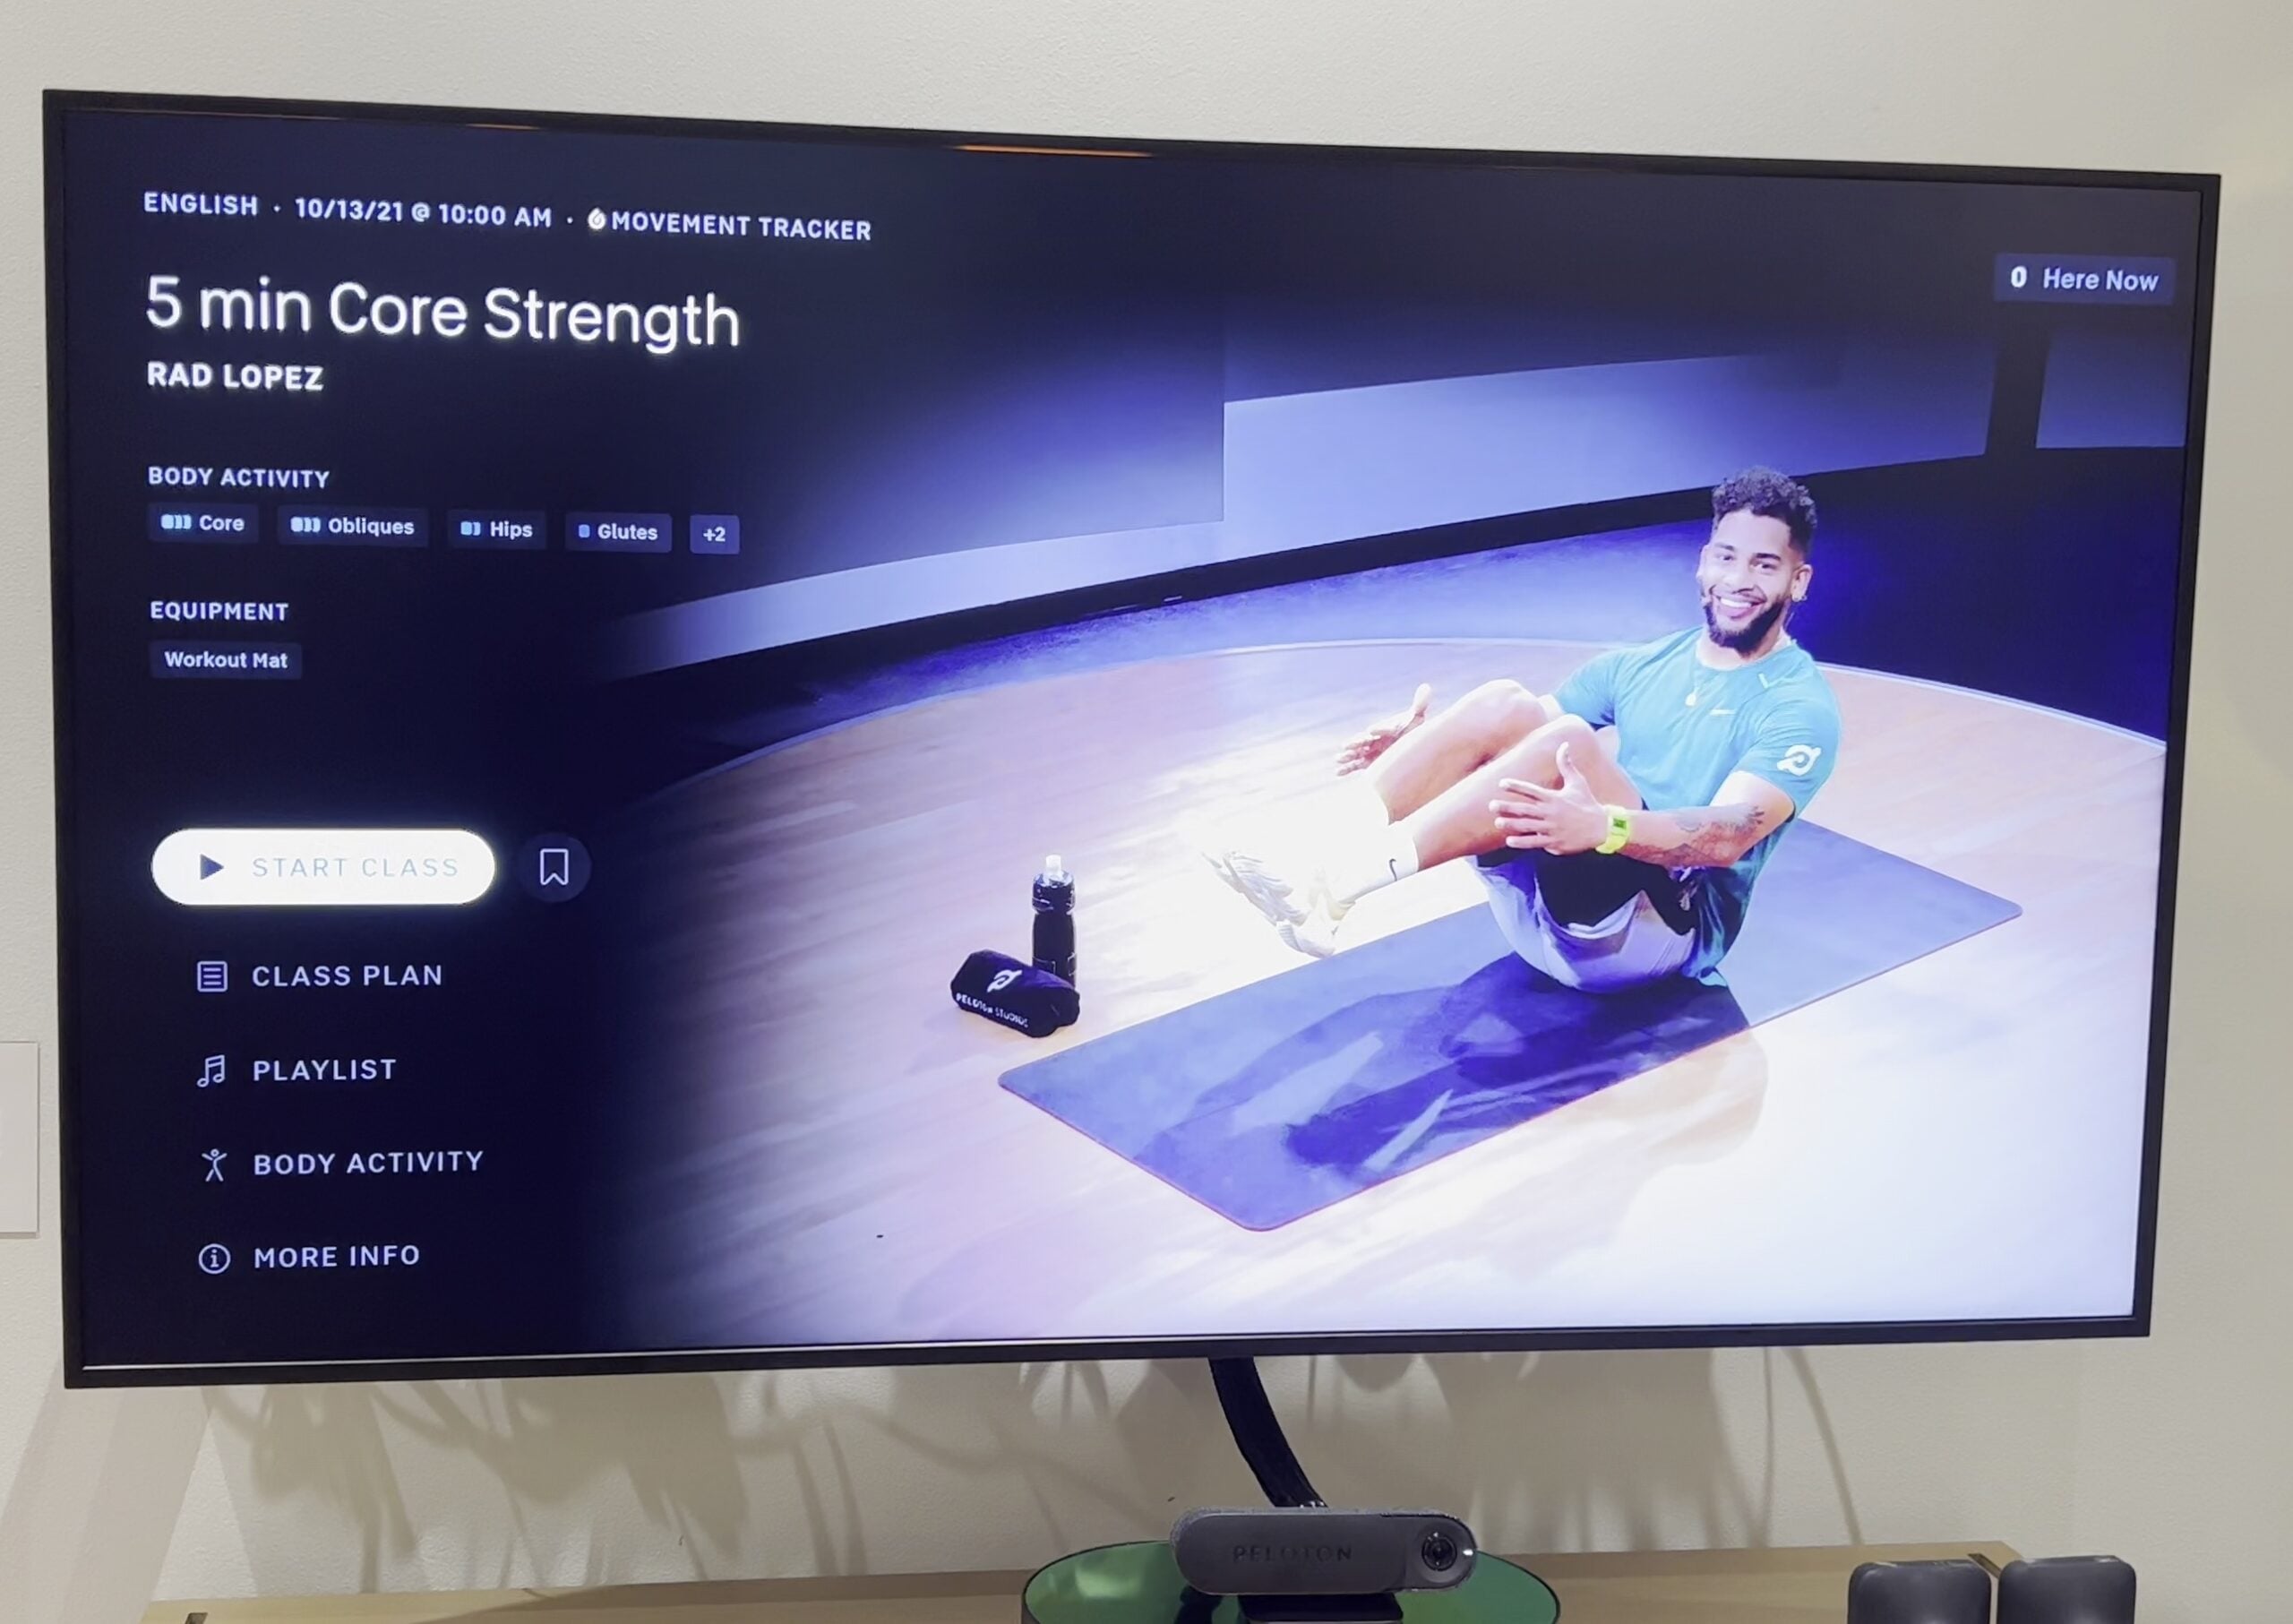
You can immediately jump into the class, or you can browse the playlist, the full class plan for the workout, or the body activity details.
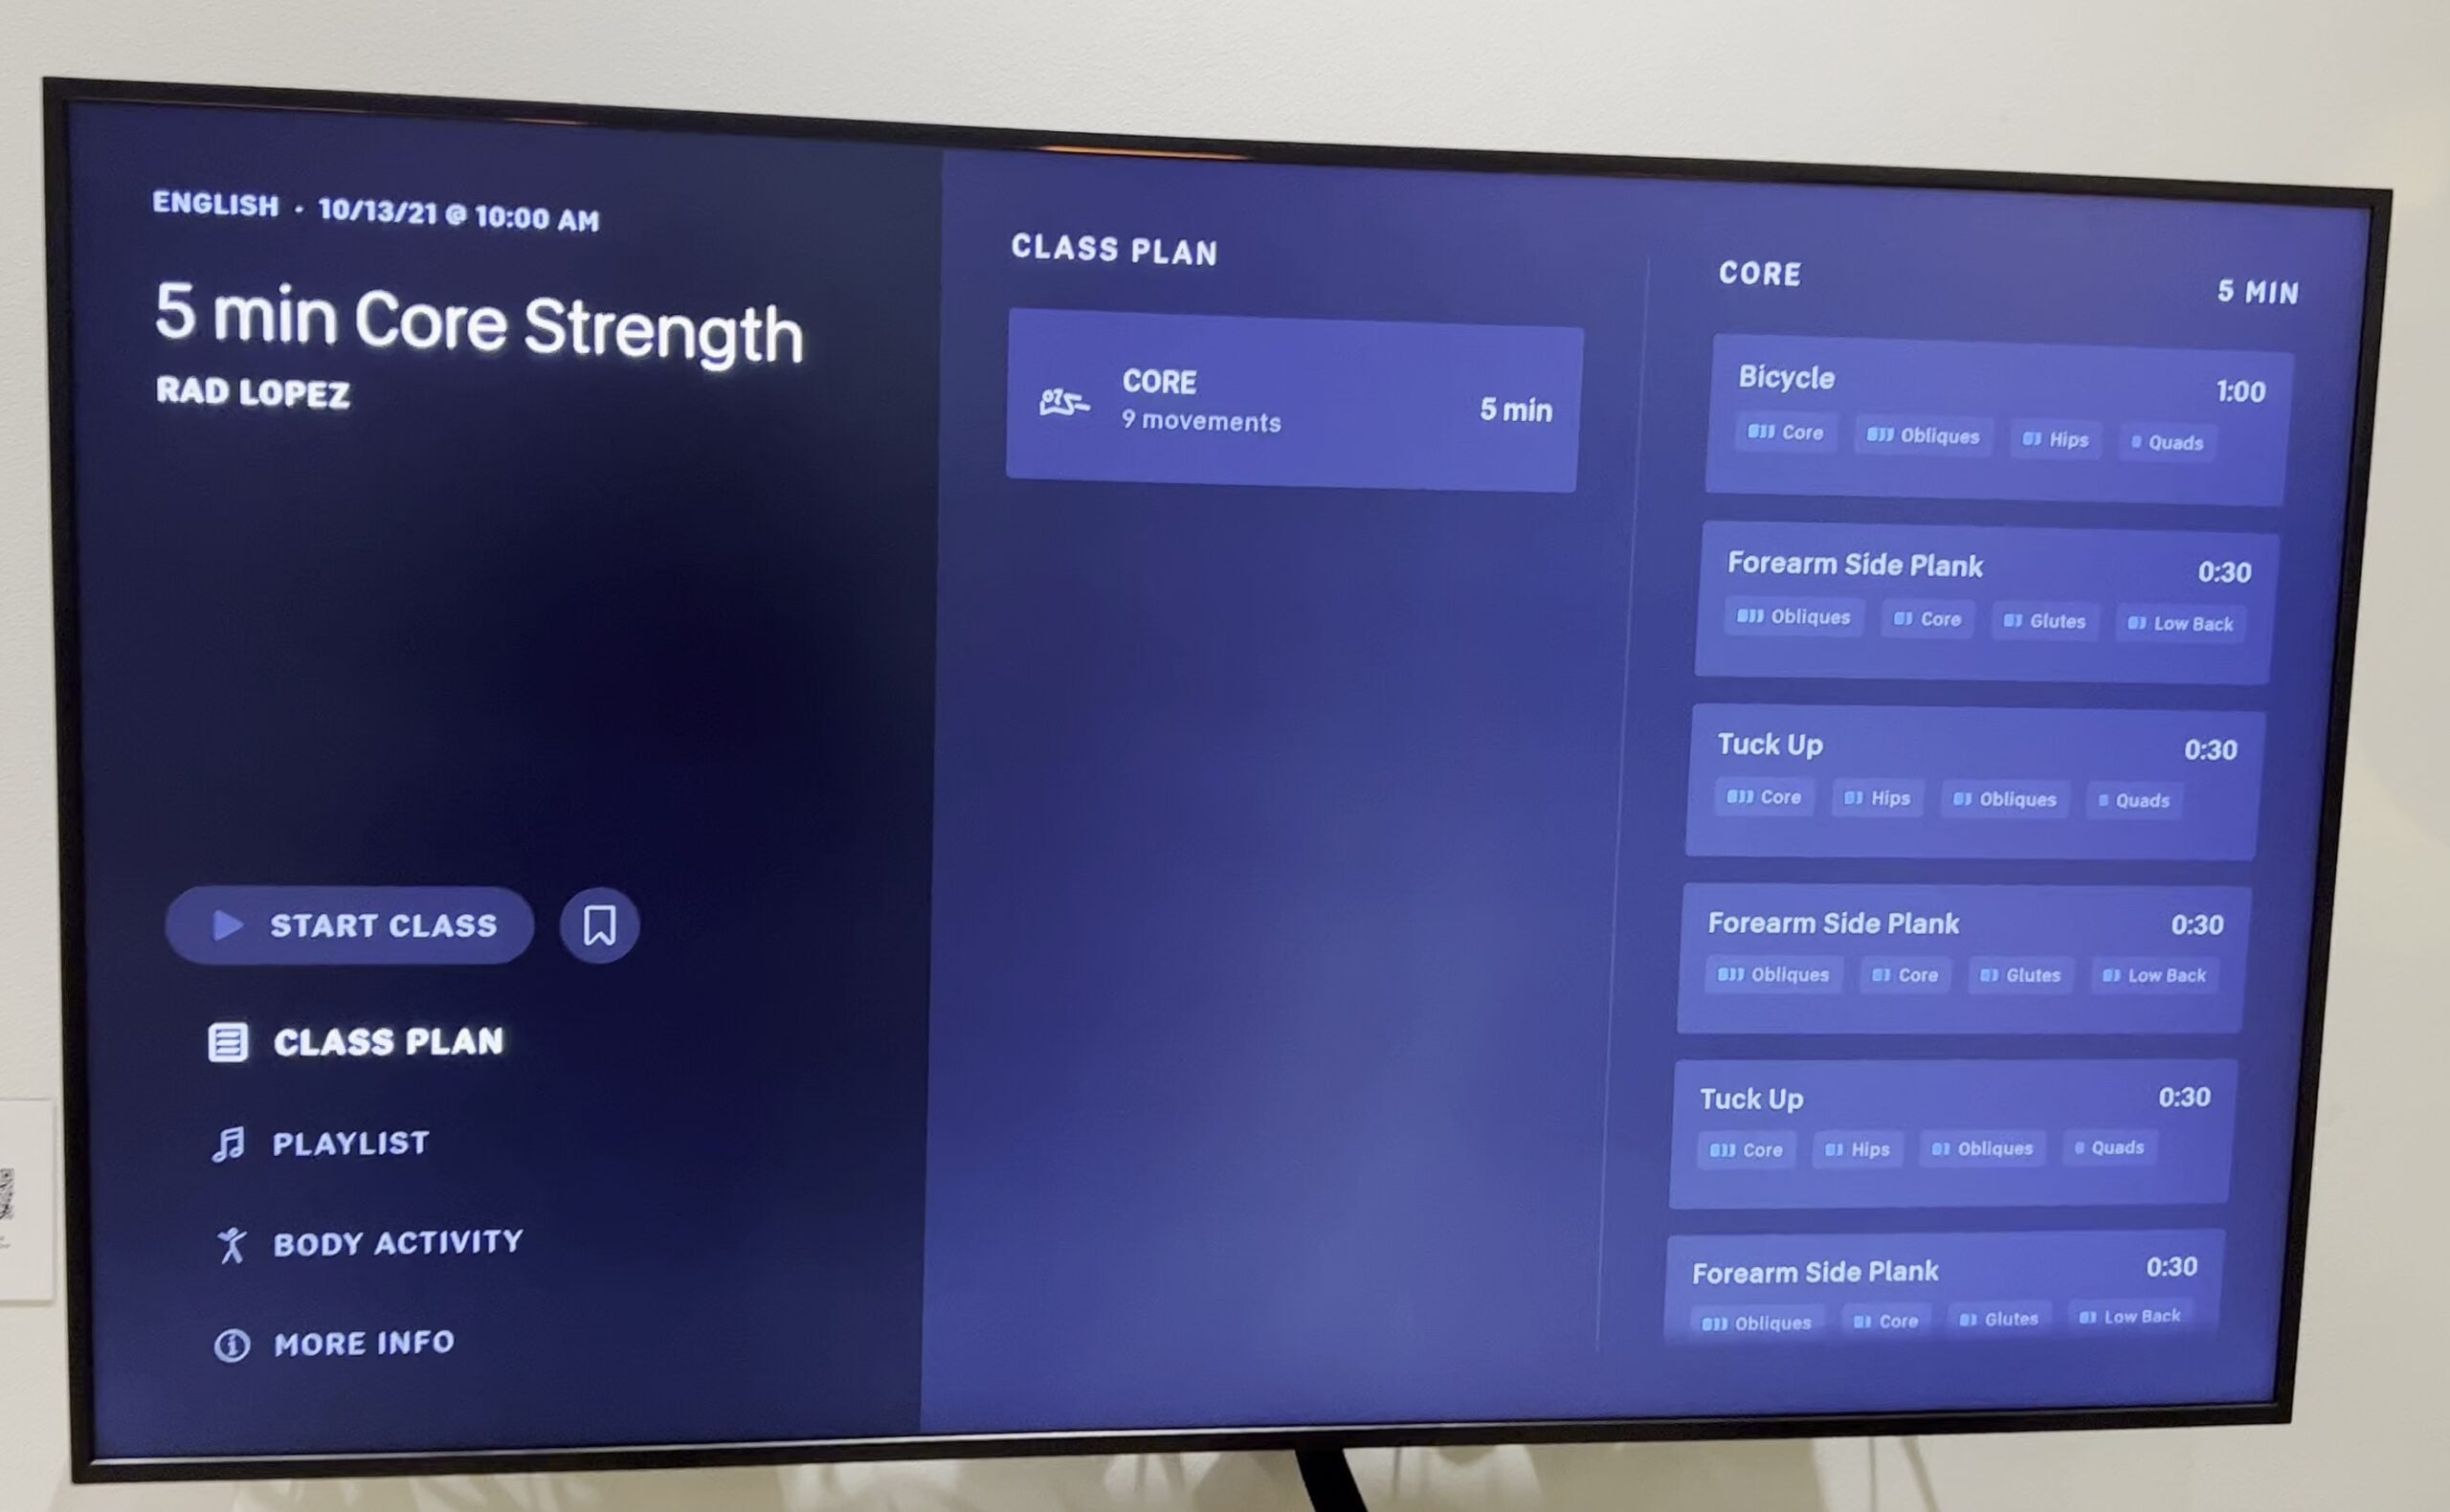
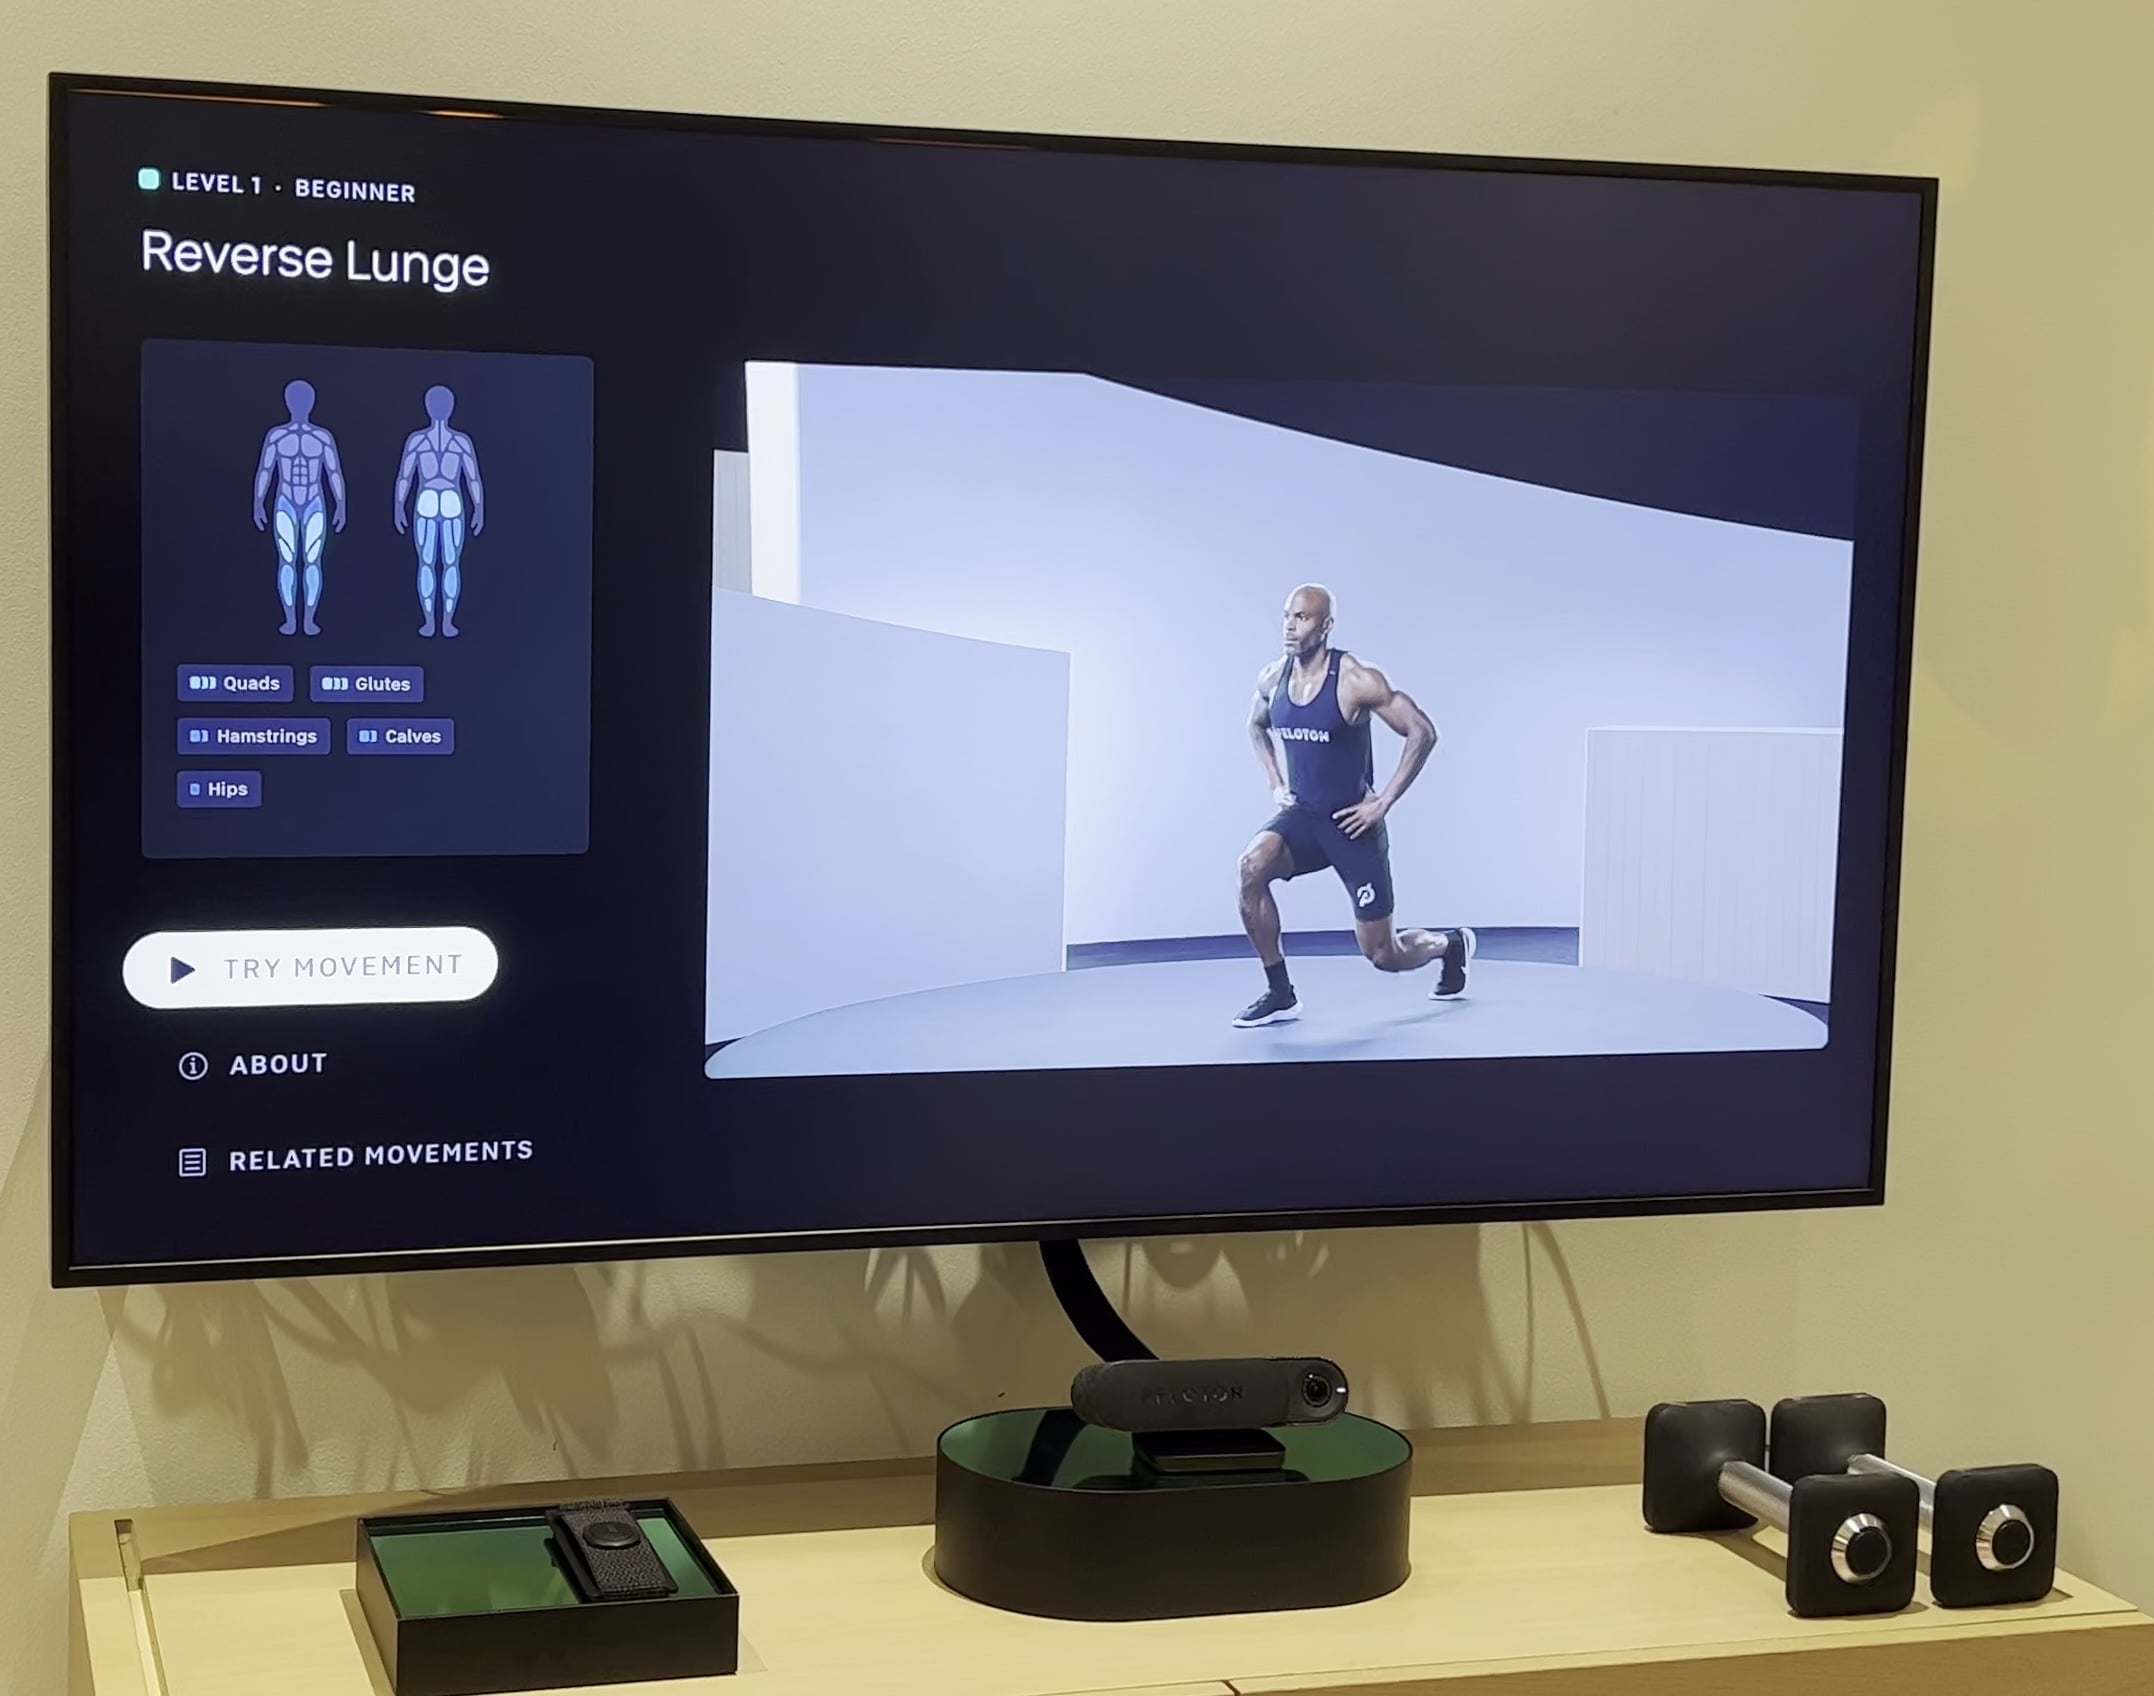
While viewing the class plan, you can click any specific movement that is included in the class – Peloton has over 400 unique movements created in their system. You have the option to view a demo of one of the instructors doing that movement prior to taking the class. This will help members make sure their form is correct, and to be able to get the most of their workouts.
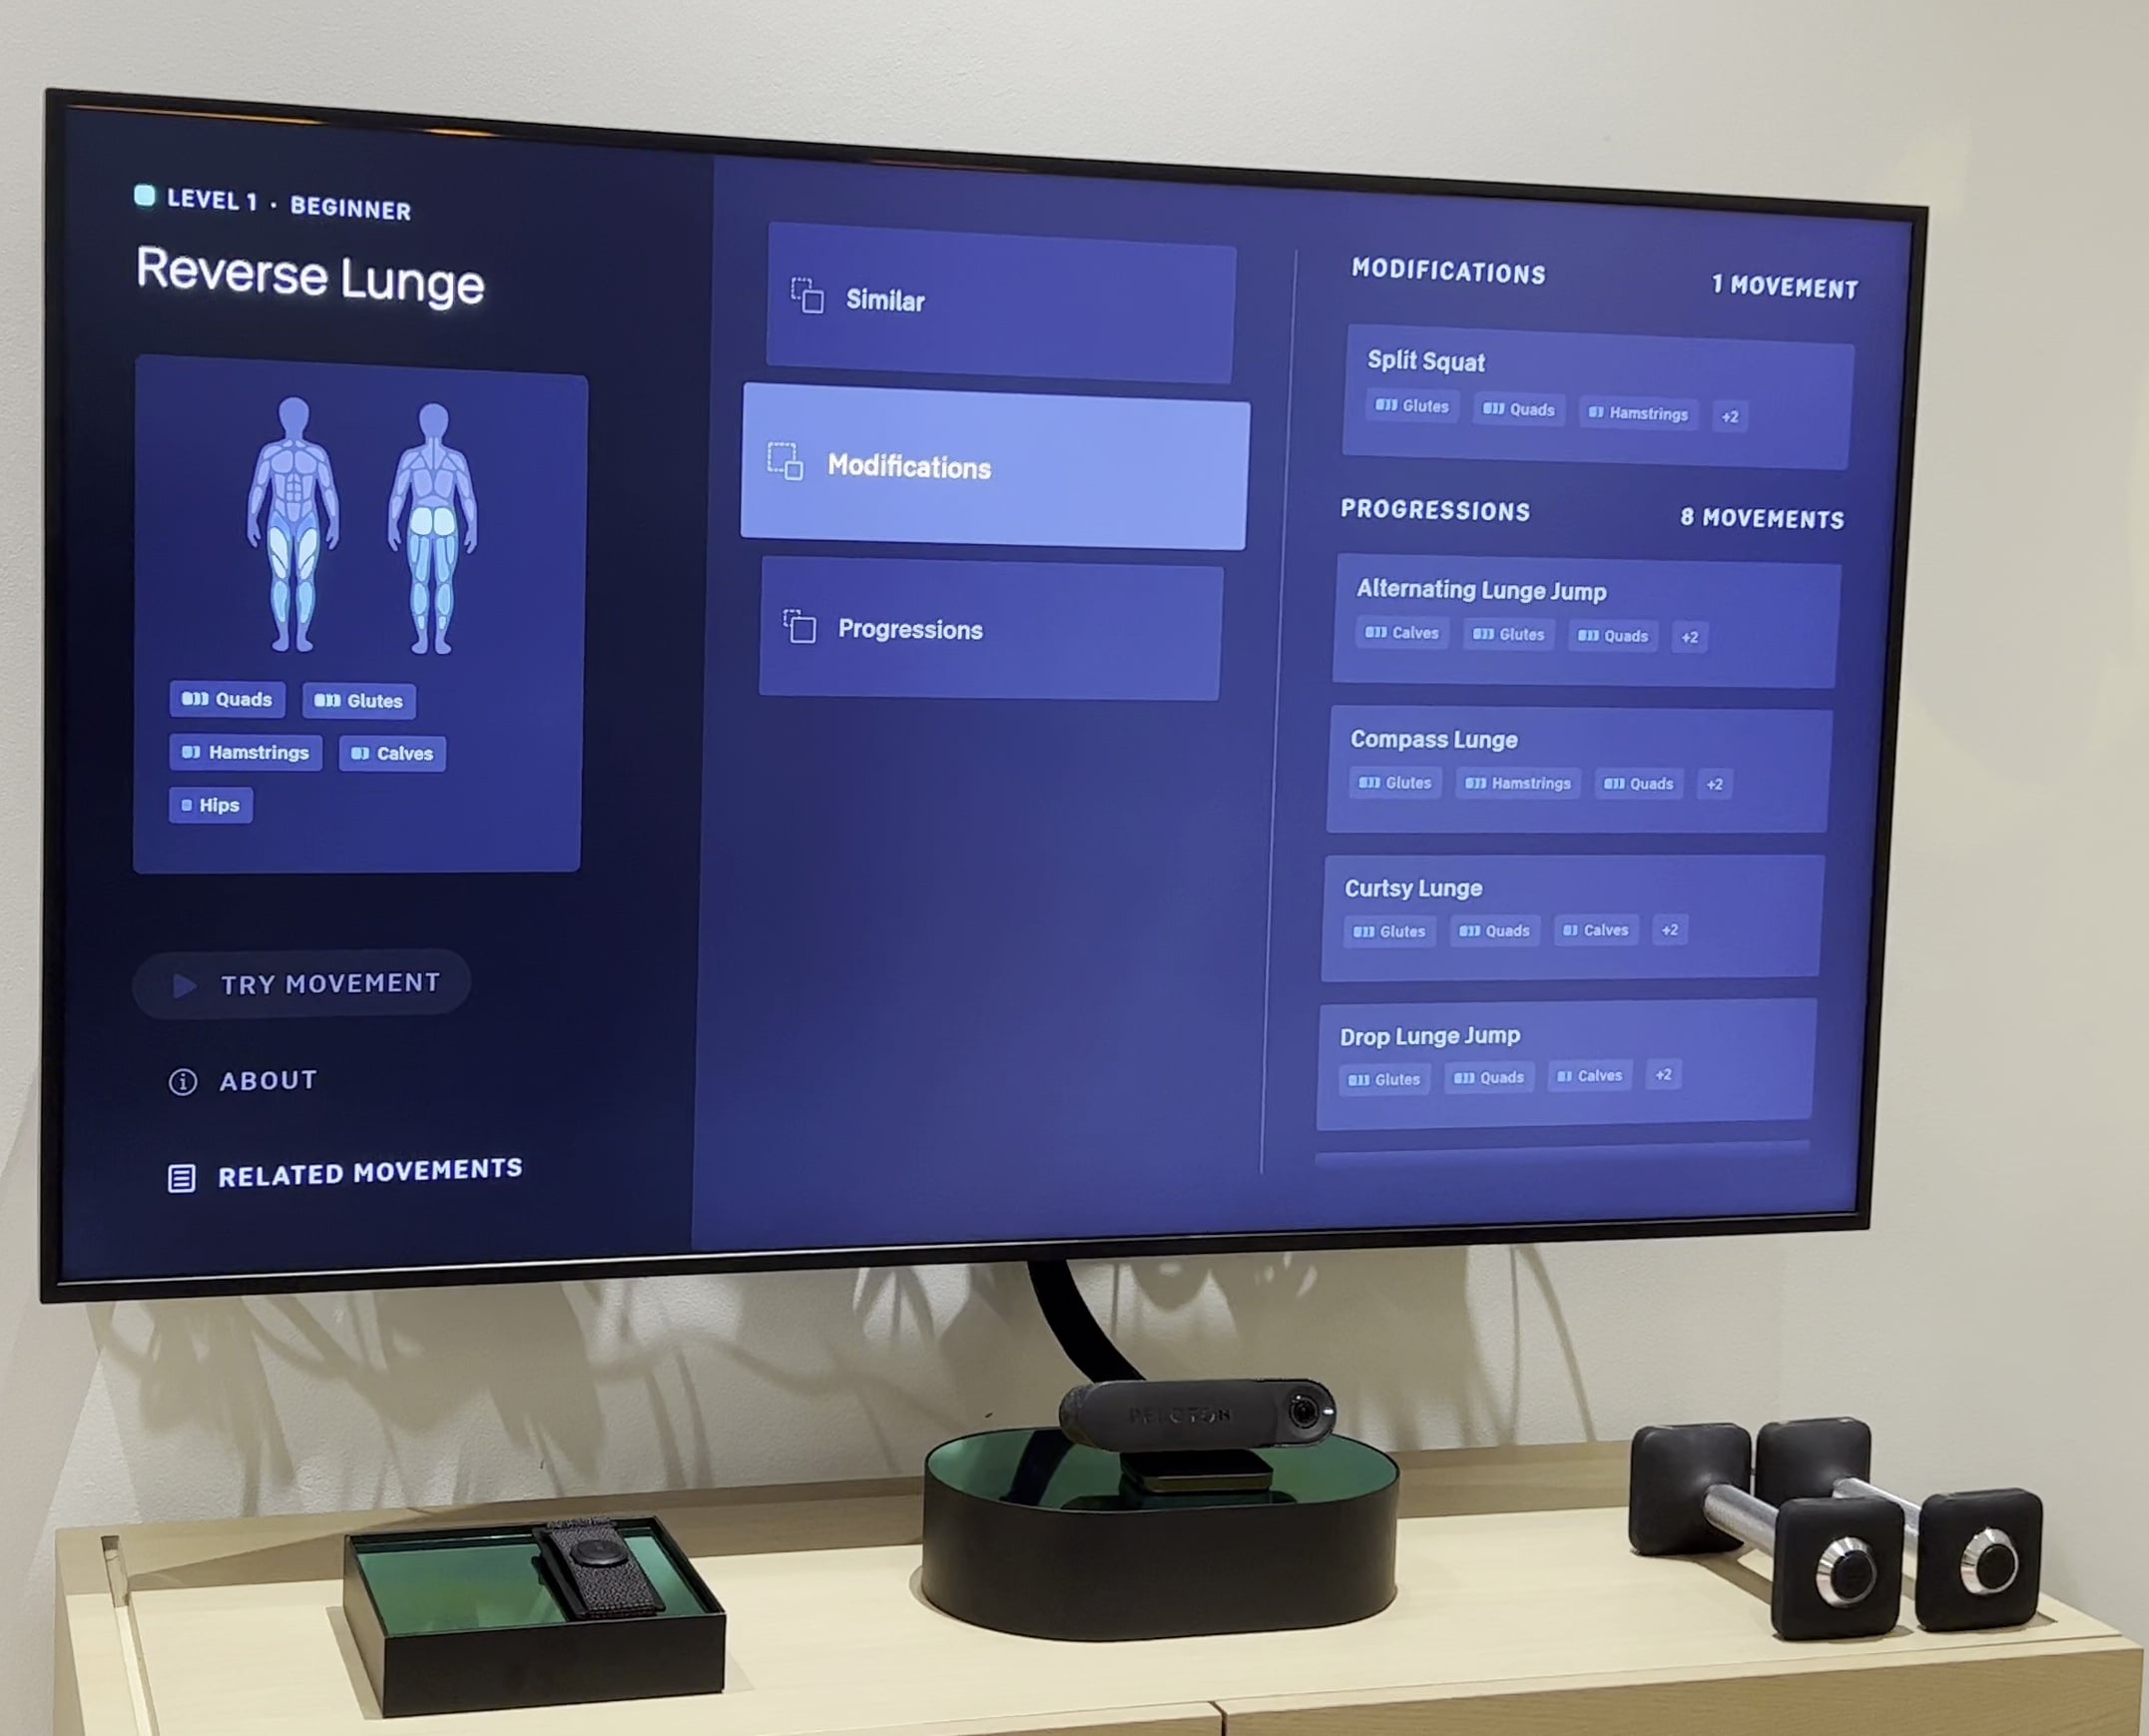
In addition, Peloton is making it easier to modify your workout and tailor it to you. When viewing the class plan, you can view similar movements, replacement movements, or progressions on movements for any of the components of the strength workout.
Once actually in a class, you’ll see a screen that will look mostly familiar if you’ve taken a class on the Peloton platform before. This image from the Peloton manual explains what a lot of the items are.
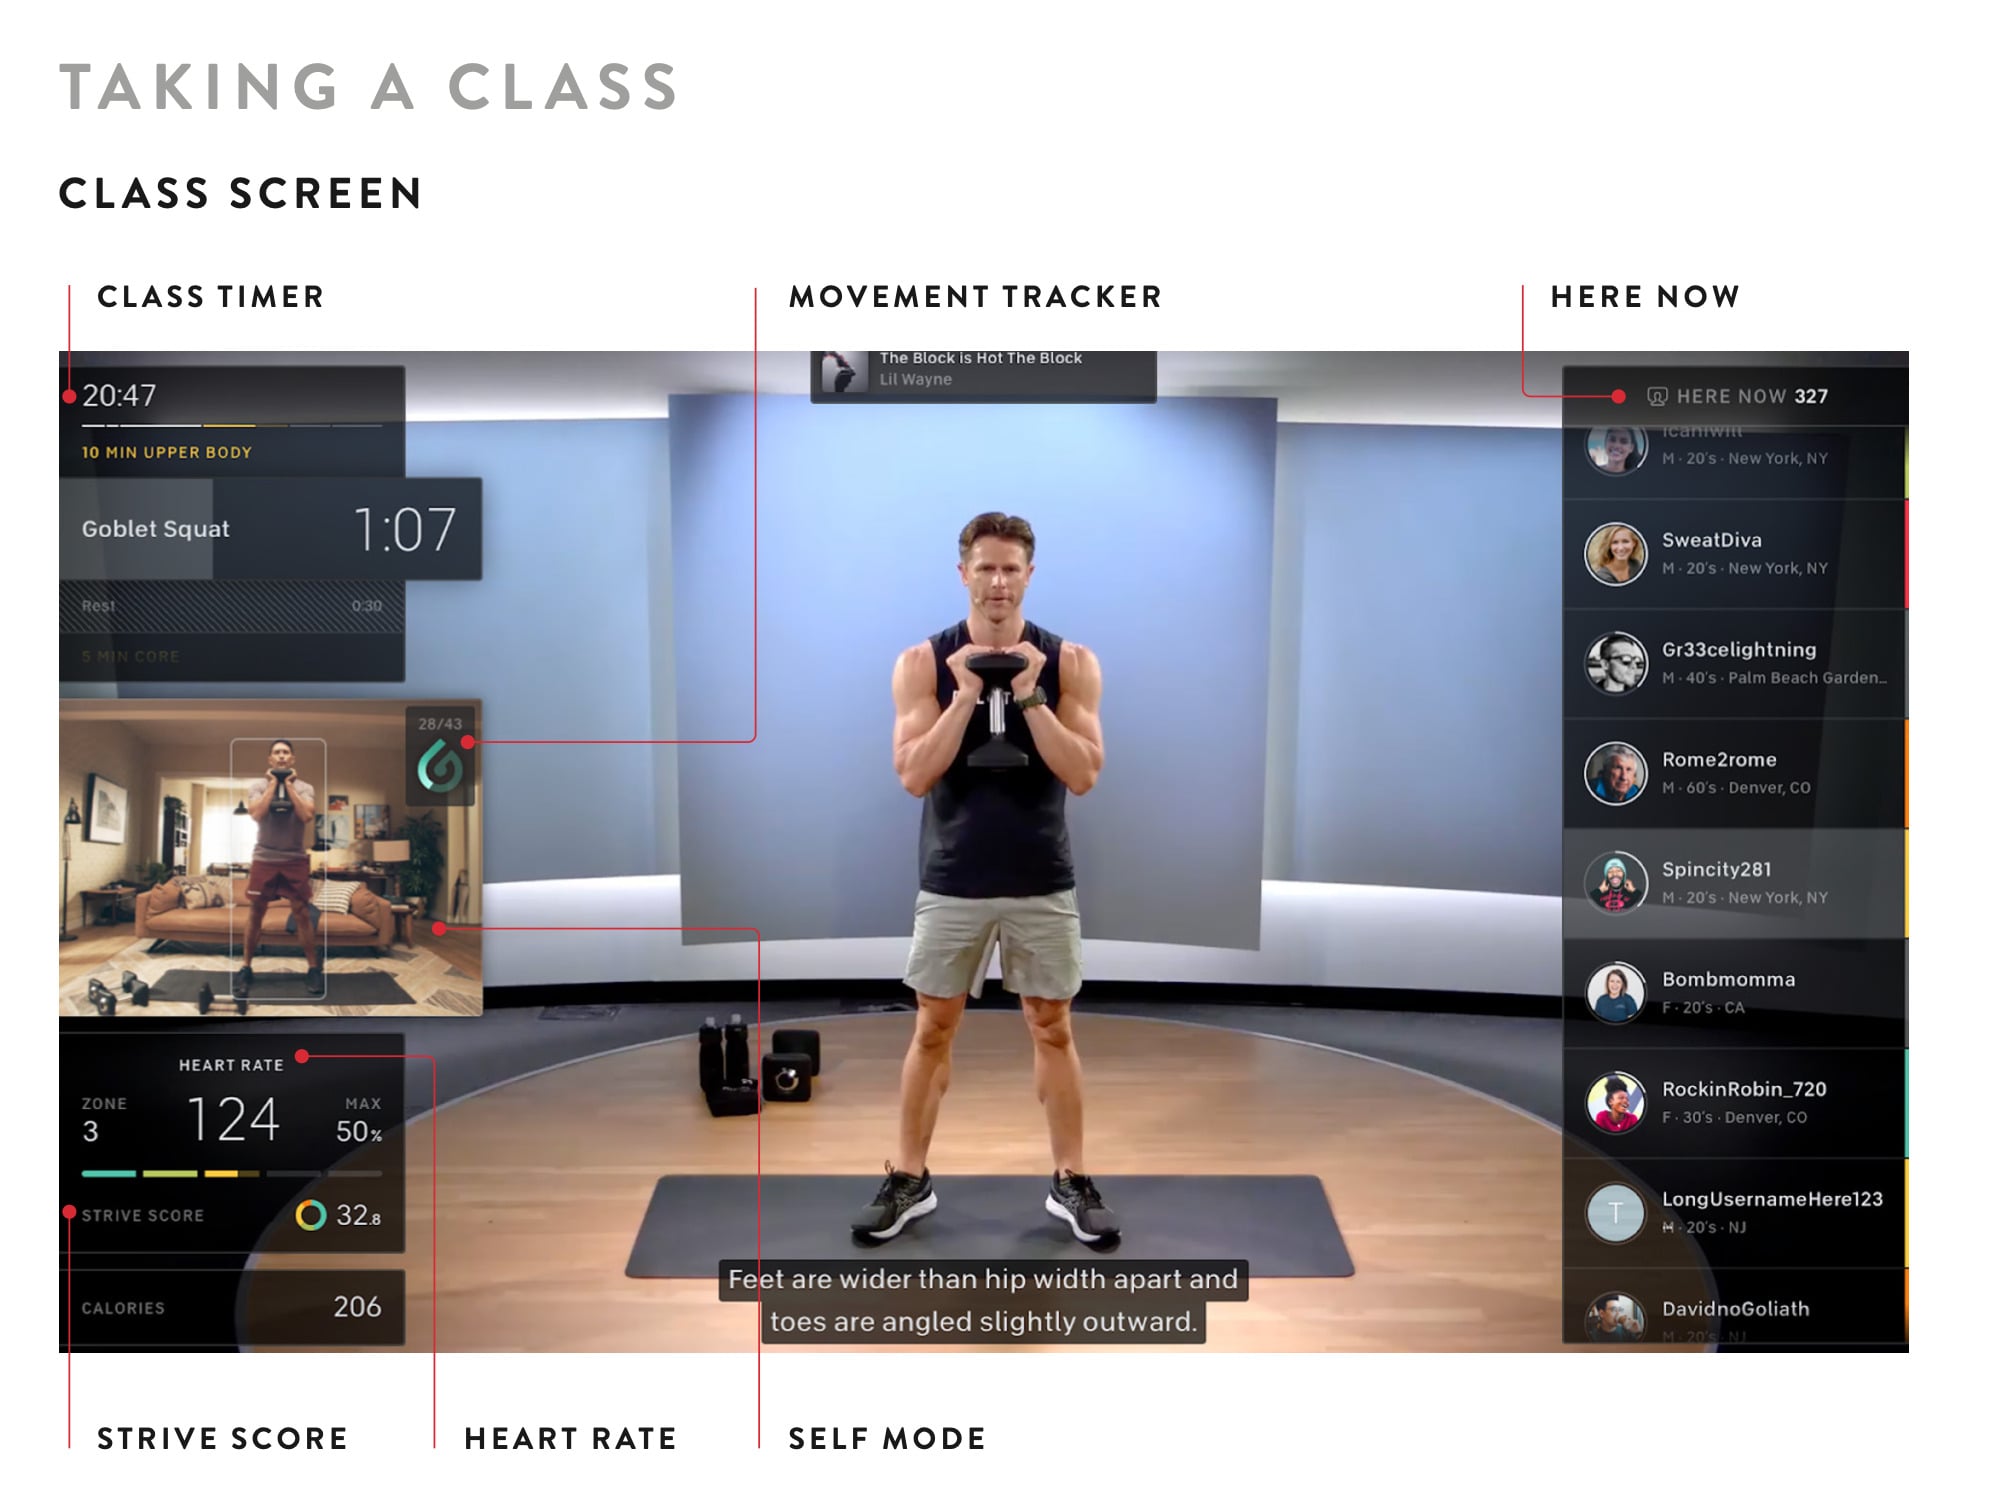
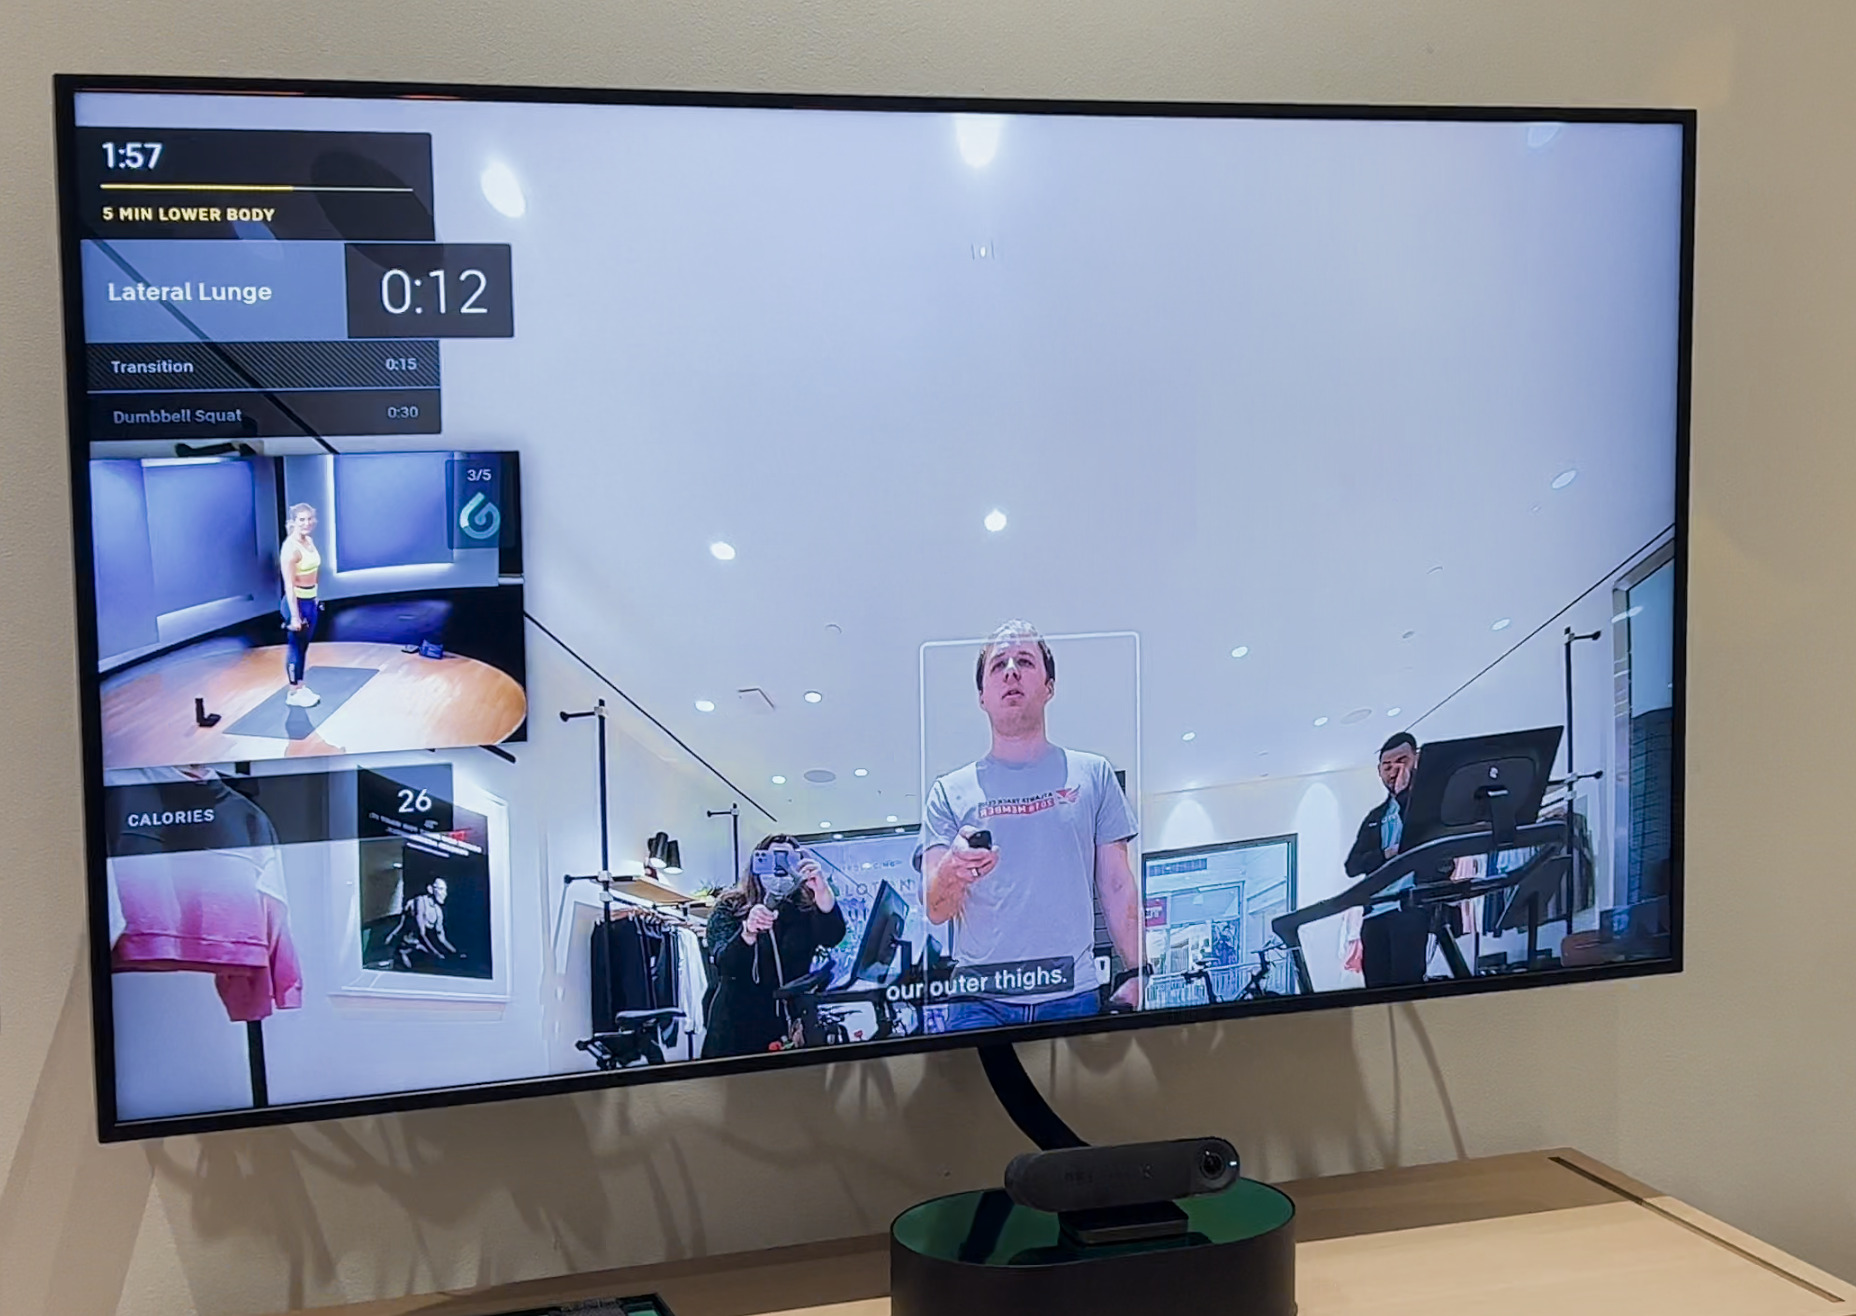
The biggest things that are new on the Peloton Guide are on the top left of the screen. This includes the detailed class plan, showing what movement you are doing and where you are in the class. In addition, there’s a window on the left side of the screen showing you (known as Self Mode), and the movement tracker.
When Self Mode is enabled and a class is running, you’ll see a small box around you on the screen when the Peloton Guide is successfully tracking you. So your goal is to always have the box around you when working out, so that you can get Movement credit for every workout.
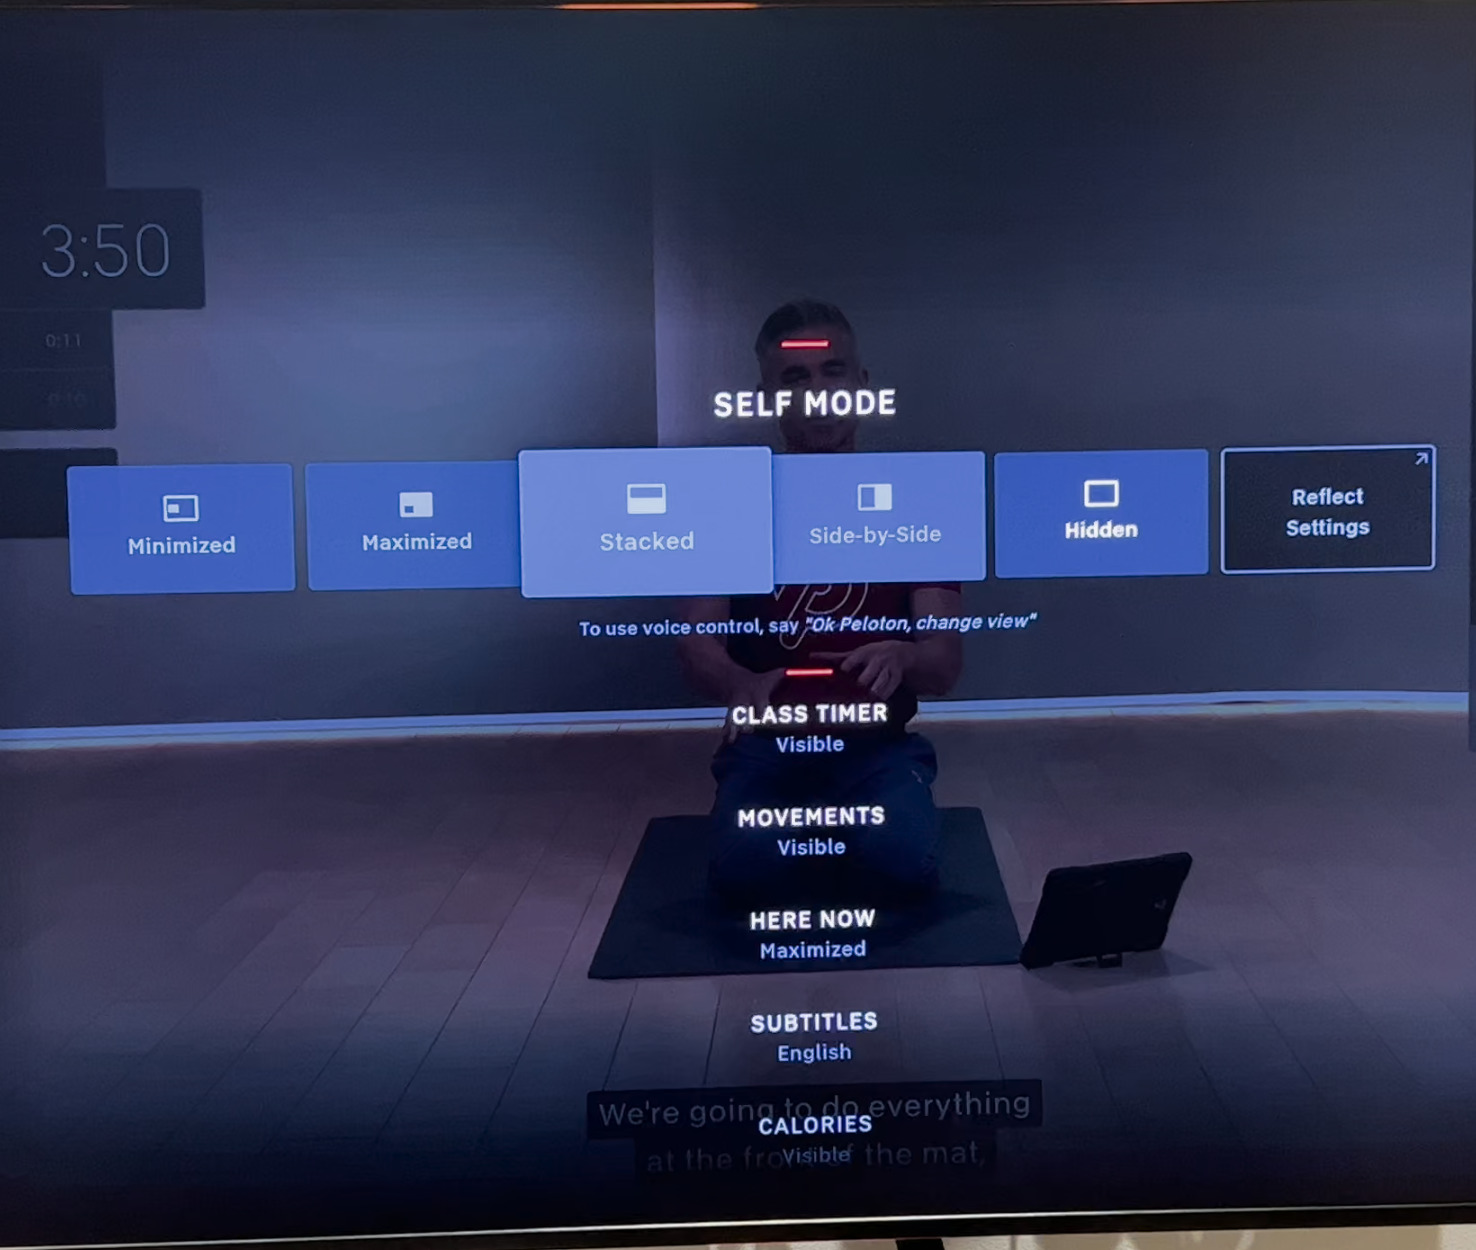
As we referenced above, there are several different configurations & layouts of the screen while in a class. You can access these via a popup menu while the class is going on.
First is “Minimized” mode, or what you might refer to as a picture in picture layout, with the instructor being full screen and your image being shown as a small layover on the left side of the screen.
Next is “Maximized” mode – which is the inverse of the mode above. Here, you’re also picture in picture, but your image from the camera takes up the whole screen, and the instructor is in a smaller layover on the left.
Note that with any of these screens, you can turn on and off certain elements as well, like the calories, time remaining, and others.
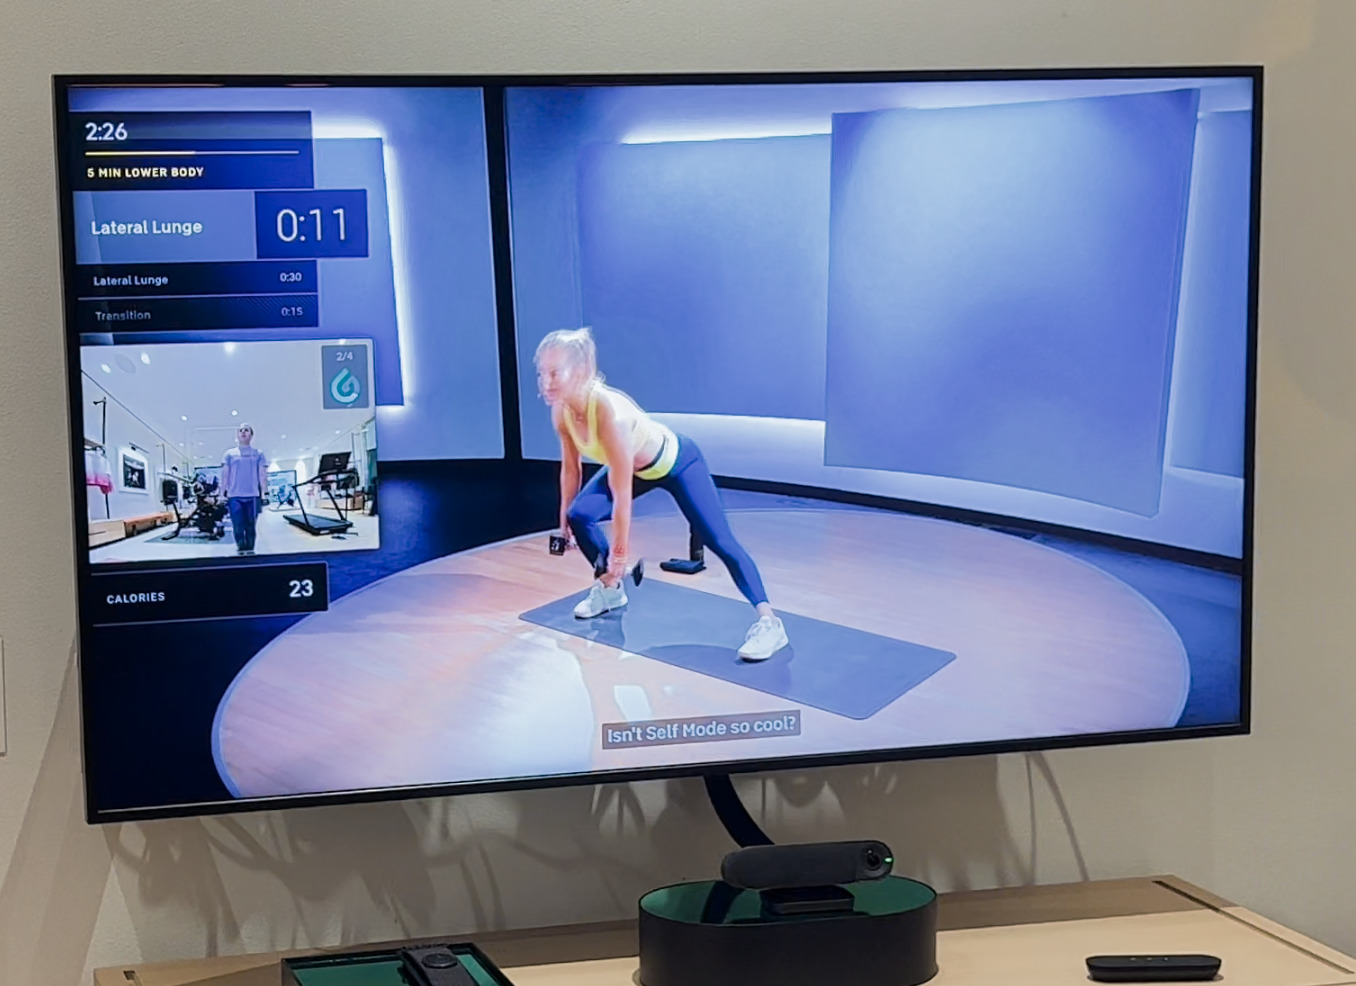
Next is “Stacked” mode – where you are shown in a box at the top of the screen, and the instructor is in a box at the bottom – and you are both the same size.

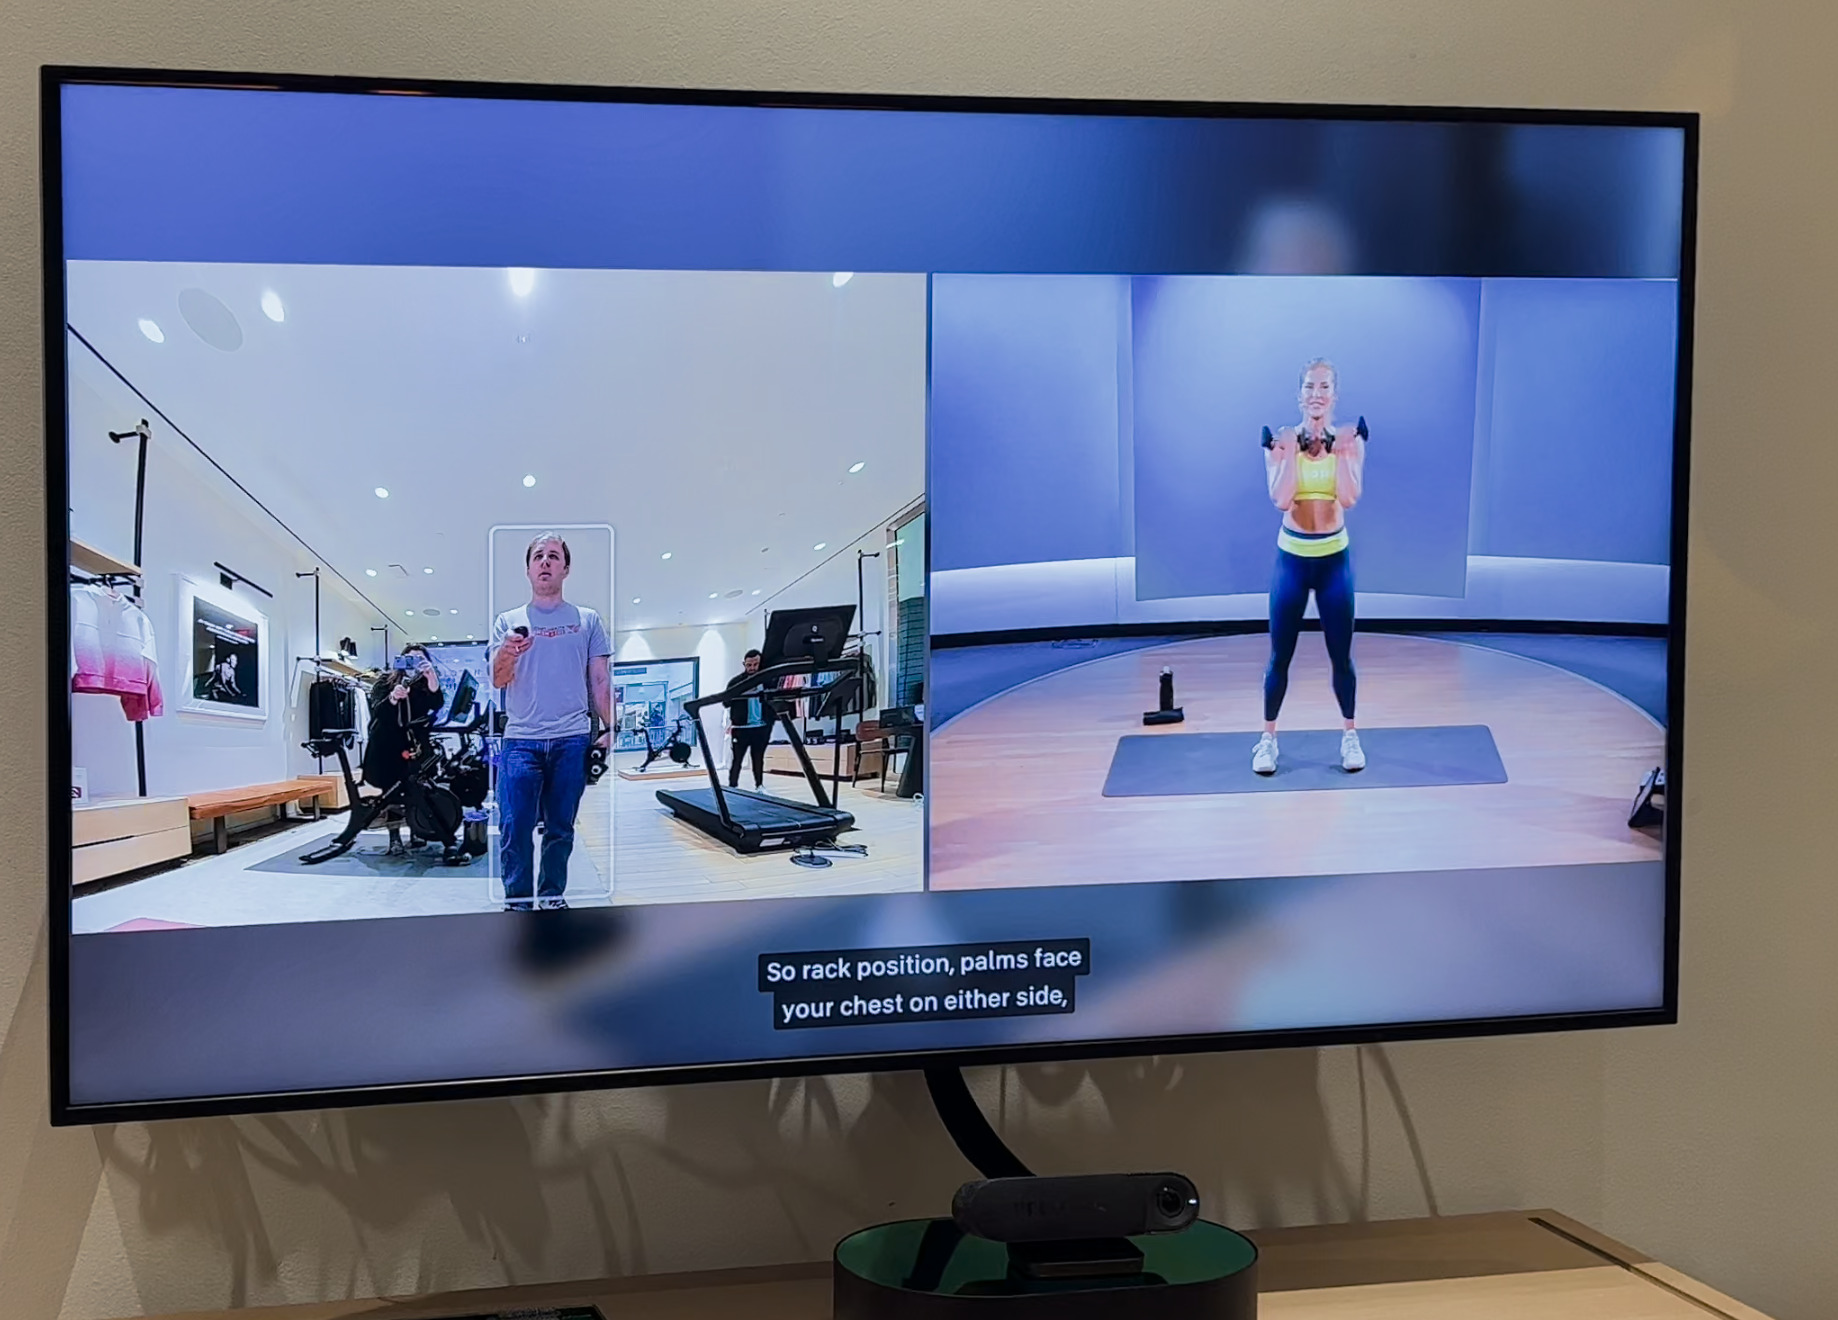
Next is “side by side” mode, which is exactly what it sounds like – you are shown in a window next to the instructor. Note that in side by side mode, you can’t have any stats or timers available – you only see yourself and the coach. The toggles for class timer and all the others are disabled in this mode.
Finally, you have “Hidden” mode – where you don’t see your own video at all, and only see the instructor.
One thing know is that on some screens, the camera crops in a little bit – while other modes have a more wide angle view. This means if you are doing a floor exercise, you might be able to see yourself in one mode, but not in another – so you’ll need to test your camera with different modes to get it in the right position.
Speaking of the classes – the experience of taking an actual class on the Peloton Guide, to us, was fairly similar to taking one through the Apple TV app, or any other app casted to a TV. And if you’ve taken a Peloton class on any other device, you know what to expect.
Image quality was good, in terms of both our image on the screen and the instructor being shown (though this will depend on your TV as well as your internet speed). [Update – we’re seeing some reports from people who have received their Guides already that they are less than impressed with the video quality – so standby for more information on this]
The biggest improvement we enjoyed was having the detailed class plan in the upper left, so we could know what was coming next (though again, note that if you don’t enjoy this you can always toggle that part of the display off). We did notice the Movement Tracker during the class, and found it provided some extra motivation to be sure to do all the reps for the complete time in order to make sure we got credit. However, at least in our brief tests, we didn’t really gain any big benefits from seeing ourselves on the screen – but we’ll come back to this more in the full review after we’ve spent more time with it.
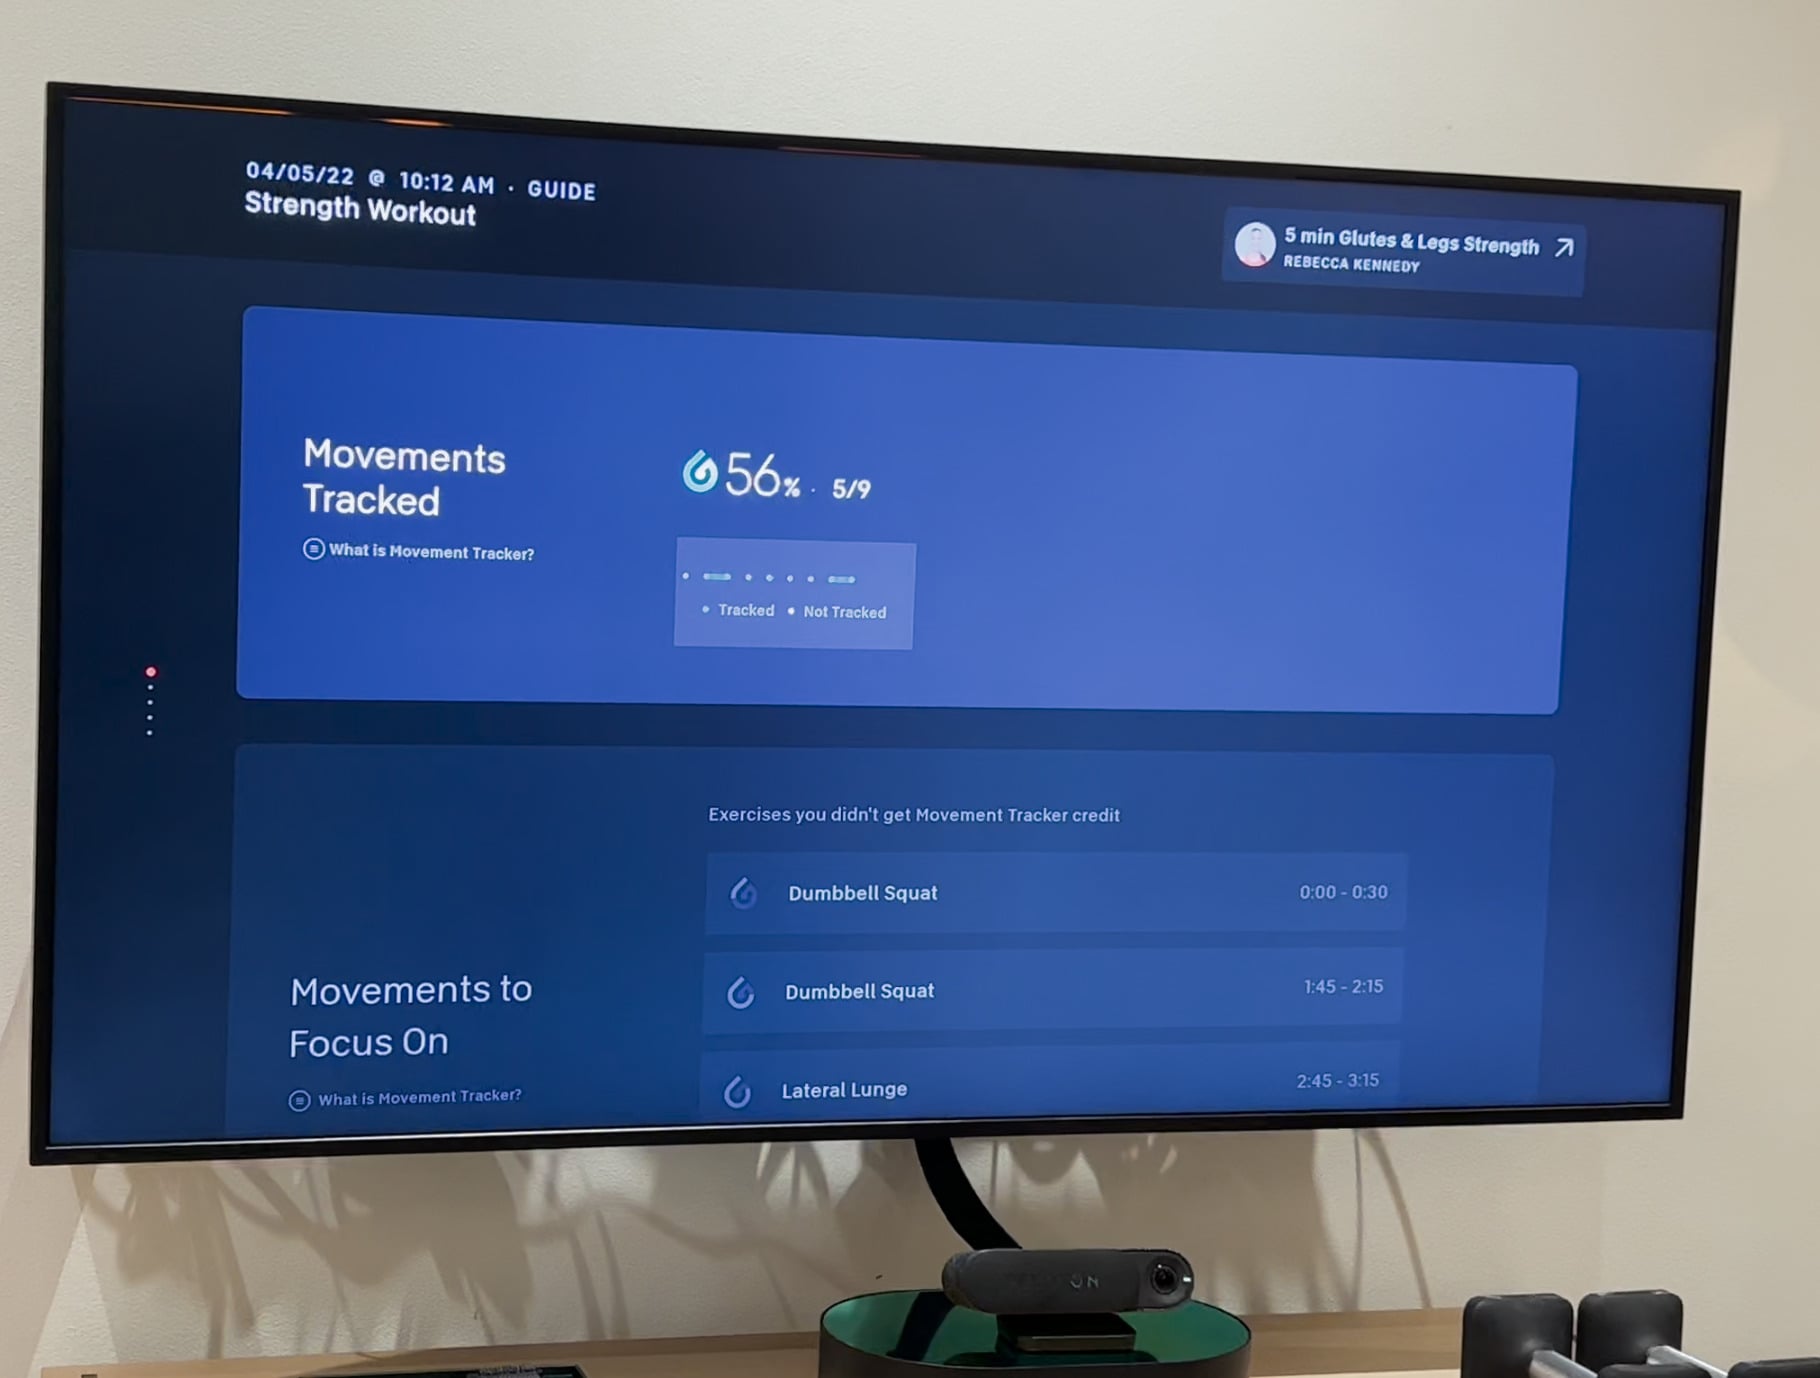
Once a class is completed, you have several new screens at the end of the class. First, you’ll see a screen showing your overall movement score – both as a percentage and the raw number of moves completed. It will also call out specific moves you could work on, if there were any you didn’t get movement tracker credit for. Depending on what % you complete, you will also earn new “Movement Tracker” badges that will show up in your profile as well. We first reported about these last December.
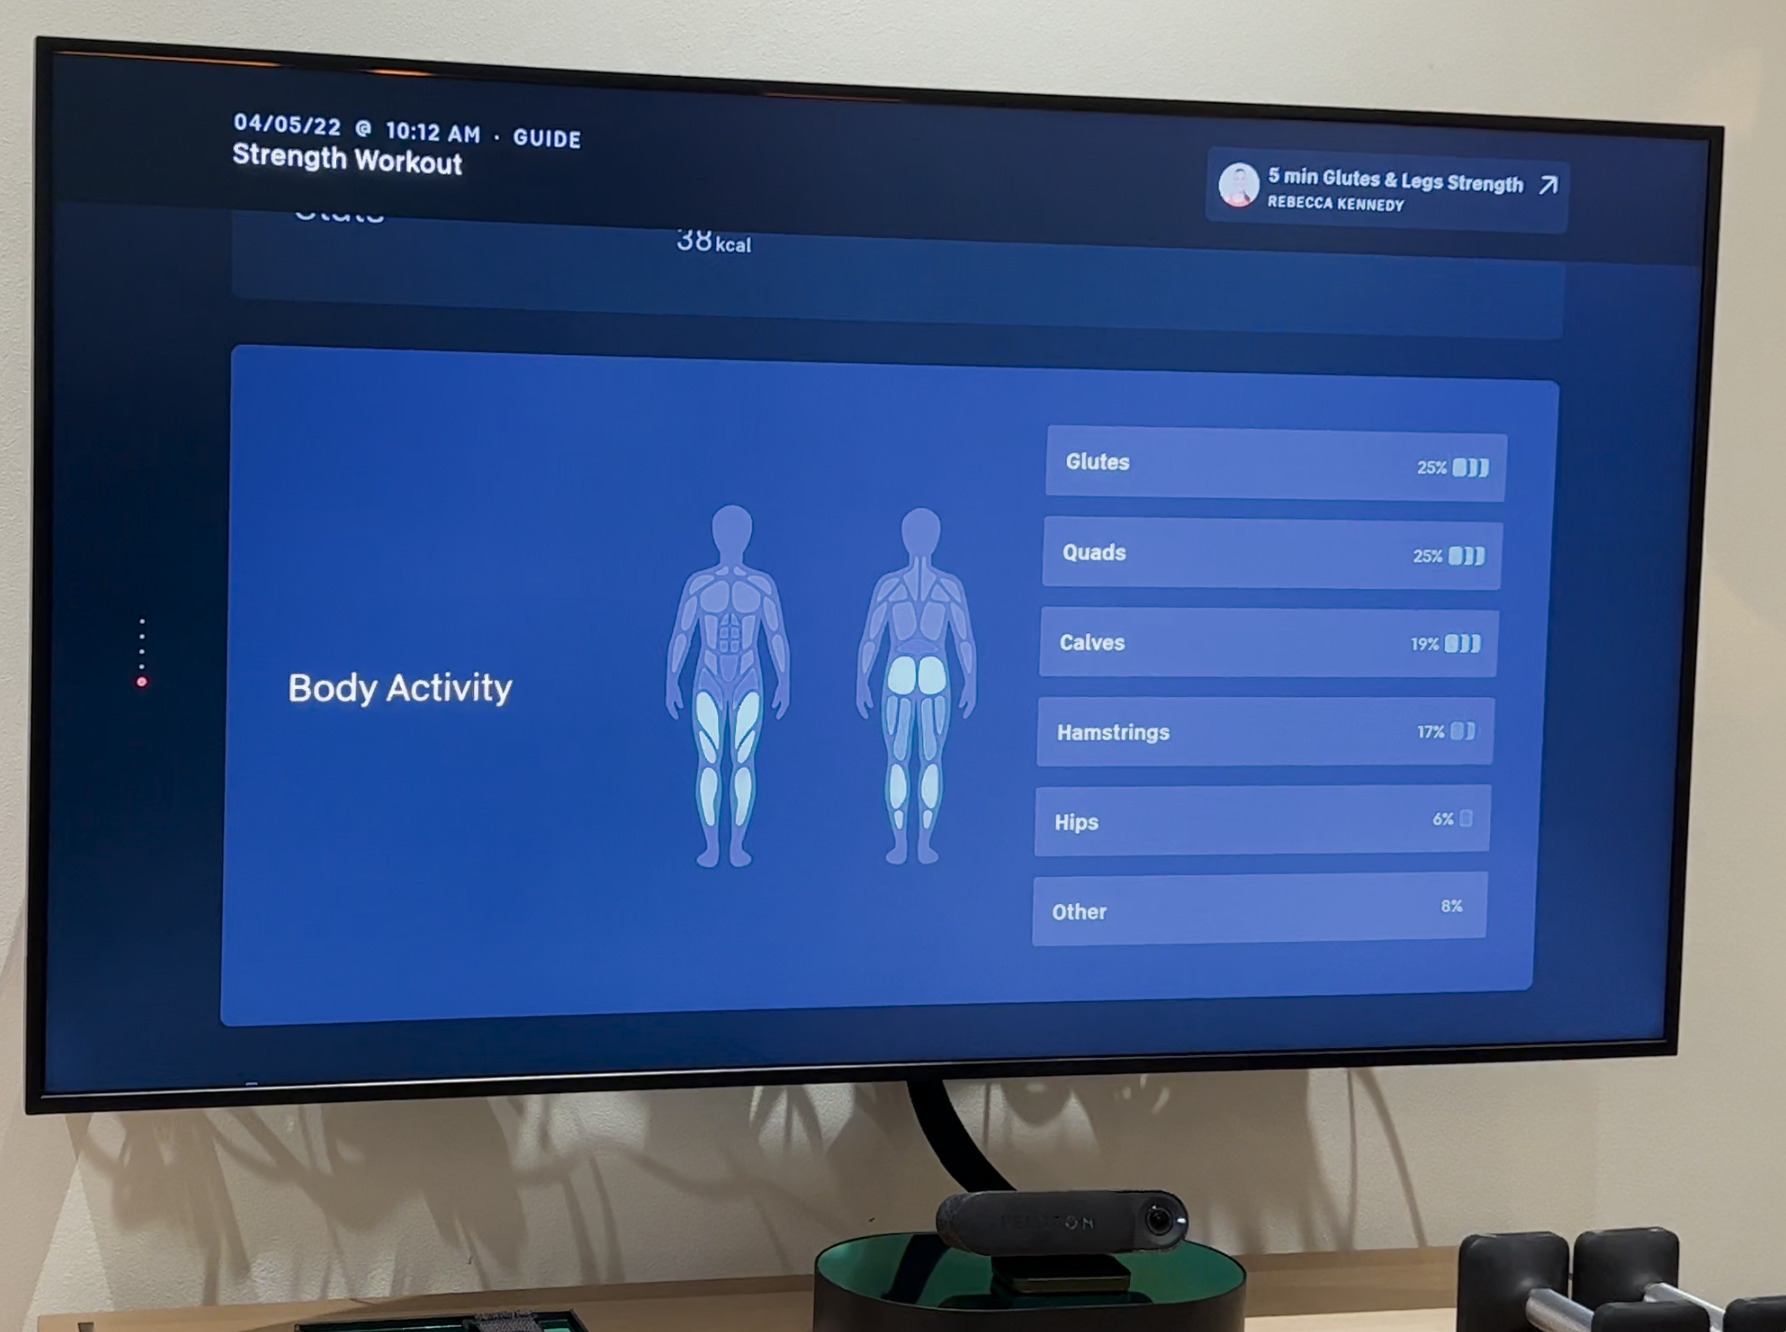
You will also see a Body Activity screen for a class, highlighting which muscles you worked during the class, and what % of the class those muscles were used.
Although you can see yourself on screen during classes, the Peloton Guide is not providing any type of form feedback, form suggestions, or form corrections. It really is just acting as a webcam to show yourself on screen here (and to feed data to the Movement Tracker). Some people might have mirrors they can use next to their TV or bike for this same functionality.
Besides seeing yourself on screen, the other big new element is the “Movement Tracker” feature. It’s a green spiral shown on screen that fills up as you complete a movement. Every time the movement changes, you get a new spiral to fill up. When you finish the class, it tells you what % of the movements you completed, and you can get some extra badges for this.
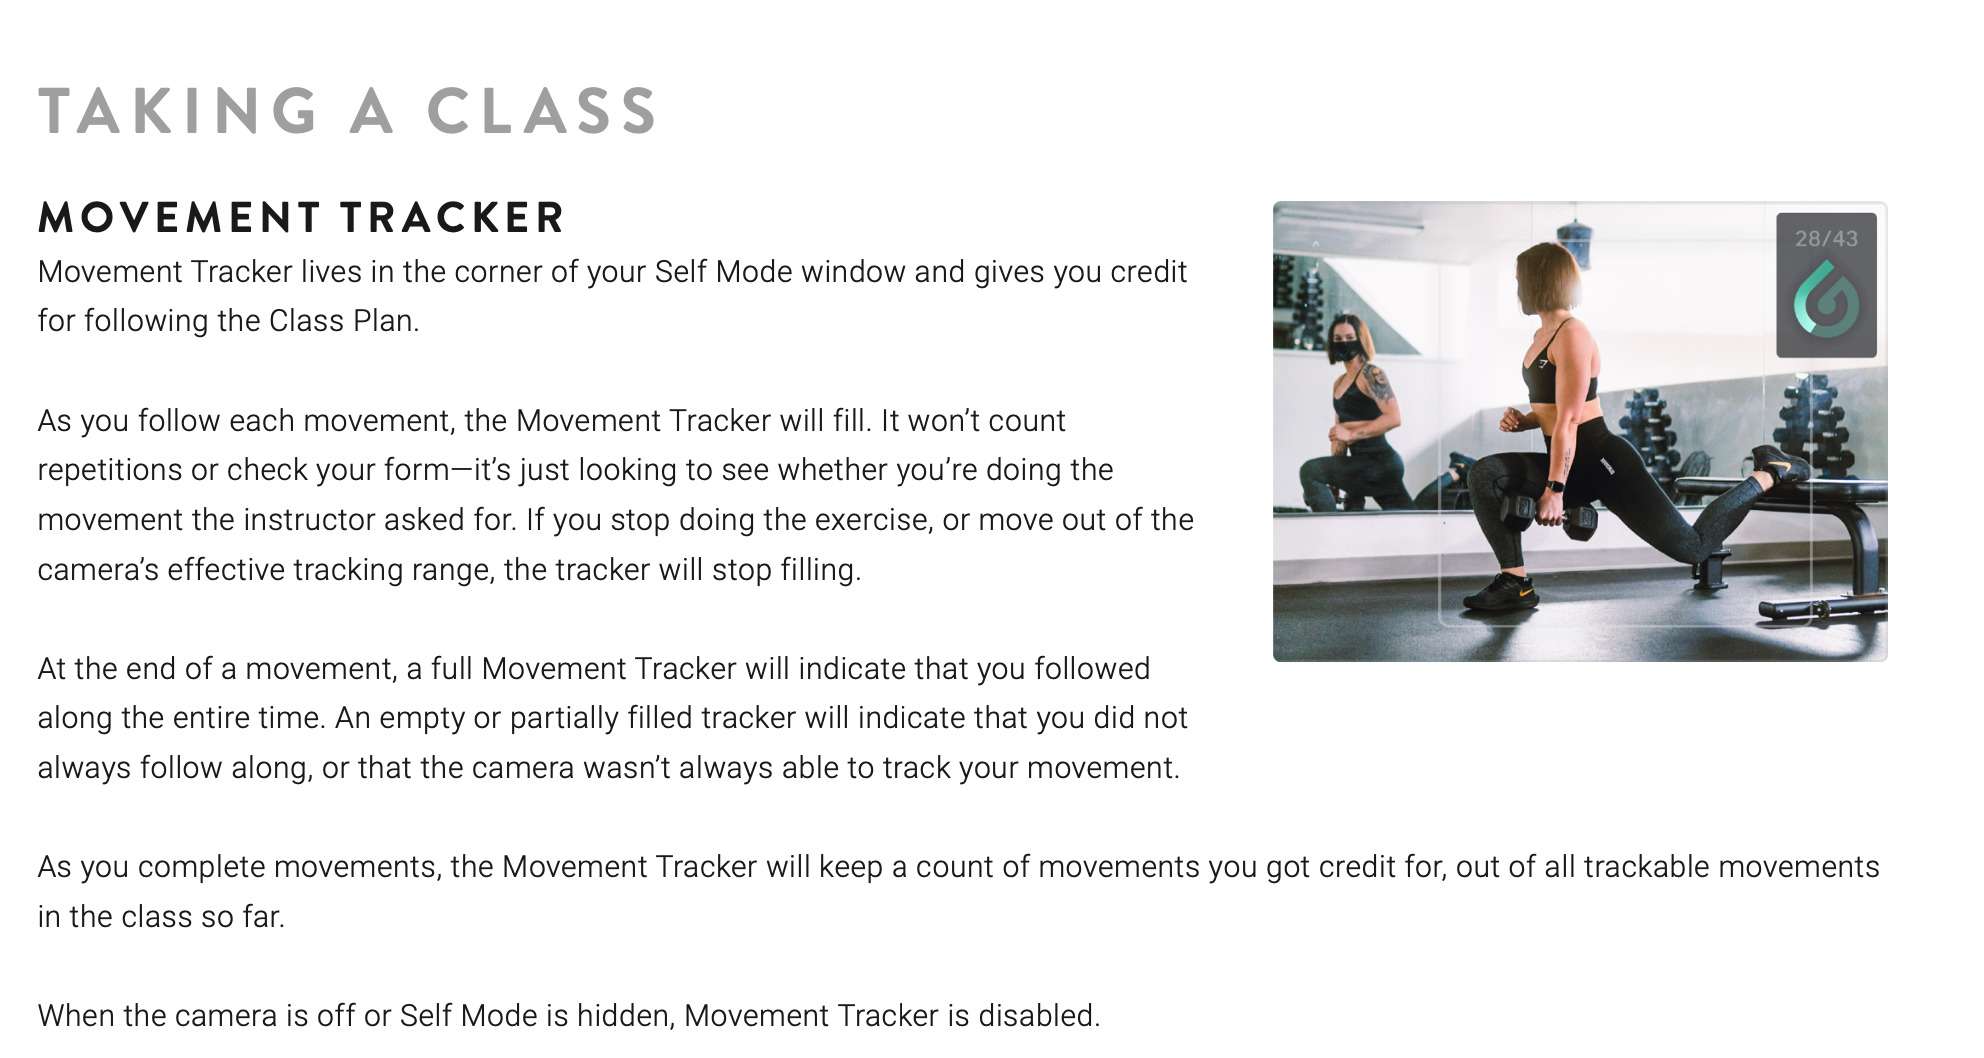
In our quick tests we found the movement tracker worked relatively well. If the class called for squats and you were doing presses, it would not give you credit for a movement. However, if it called for doing a left leg movement, and you did a right leg movement instead, if would give you credit. We’ll have more thoughts on the Movement Tracker once we’ve spent more time with it.
And even though the camera is tracking your movements in order to provide the Movement Tracker percentages for you – there is no rep counting. This seems like a big missing feature to us, and one that most people would have hoped & expected the Peloton Guide to have.
In recent interviews, like this one in the WSJ, Peloton stated that they would be looking at adding rep counting as a future software update:
Ben Schultz, director of product management at Peloton, said the company has looked at rep counting and form feedback, and intends to expand the product’s features in the future.
So what does the Peloton Guide offer today? First, it’s a way to get Peloton classes on a TV (though with things like SmartCast, Apple TV, Airplay, Roku, FireTV sticks and more, most people who want that might already have it).
However, the big thing the Guide offers that those other methods don’t is the ability to see yourself on the screen next to the instructor, and the “Movement Tracker” functionality. Many people will find the Movement Tracker is a fun gamification feature, and enjoy the ability to earn extra badges as they complete the workouts. In addition to the gamification, it might nudge people to get a more complete workout in. If you find yourself stopping with 5 seconds left of a movement, the extra motivation of trying to get a higher score on the Movement Tracker might give you the push to get those extra seconds of workout in.
The new class recommendations on the home page will also be very beneficial to some people. Right now Peloton’s strength recommendations are mostly limited to Monthly strength stacks, training programs like Crush Your Core 2 and Total Strength 2, as well as Facebook groups like Hardcore On The Floor that make training programs. Outside of that, members share that it can be a lot of work to pick and choose the correct class on Peloton to get the right amount of training for your goals. Depending on how well class recommendations in the new “Recommended Body Activity” work, this could be a big perk to people. However – this is a feature that seems like one that the whole community could benefit from, not just those with the Peloton Guide, so hopefully this will be rolled out across all platforms in the future.
One other improvement that will be especially useful to beginners is the ability to view demos of any workouts before, or after class. As you are getting into strength training, you might not be familiar with all the moves the instructors call out. Having the ability to watch the demo as many times as you want can be beneficial both for safety, and your overall workout. However, Peloton just updated their app and website to include movement demos as well, so all users can use this feature now – not just Peloton Guide owners.
This is also where seeing yourself on screen might be handy as well. Some will find they enjoy seeing themself on screen next to the instructor – and be able to analyze their own form and make small tweaks in real time to improve their form & workout. However, others will instead decide to take a low tech approach, and place a mirror next to the TV – which provides most of the same functionality as of today with the lack of form tracking as well as rep counting – although you do miss out on the Movement Tracker feature.
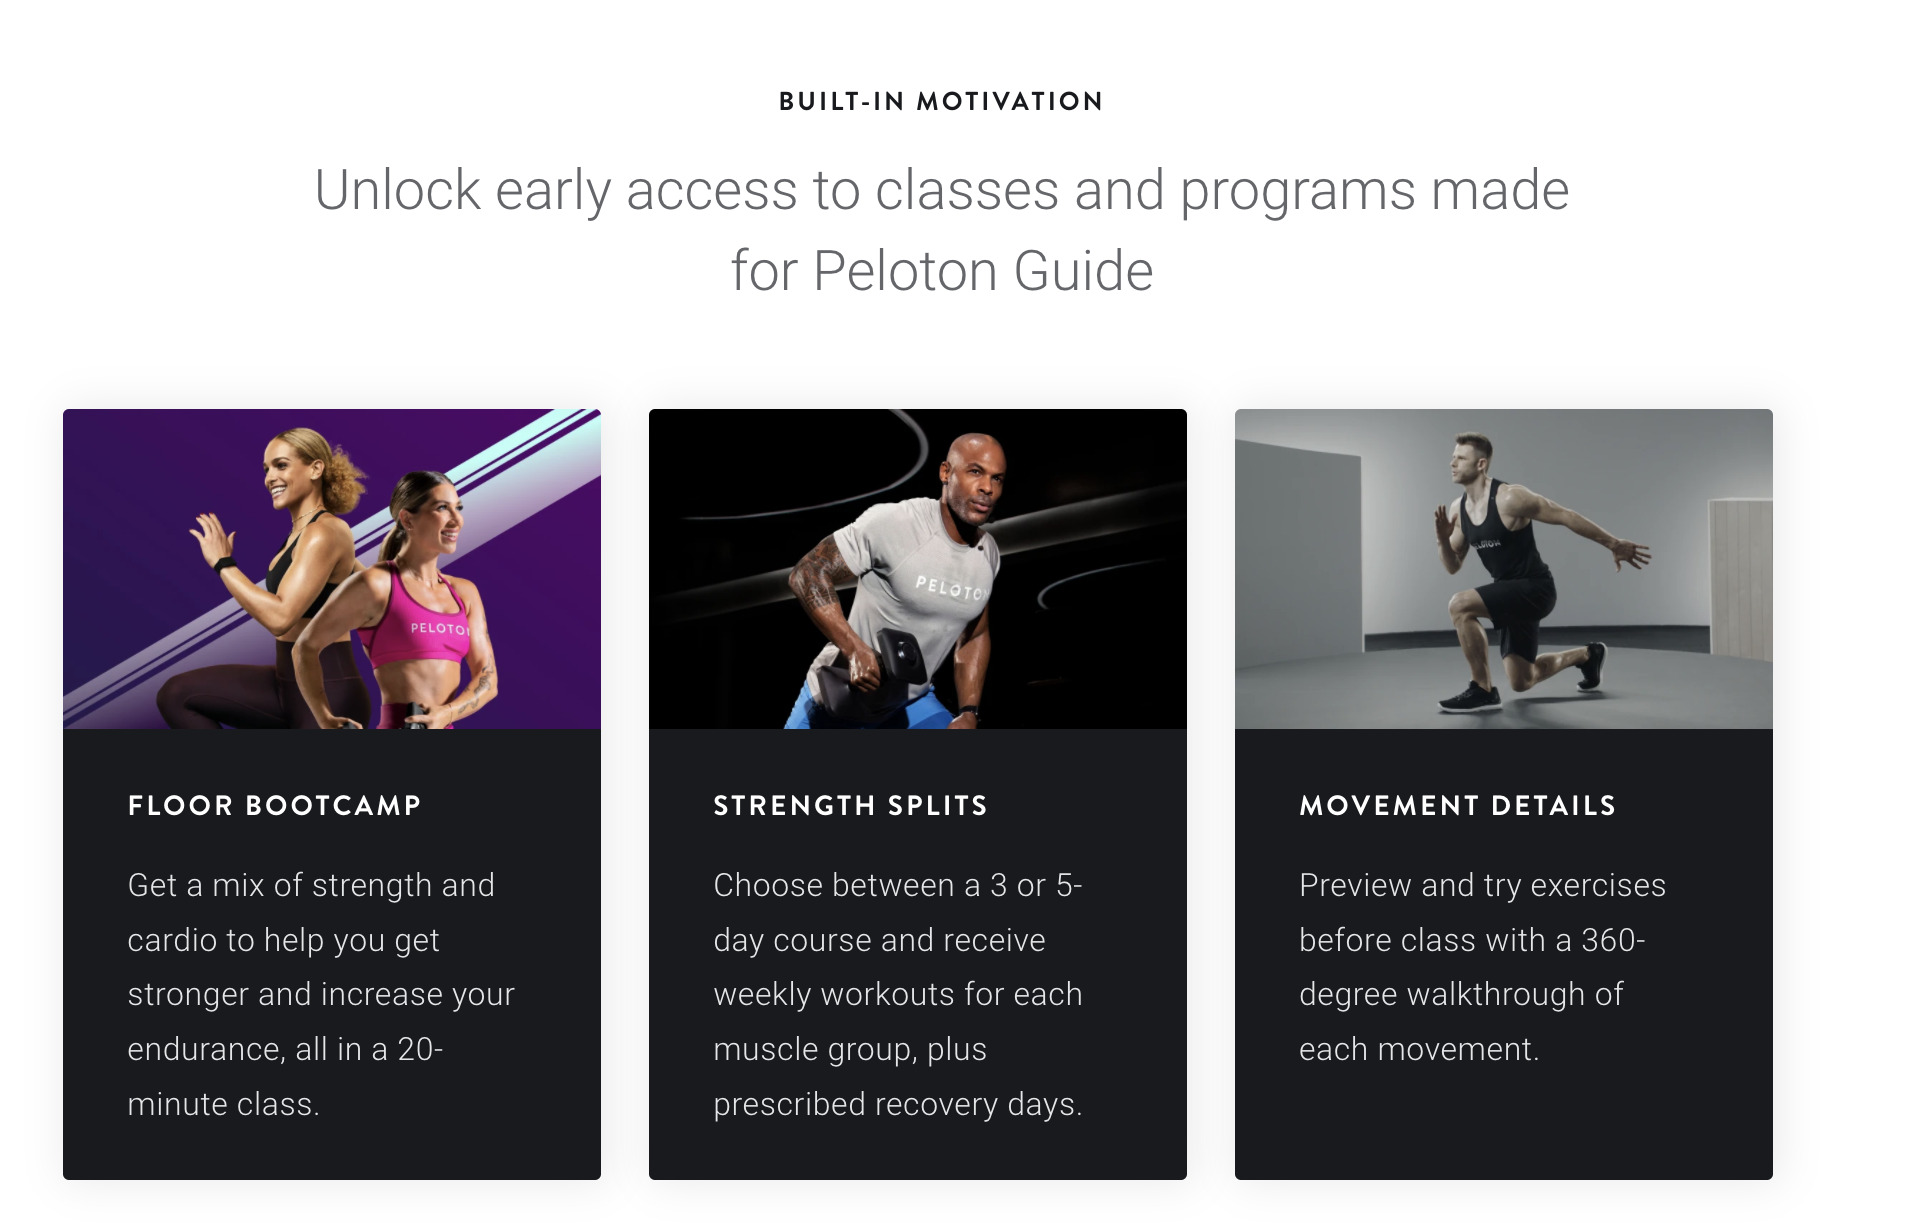
One other thing Peloton is adding to make the Peloton Guide more appealing is some programs (and possibly classes) that will be exclusive only to the Peloton Guide for 45 days. These include a new floor bootcamp program, some split strength programs, and more.
We browsed the on-demand library of strength classes of both the Peloton Guide and what was available on a Peloton Bike, and from our quick scroll, all classes appeared to currently be available on both. Peloton has said they will start having special “Strength Roll Call” classes, which are strength classes designed for the movement tracker – it’s possible these are some of the individual classes that will be exclusive for a period of time. We’ll update this once we find out if there will also be individual classes that are exclusive for a certain amount of time, or just the classes in the new strength programs.
The big question people are going to ask is: Is it Peloton Guide worth it? We think in the future this answer will be easier to say “Yes” to, once features like rep counting and form feedback are added in.
As of today, it might be a trickier answer. We’ll come back to this once we’ve been able to spend more time with it hands-on. If you’re a bike or Tread user, and don’t find the $295 price point to be too high – there’s no real harm in buying one to try. It has a 30 day free trial, and it won’t cause your monthly cost to change. If you enjoy the Movement Tracker, or find yourself improving your form thanks to the video of you on the screen – great.
If you’re an app user or new to the Peloton community – the answer seems to be more complicated – mainly due to the change in subscription cost. As an app user, you are paying $13 / month right now. Once you buy the Peloton Guide, that will increase to $24 / month for the rest of the year, before increasing to $39 / month at the start of next year. You’ll have to consider whether the features available today make it worth that increased monthly cost. But again, there is a 30 day free trial if you are on the fence.
In either case, whether you’re already a Bike/Tread owner, or an app user – one consideration will be how much content gets that 45 day exclusive window on the Guide. If you want to be the first to take a class from your favorite coach, this might need to weigh into your decision about the Peloton Guide.
Some of the new features that popped up today and are new on the Peloton Guide screen (like Body activity, and others) seem to be available through the Peloton App & website as well for all members. For example, on your profile page on the Peloton website & app, there is now an overview showing you your Body Activity – the same sort of thing you see on the home screen of the Peloton Guide.
For anyone thinking about the Peloton Guide, there are some other options out there. However, if you’re already in the Peloton ecosystem, you already have a $39/month subscription fee – and is it worth another for a different device from a different company? Right now there are at least 2 big competitors the Peloton Guide has to contend with.
Tonal has been innovating on their software for years now, and the Tonal machine is a favorite for a lot of people (and there are many people who wish Peloton would just buy Tonal) – being a full smart home gym in one device, with digital weights integrated into the machine. However, the Tonal requires being mounted to a wall, is several thousand dollars (with a monthly subscription as well), so might not be a direct competitor for the Peloton Guide.
A better comparison will be for the Tempo Move. The big difference between the Tempo Move & Peloton Guide is that Peloton Guide is all-in-one device, and simply requires being plugged into your TV. The Tempo Move doesn’t have a camera, and instead relies on your iPhone to be the camera (with Android support coming in the future). The Tempo Move class library is nowhere near as robust as Peloton’s – but the Tempo can count your reps for you, and is also able to do some form feedback & correction (which they continue to release software updates for improving it). The Tempo also can auto detect what weights you are using and track the number of pounds lifted as well – and several weights are included with your purchase. Of course, Tempo has their own $39/month subscription cost.
We’ll have more thoughts on who the Peloton Guide is best for once we’ve had more time with it in our in-depth review.
In the meantime, below are several other questions our community has asked about the Peloton Guide (or just some direct answers to the most common FAQs) in case we didn’t cover what you are looking for above!
Can the Peloton Guide count your reps for you?
No – there is no rep counting enabled on the Peloton Guide. They instead have a “Movement Tracker”, which is a green spiral that fills up as you complete the current activity of the workout. You then get scored on what % of the movements you filled up the Movement Tracker.
In several interviews, Peloton has specifically mentioned rep counting as a feature they are investigating for the future.
Does the Peloton Guide have form feedback or form correction? Can the Peloton Guide correct my form?
No – the Peloton Guide has no form feedback or correction. You are able to see a video of yourself on the screen next to the instructor, and can adjust your form if you notice any differences.
How do I control the Peloton Guide?
There are two ways to control the Peloton Guide – one is a remote control, and the other is through voice control. Once you use it a few minutes, the controls for the Guide are relatively intuitive. Once a class has started, the main things you would need the remote for are to pause, or change your display mode.
Voice control is currently considered a “beta” feature. If you enable voice control, you’ll have to say a couple of sentences so Peloton will recognize your voice. Once it’s set up, you can activate voice control on the Peloton Guide by saying “OK, Peloton”. One example would be “Ok, Peloton, Pause class”
Once the voice control is configured, it should only recognize your voice. We tested this, and in our short tests, the Peloton Guide would only take voice commands from the user who set up the device, and not other people.
What classes are available on the Peloton Guide?
First, some good news – all class types are available on the Peloton Guide. This means you can take strength, yoga, cycling, running, cardio, and any other class through the Guide connected to the TV. Just keep in mind that right now only Strength classes will have the Movement Tracker overlay and track your progress through the class – all the other disciplines will just display the class & the timer.
You are able to take live classes (of any type) as well as on-demand classes on the Peloton Guide
Is there a leaderboard on the Peloton Guide? Can I high-five my friends on the Peloton Guide?
There is a leaderboard that will show others in the class. However, the leaderboard on the Peloton Guide will only show others taking the same class also on a Peloton Guide. We tested by having a class playing on the Peloton Guide, and then the same class be taken by a different profile on a Peloton Bike+. The Bike+ user did not show up on the leaderboard for us on the Guide, and the Guide user did not show up on the leaderboard for the Bike.
Can you use an Apple Watch with the Peloton Guide as a heart rate monitor.
No, the Apple Watch can’t be used with a Peloton Guide. Peloton’s FAQ page specifically states this is not possible right now – “At launch, we will not support Apple Watch® for heart rate monitoring and Strive Score”. However, the Peloton Heart Rate band or any other Bluetooth heart rate monitor should be able to be used.
What are the specs of the Peloton Guide?
The Peloton Guide has a 12MP camera on the front of it, and has Bluetooth 5.0. It is able to connect via WiFi 802.11 a/b/g/n/ac (note that is says hidden networks are not supported).
The dimensions of the Peloton Guide are 166mm × 64mm × 42mm / 6.5′′ L × 2.5′′ W × 1.7′′ H, and it weighs 18oz (or 22.4 oz with the mounting plate).
The Peloton Guide remote requires 2 AAA batteries.
Can I use an ethernet cable with the Peloton Guide?
There is no ethernet port on the Peloton Guide, and only one USB-C port that is used for power. The manual states Wired networks are not supported.
Is the Peloton Guide worth the price?
We covered this a little higher above. Long story short – with the features it has right now it depends. However, Peloton is talking about features like rep counting and form feedback in the future.
Can you use the Peloton Guide with a Peloton Bike or Tread?
Another common question we’ve seen is whether the Peloton Guide can be plugged into a Peloton Bike or Tread – and use that device as a screen for the Peloton Guide. Unfortunately, it seems like this is not possible – it’s only possible to plug in into a standard TV or monitor with a HDMI port.
Can I use the camera on my Peloton Bike or Tread for the Peloton Guide? Is the Peloton Guide compatible with the Peloton Bike+?
A similar question we’ve seen is that the new Peloton Bike+ has an upgraded camera, and the screen can be rotated for Bootcamps – can that camera on the Bike+ be used to run Peloton Guide? Or can the Peloton Guide be plugged into the Bike+ screen? Again, the answer for this is no – the only way for Peloton Guide to work is with the new standalone device plugged into a separate TV.
Do you need specific weights for the Peloton Guide? Do only Peloton weights work with it?
Any weights will work with the Peloton Guide. Peloton is not counting your reps, or your weights, so it doesn’t matter what weights you use.
Does the Peloton Guide work with Android?
The Peloton Guide software is self-contained on the device so doesn’t require any other software. This means it doesn’t need Android, iOS, or any other phone software to work – it all runs from the Peloton Guide device and shows on the TV.
I have other questions about the Peloton Guide?
You can find a dedicated FAQ page for the Peloton Guide on Peloton’s website here, as well as the official Peloton Guide users’ manual here.
Let us know what you think of the Peloton Guide – are you going to be getting one?
And if we didn’t answer your question, let us know in the comments.
Support the site! Enjoy the news & guides we provide? Help us keep bringing you the news. Pelo Buddy is completely free, but you can help support the site with a one-time or monthly donation that will go to our writers, editors, and more. Find out more details here.
Get Our Newsletter Want to be sure to never miss any Peloton news? Sign up for our newsletter and get all the latest Peloton updates & Peloton rumors sent directly to your inbox.
Leave a Reply