
The team at Top Form Design, who is the same crew that makes the SpinTray we previously reviewed, were kind enough to send us a demo unit of one of their “The Adjuster” to try out and review. The links in this review are affiliate links, which means if you end up deciding to purchase The Adjuster through our links, you’ll be supporting our site.
Review of the TFP Top Form Design Adjuster
The Top Form Design Adjuster is a product with one simple goal – provide an add-on that allows Peloton Bike handlebar depth adjustment (also known as fore/aft adjustment). It does this and allows one to quickly shift their handlebars to be 3″ closer or further away from the normal position. Due to its unique design, it also has the side effect of raising the handlebars slightly as well. To cut to the chase – this is a well designed, well engineered product that allows for easy depth adjustment of the Peloton Bike handlebars. Whether it’s worth the premium $249.99 (retail price at time of publishing) is left as an exercise to the reader. You can see a full video review of the Top Form Design Adjuster embedded below (or watch here on YouTube), however, if you prefer reading, we’ll summarize the highlights in the following article as well!
You can find and purchase “The Adjuster” here.
Who is the TFD Top Form Design Adjuster For?
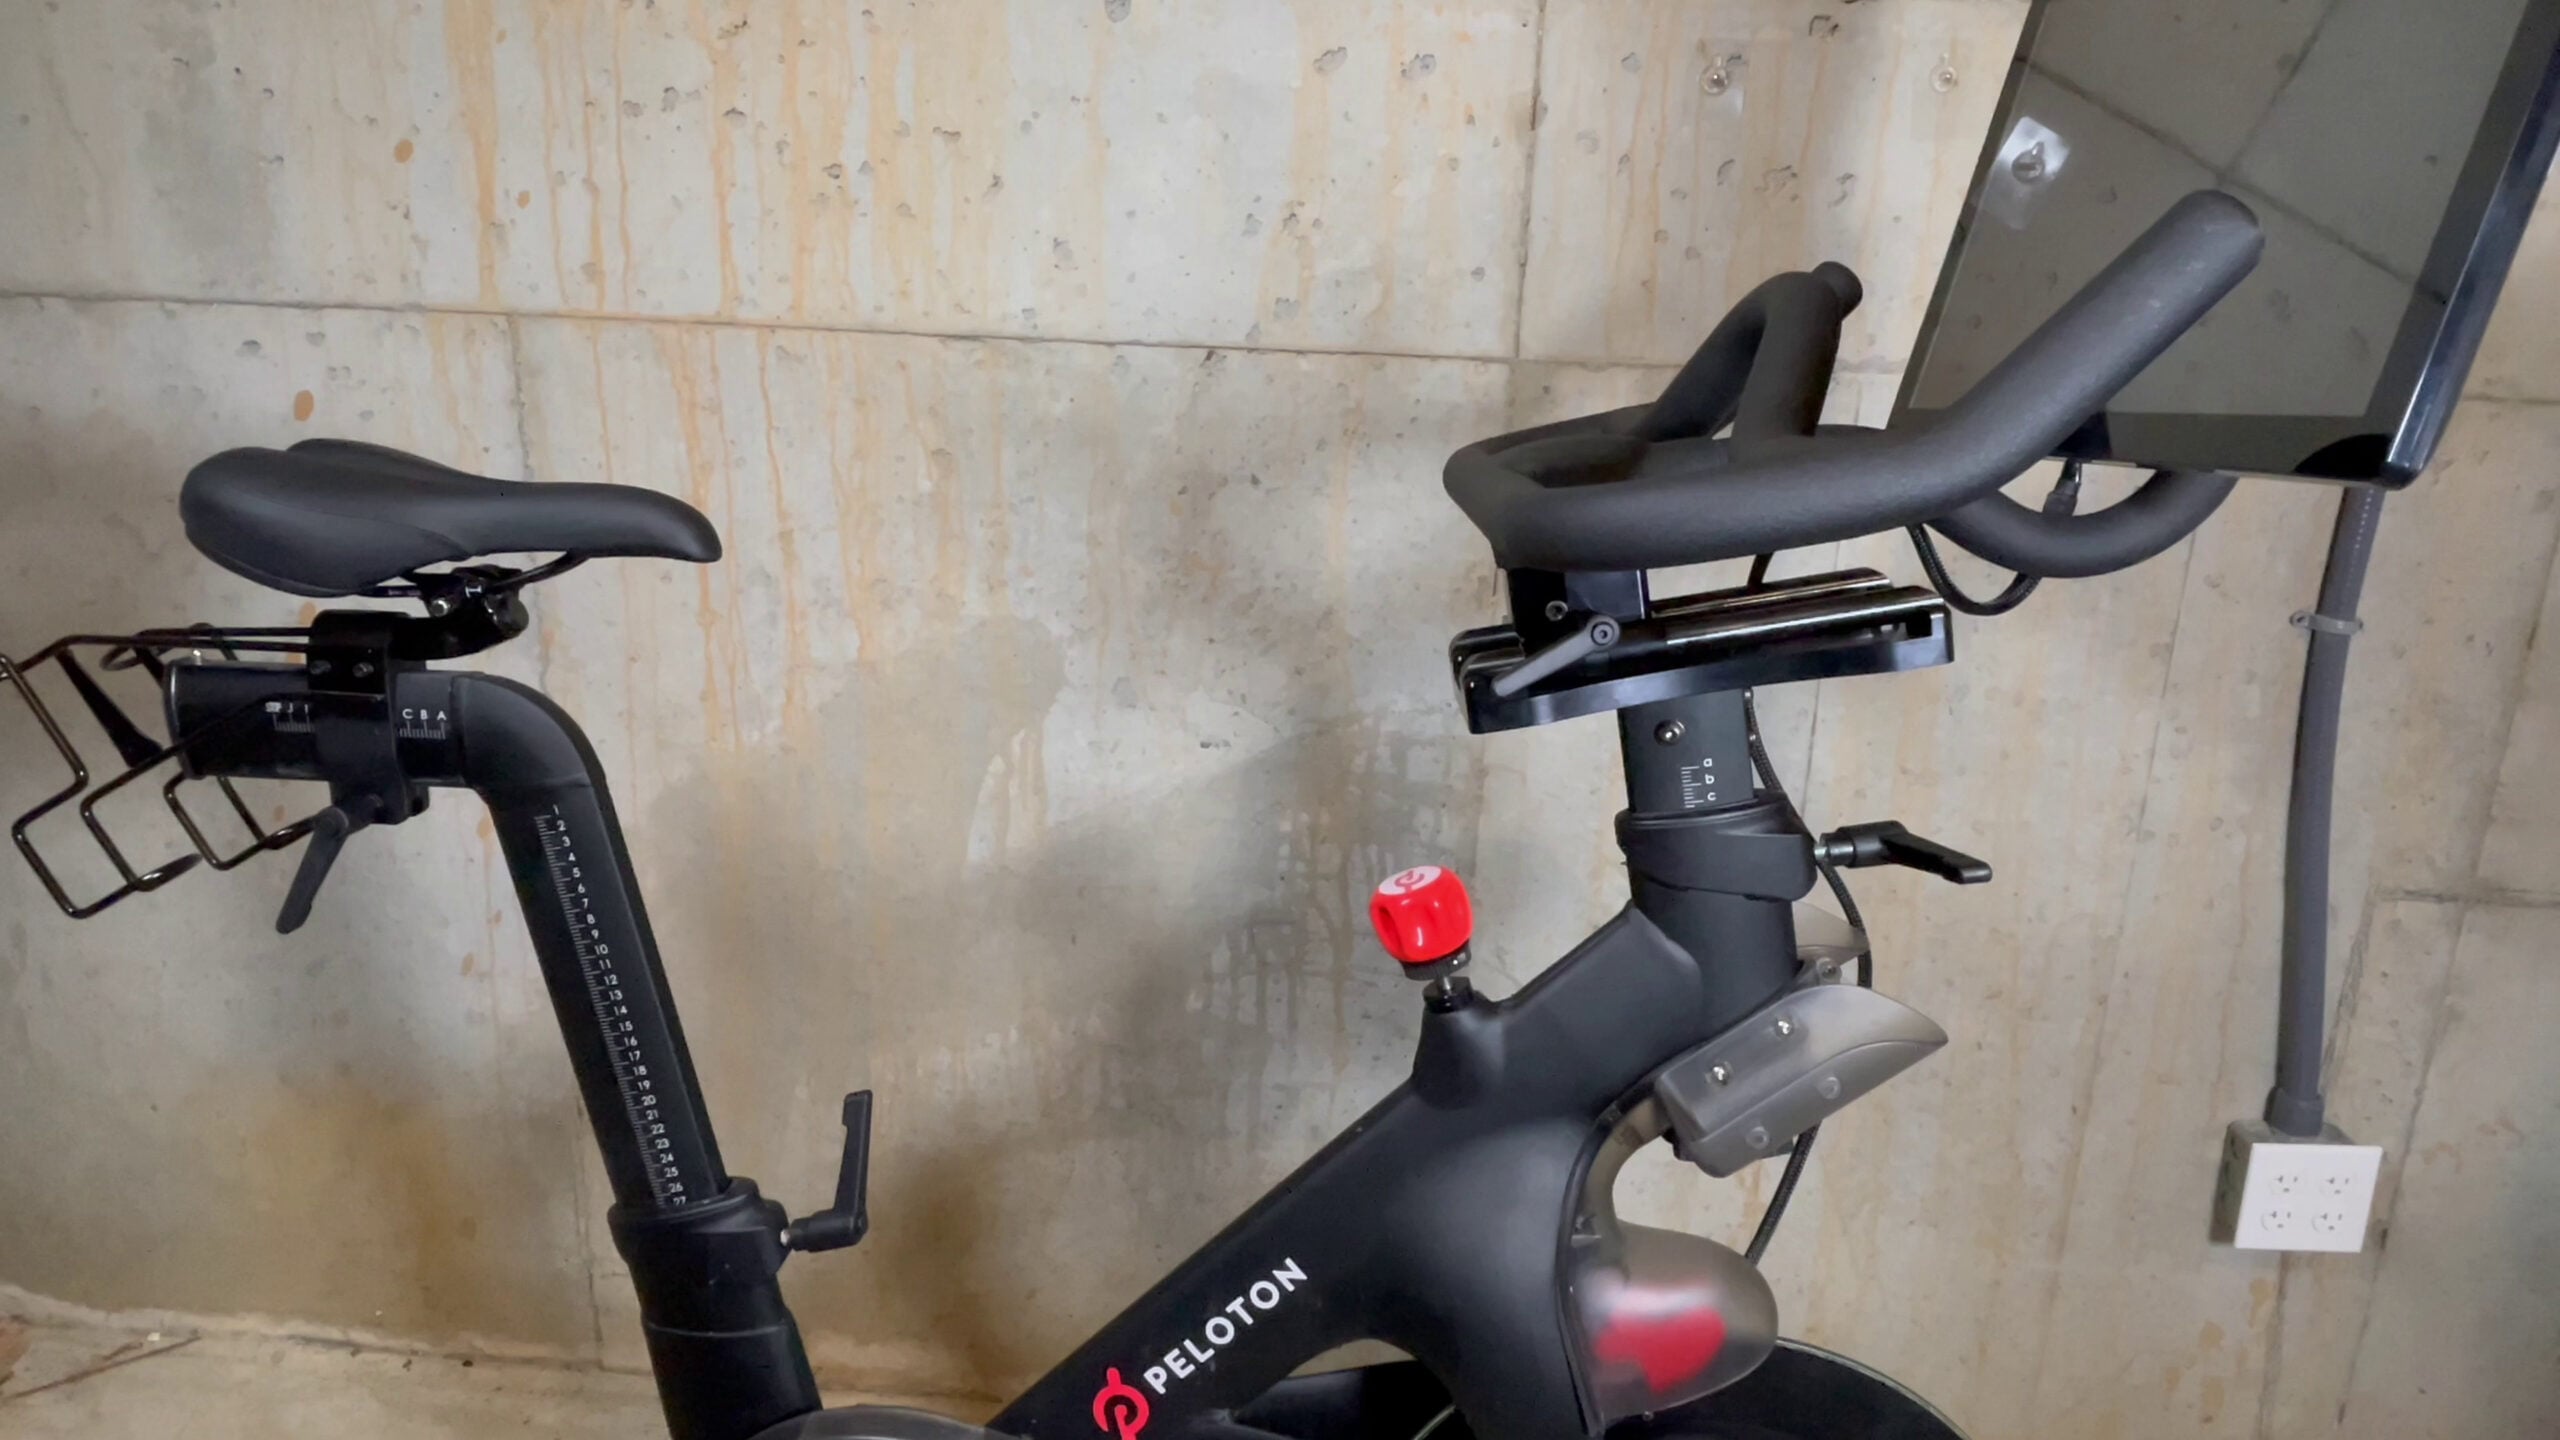
The Adjuster is designed for two main groups of people. First, those shorter riders who might have trouble reaching the handlebars. Secondly, riders who are unable to get a proper fit on their bike, even after making other adjustments on the bike. Typically the bike has 3 points you can use to change the fit – handlebar height, seat depth, and seat height. Some people find that after they get the seat adjusted for proper cycling mechanics, the reach to the handlebars then pushes them out of position, causing a loss of power, back or shoulder pain or discomfort, or other issues. The Adjuster aims to help provide one extra layer of customization, with the addition of the ability to adjust fore/aft depth of your Peloton handlebars.
Installation of the Top Form Design Adjuster
The installation of The Adjuster ended up being a relatively quick and easy process. We were able to easily complete the install by ourselves, however, some people might want two people for the job. In particular, one step requires lifting the assembled handlebars + monitor out of the frame and laying it on the ground (and later re-inserting it). Having two people for that step wouldn’t be the worst idea.
The following is the (abridged) installation steps for the Top Form Design Adjuster. We recommend watching their install tutorial (linked here) or following along with the instructions that come in the box though, as you want to tighten certain screws before others! The Adjuster comes with both sizes of allen wrenches you will need to remove and re-add screws.
- Remove the 4 screws that on the neck of the bike that keep the handlebars attached to the frame of the Bike
- Lift the handlebars (with monitor attached) out of the Bike, and set nearby
- Place the Top Form Design Adjuster in the neck of the Peloton bike, where the handlebars previously went
- Using the same screws you just removed, screw the Top Form Design Adjuster into the neck of the bike
- Place the handlebars (and monitor) into the Top Form Design Adjuster
- Use the 4 new screws provided to attach the handlebars into the Top Form Design Adjuster
- Enjoy your new flexibility on the bike!
Beyond this basic install, the Top Form Design Adjuster comes with 2 optional settings. The main plate of the unit has 4 holes drilled into it – and it ships with the two center holes being used. If you wish, you can adjust this and use the two front or two back holes instead. This will shift the entire unit to be about 1.5″ either closer, or further away from the rider, depending on which installation holes are used.
Fore/Aft Adjustments – Handlebar Depth (and Height) adjustments for Peloton Bike with TFD Top Form Design Adjuster
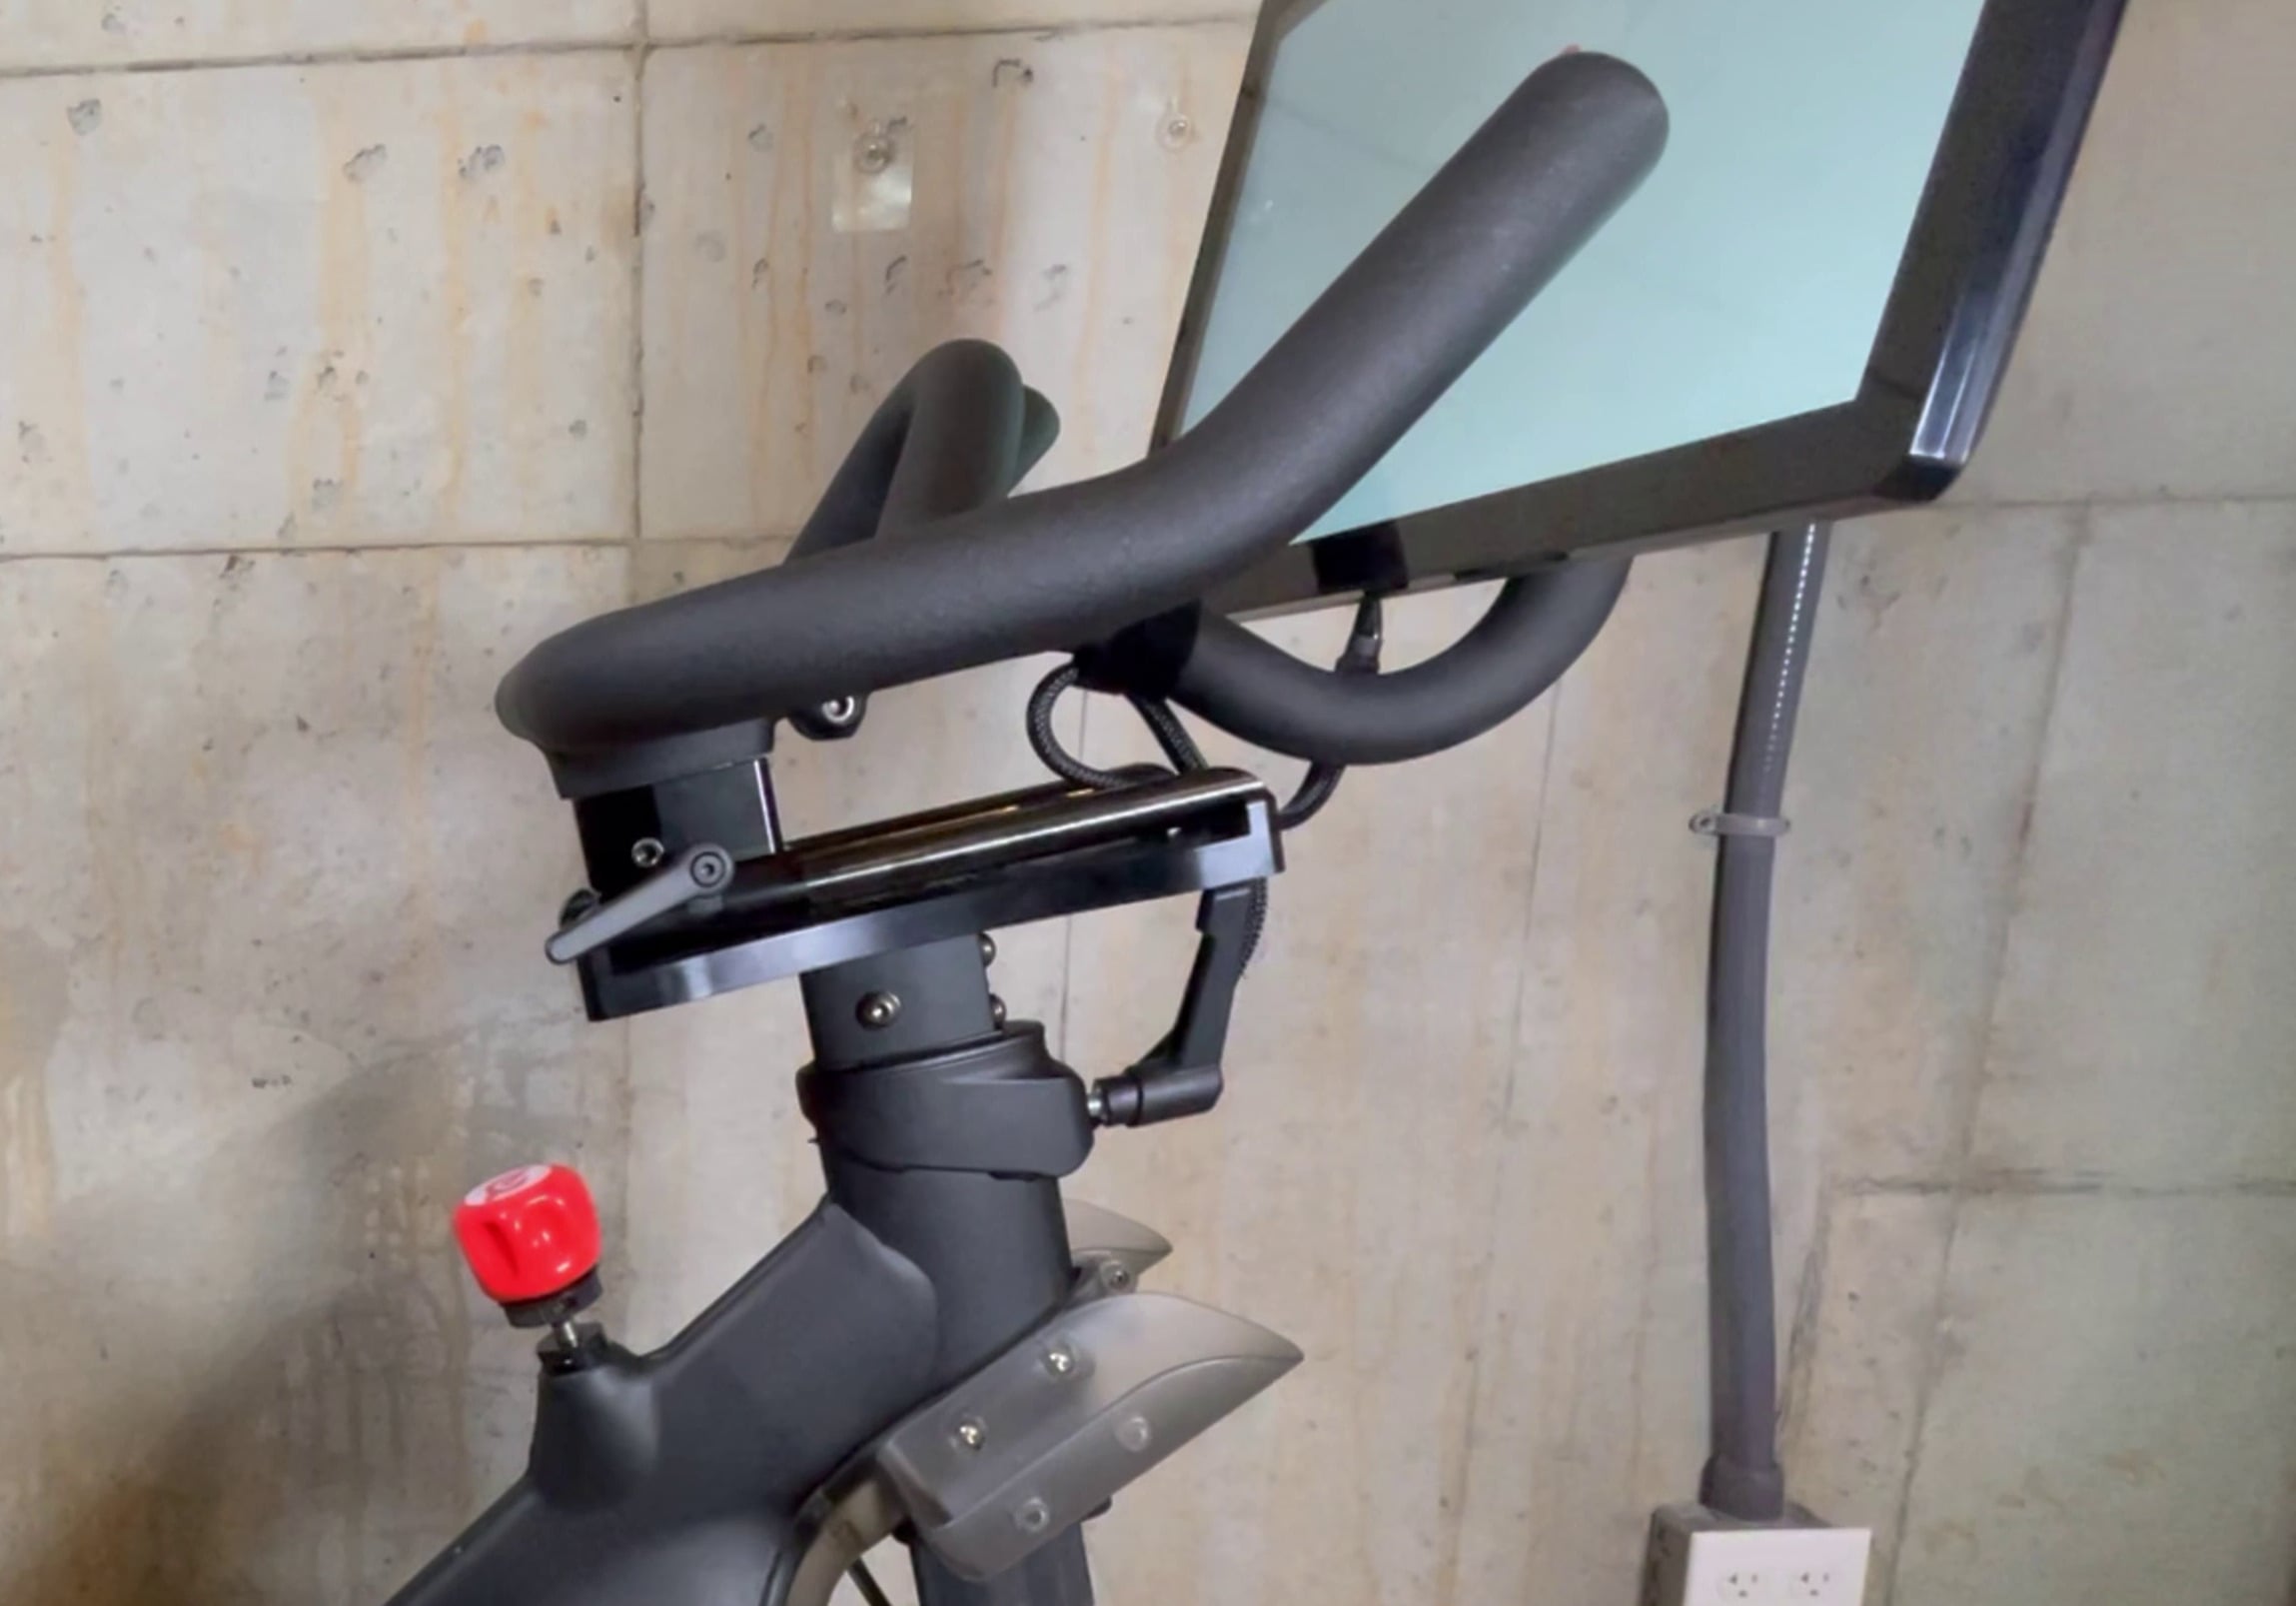
Once The Adjuster is installed, actually adjusting the handlebar position forward and backwards is simple. You have to loosen the clamp on the side of The Adjuster, and then you are able to push or pull the handlebars up or down the track. You need to use a little force to get the handlebars to start moving, but then once you do, they glide along the rails easily. Once the handlebars are in the position you want, you re-tighten the clamp to lock the handlebars back into place. This can be done easily by any rider (without assistance), either off the bike, or while seated on the bike.
Impressions & Hands-On with TFD Top Form Design Adjuster
The TFD Top Form Design Adjuster feels very solid – which is a good thing, considering it’s responsible for holding your handlebars & monitor in place. It is made out of machined aluminum, with stainless steel rails that one’s handlebars seem to glide effortlessly over, and weighs in at around 6 pounds. It is this combination of design, material (machined aluminum is much more expensive than 3D printing), and R&D that went into designing and prototyping The Adjuster that contributes to the overall $250 cost. One initial concern we had before we got our hands on it was whether it would introduce any looseness or wiggles in the handlebars while it was in use. However, once we re-tightened down the screws after some initial tests with it, we didn’t notice any detectable wiggle or shakiness of the handlebars or monitor with it installed. The instructions note that the screws might take a few rides to settle in, and you will want to be sure to re-check for tightness after your first few rides – and this was the case for us.
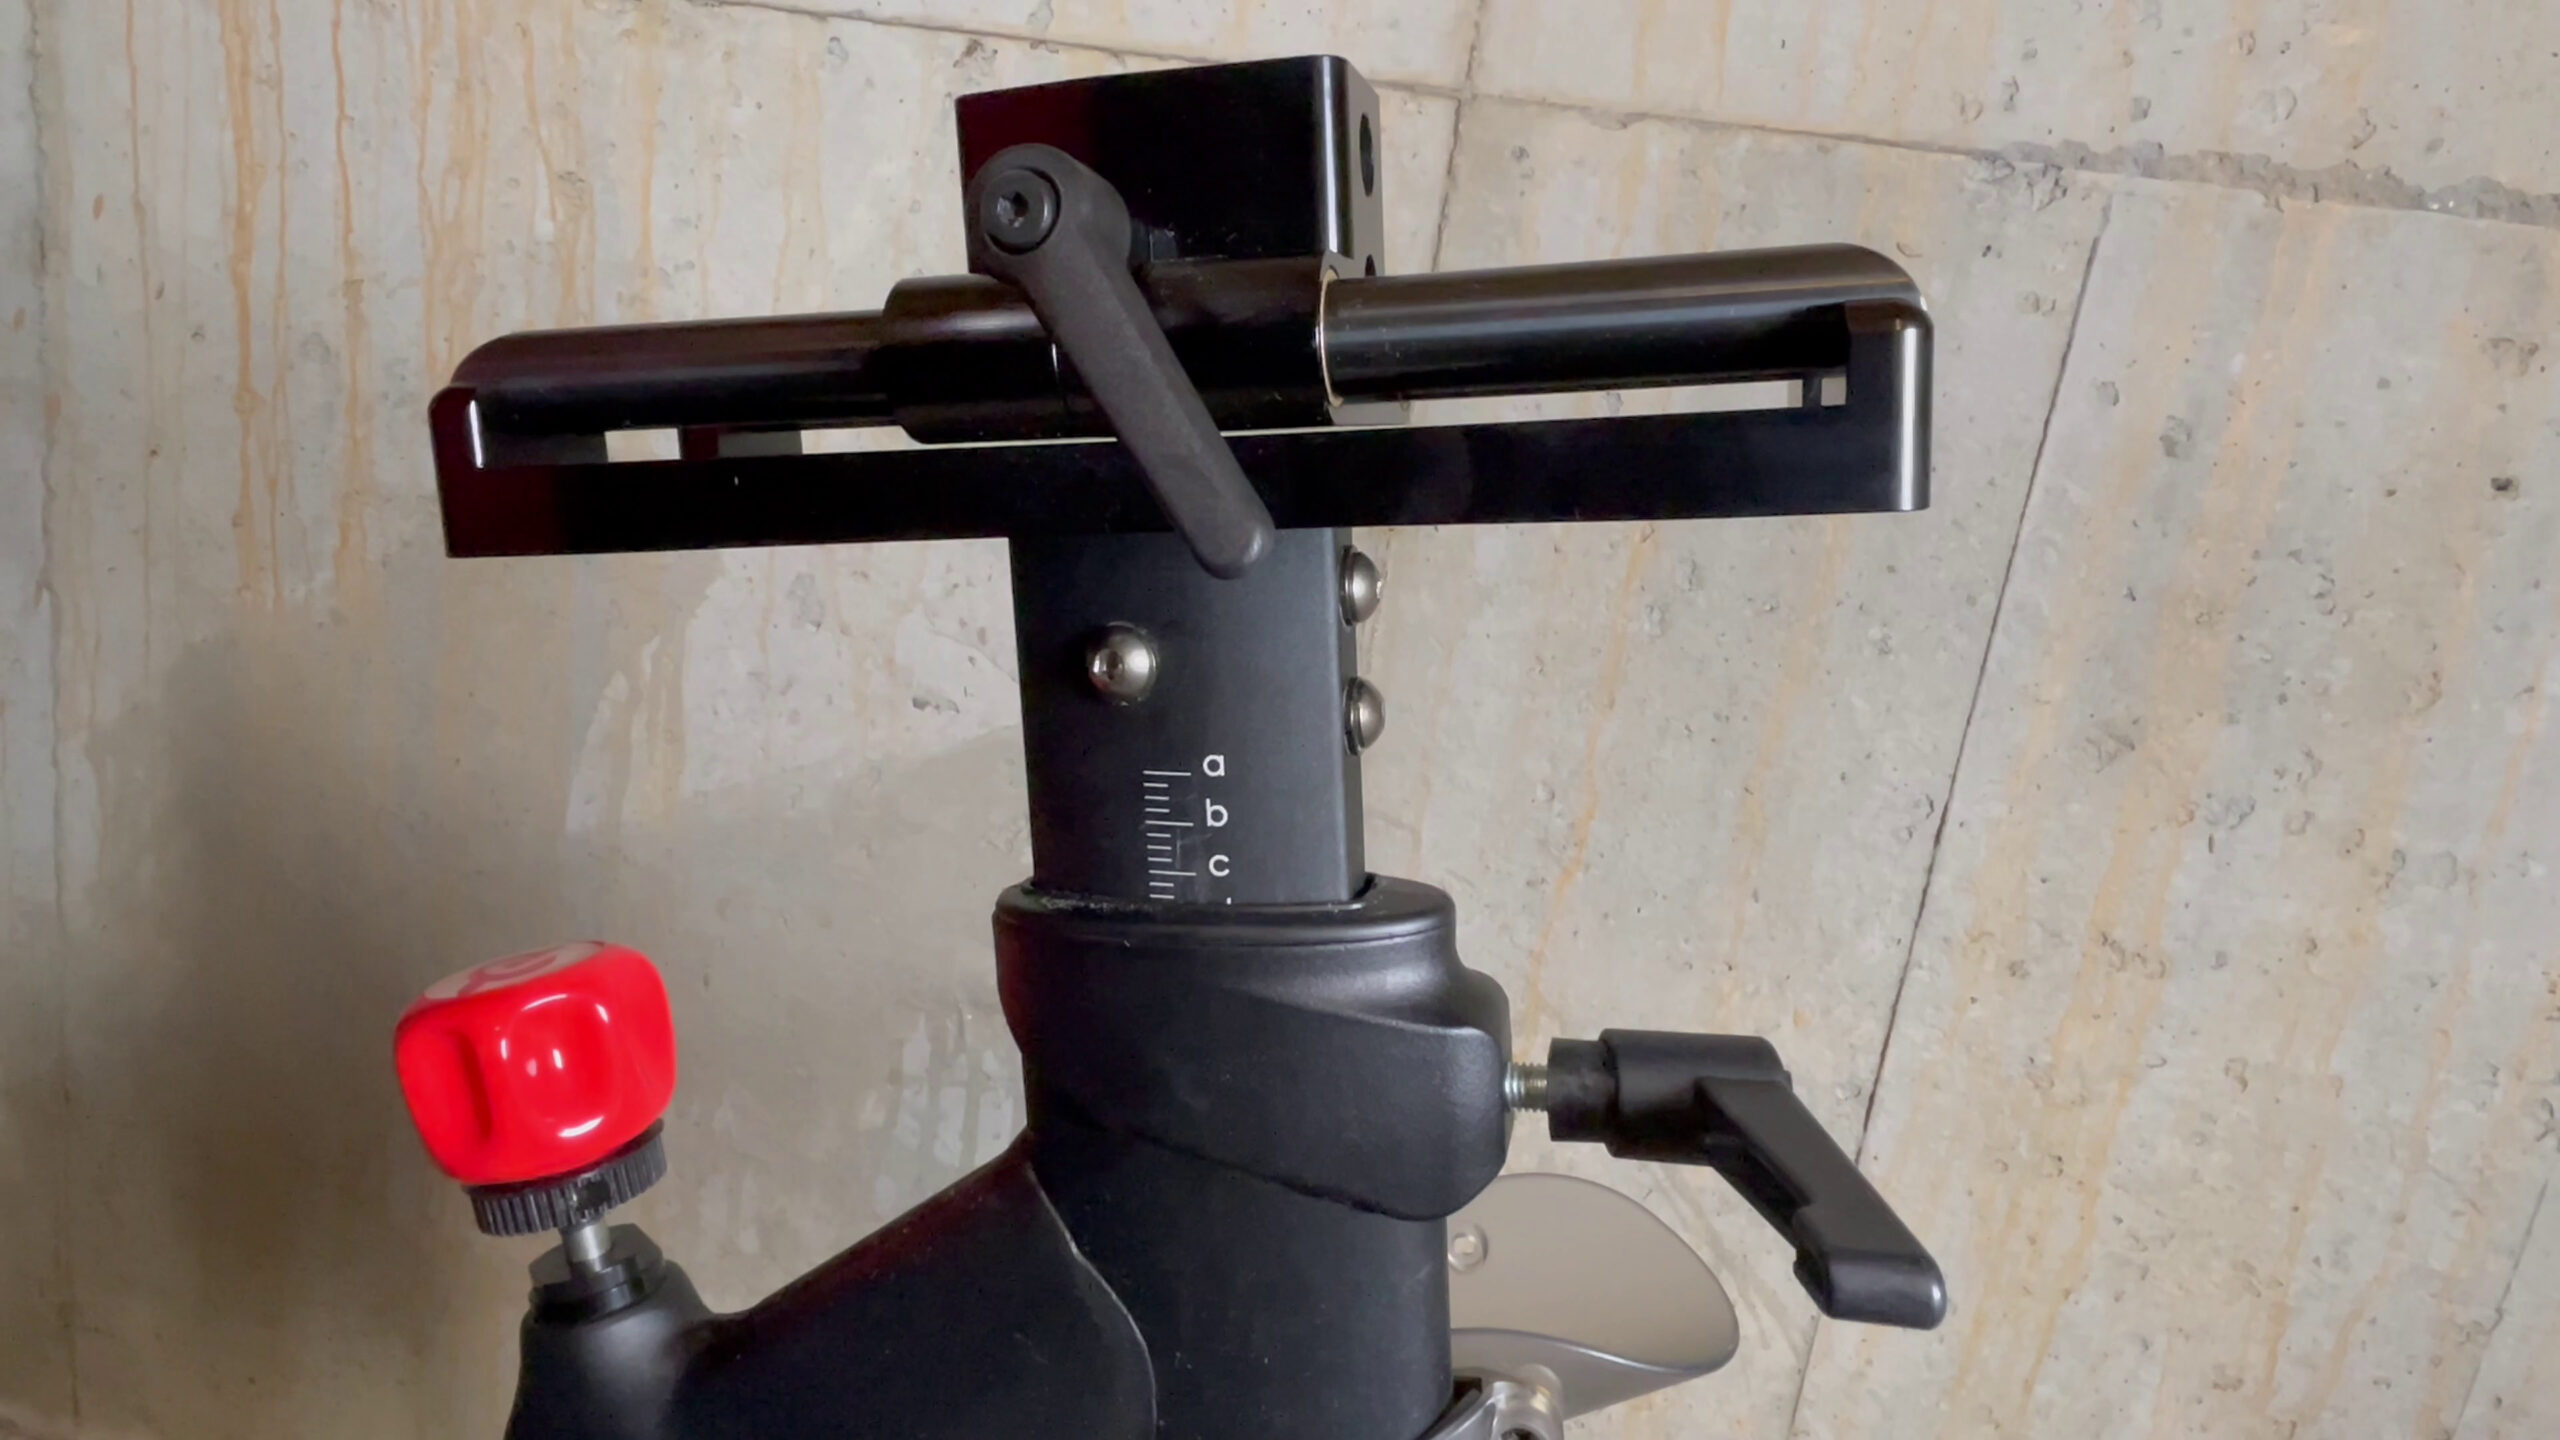
For us, this product ended up being a “set it and forget it” type product, which is a good thing. It ends up feeling like it is part of the bike, and a piece that should have been included. When different riders use the bike, it’s just as easy to shift the handlebars forward and backward as it is to do any of the other adjustments. And similar to the other changes you can make, The Adjuster has letters and notch marks on the device so you can note your preferred setting to easily swap it if you have multiple riders.
The Adjuster provides for a total of 8.5″ of adjustment you can make for your handlebars (6″ that can be quickly done using the clamp, the other 2.5″ require unscrewing and un-mounting things). The center plate has 4 different installation holes, and ships with the 2 center being used. With this configuration, you can slide the handlebars 3″ forward and 3″ backwards. However, if you wish, you can unmount The Adjuster, and remount the center plate to use either to two front, or two back installation holes. This will bring the handlebars forward or backwards an additional 1.25″.
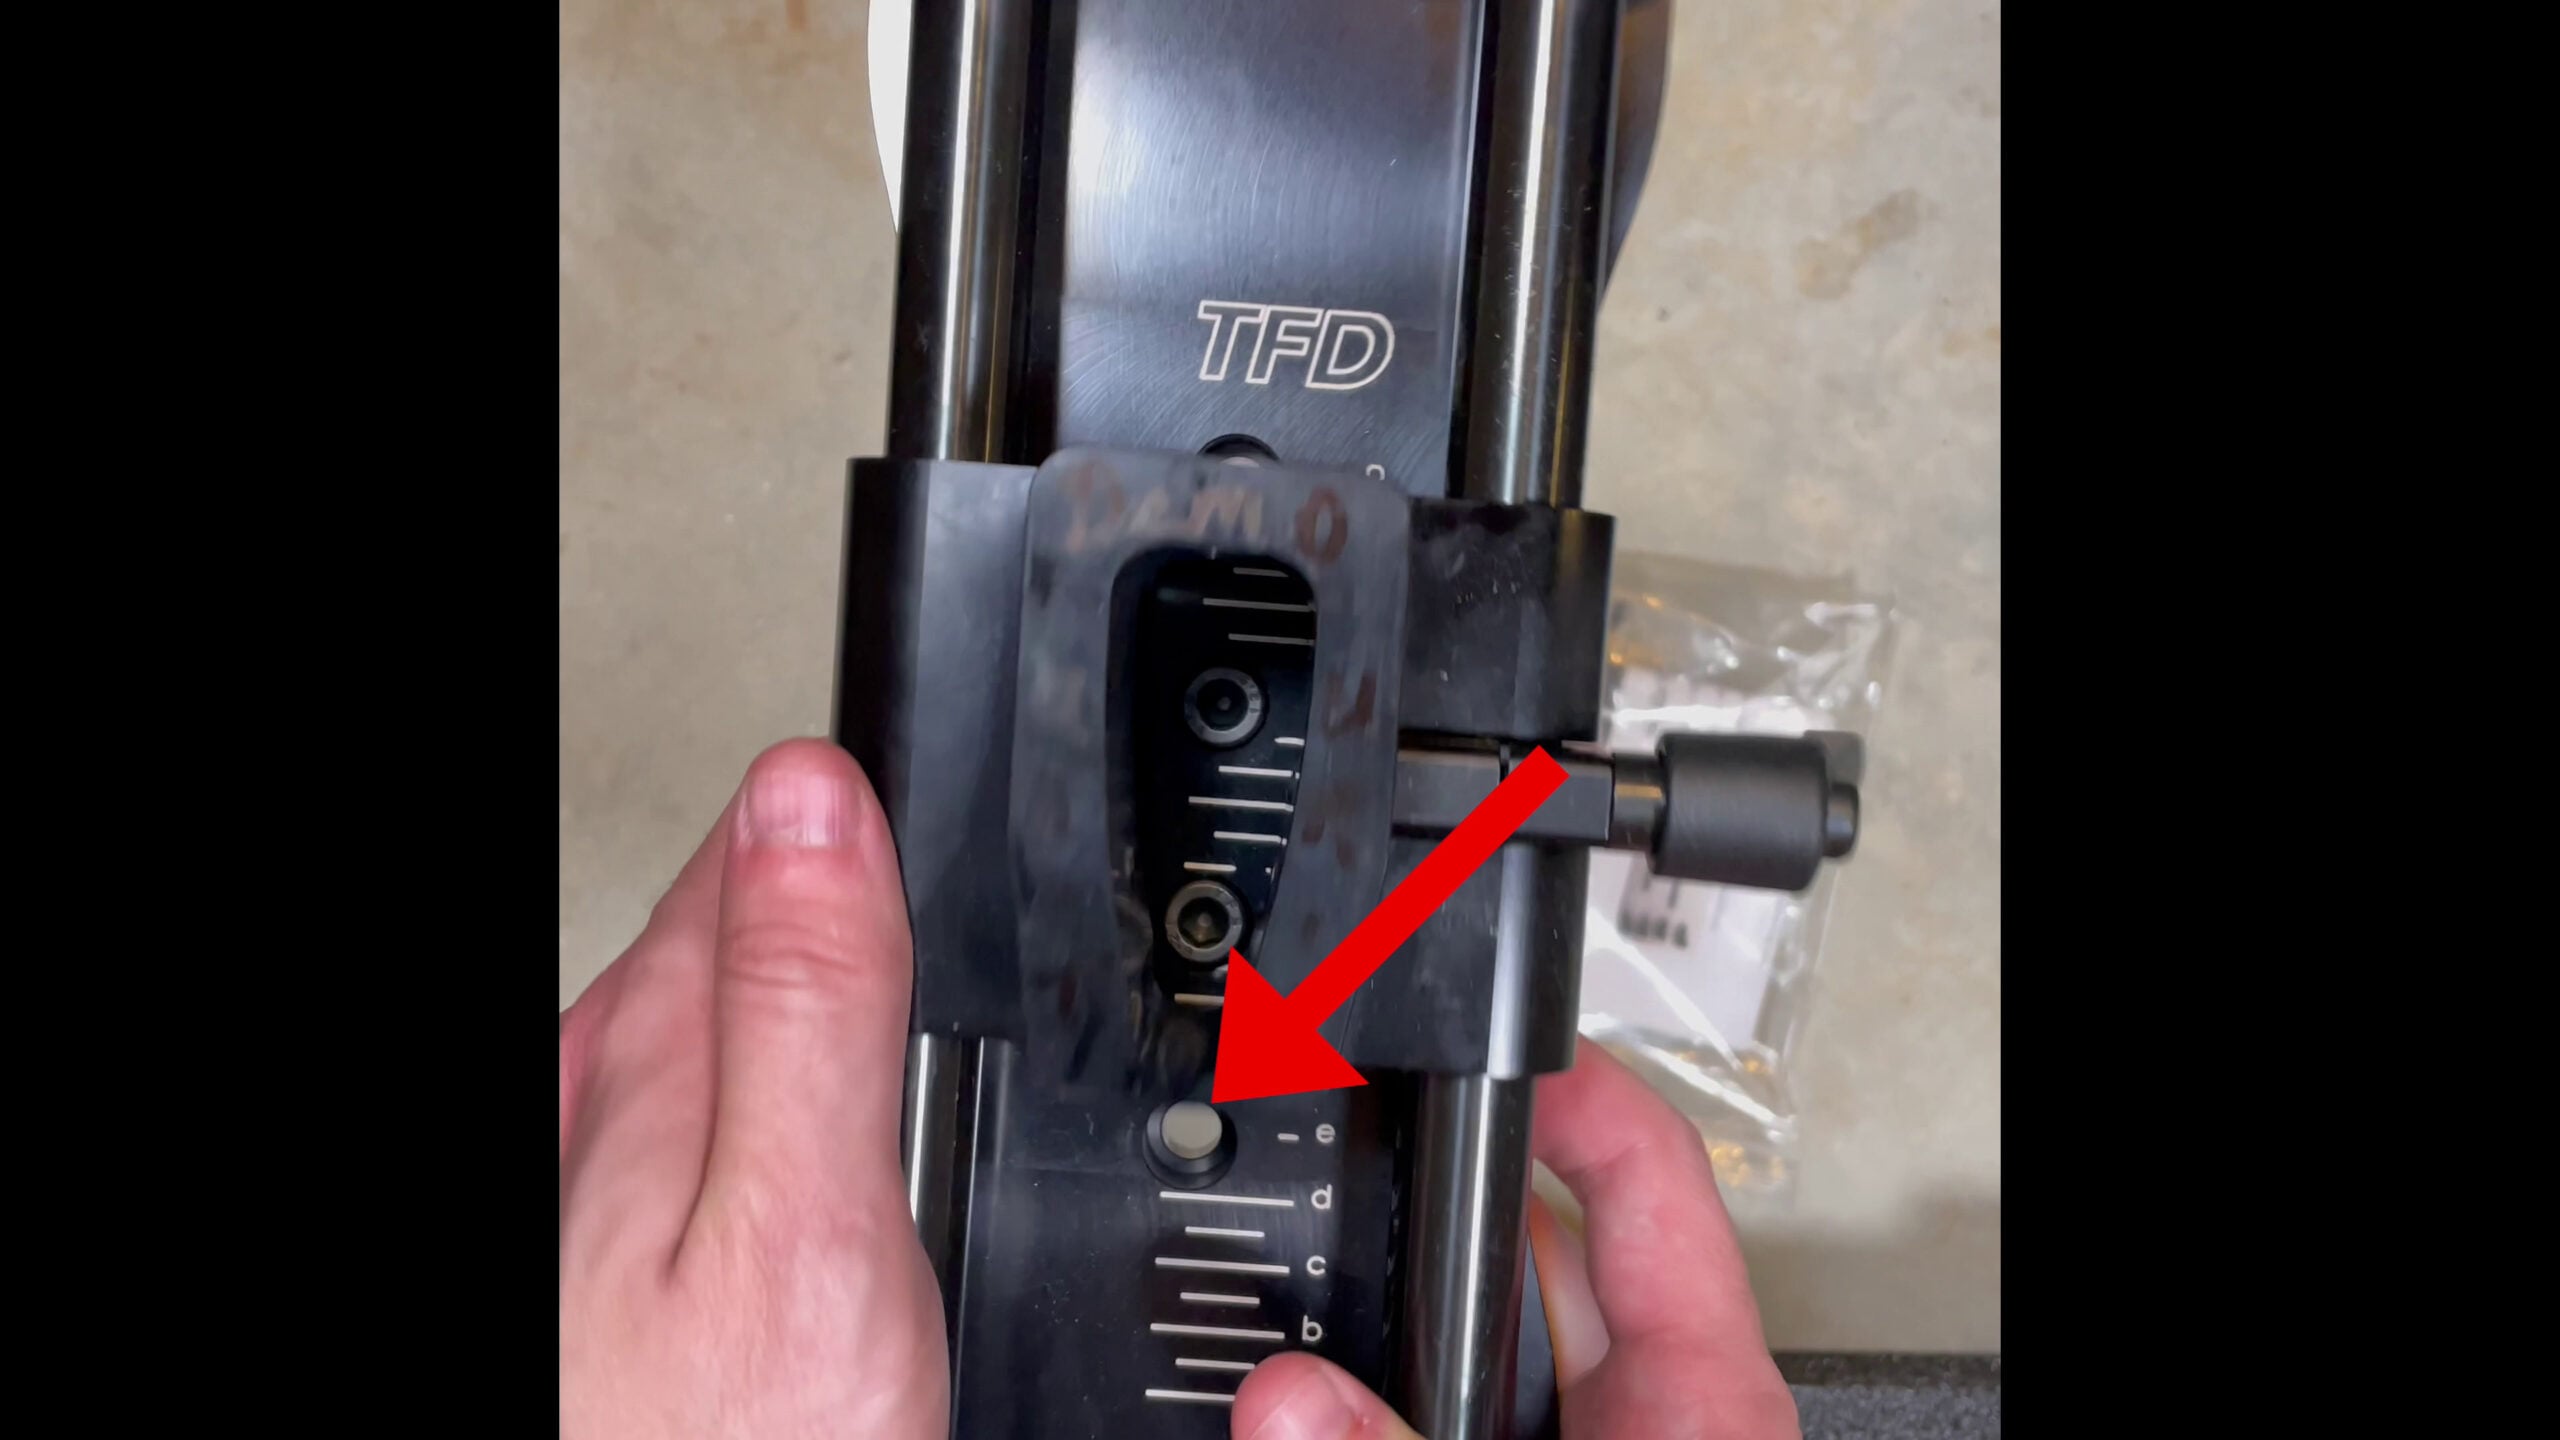
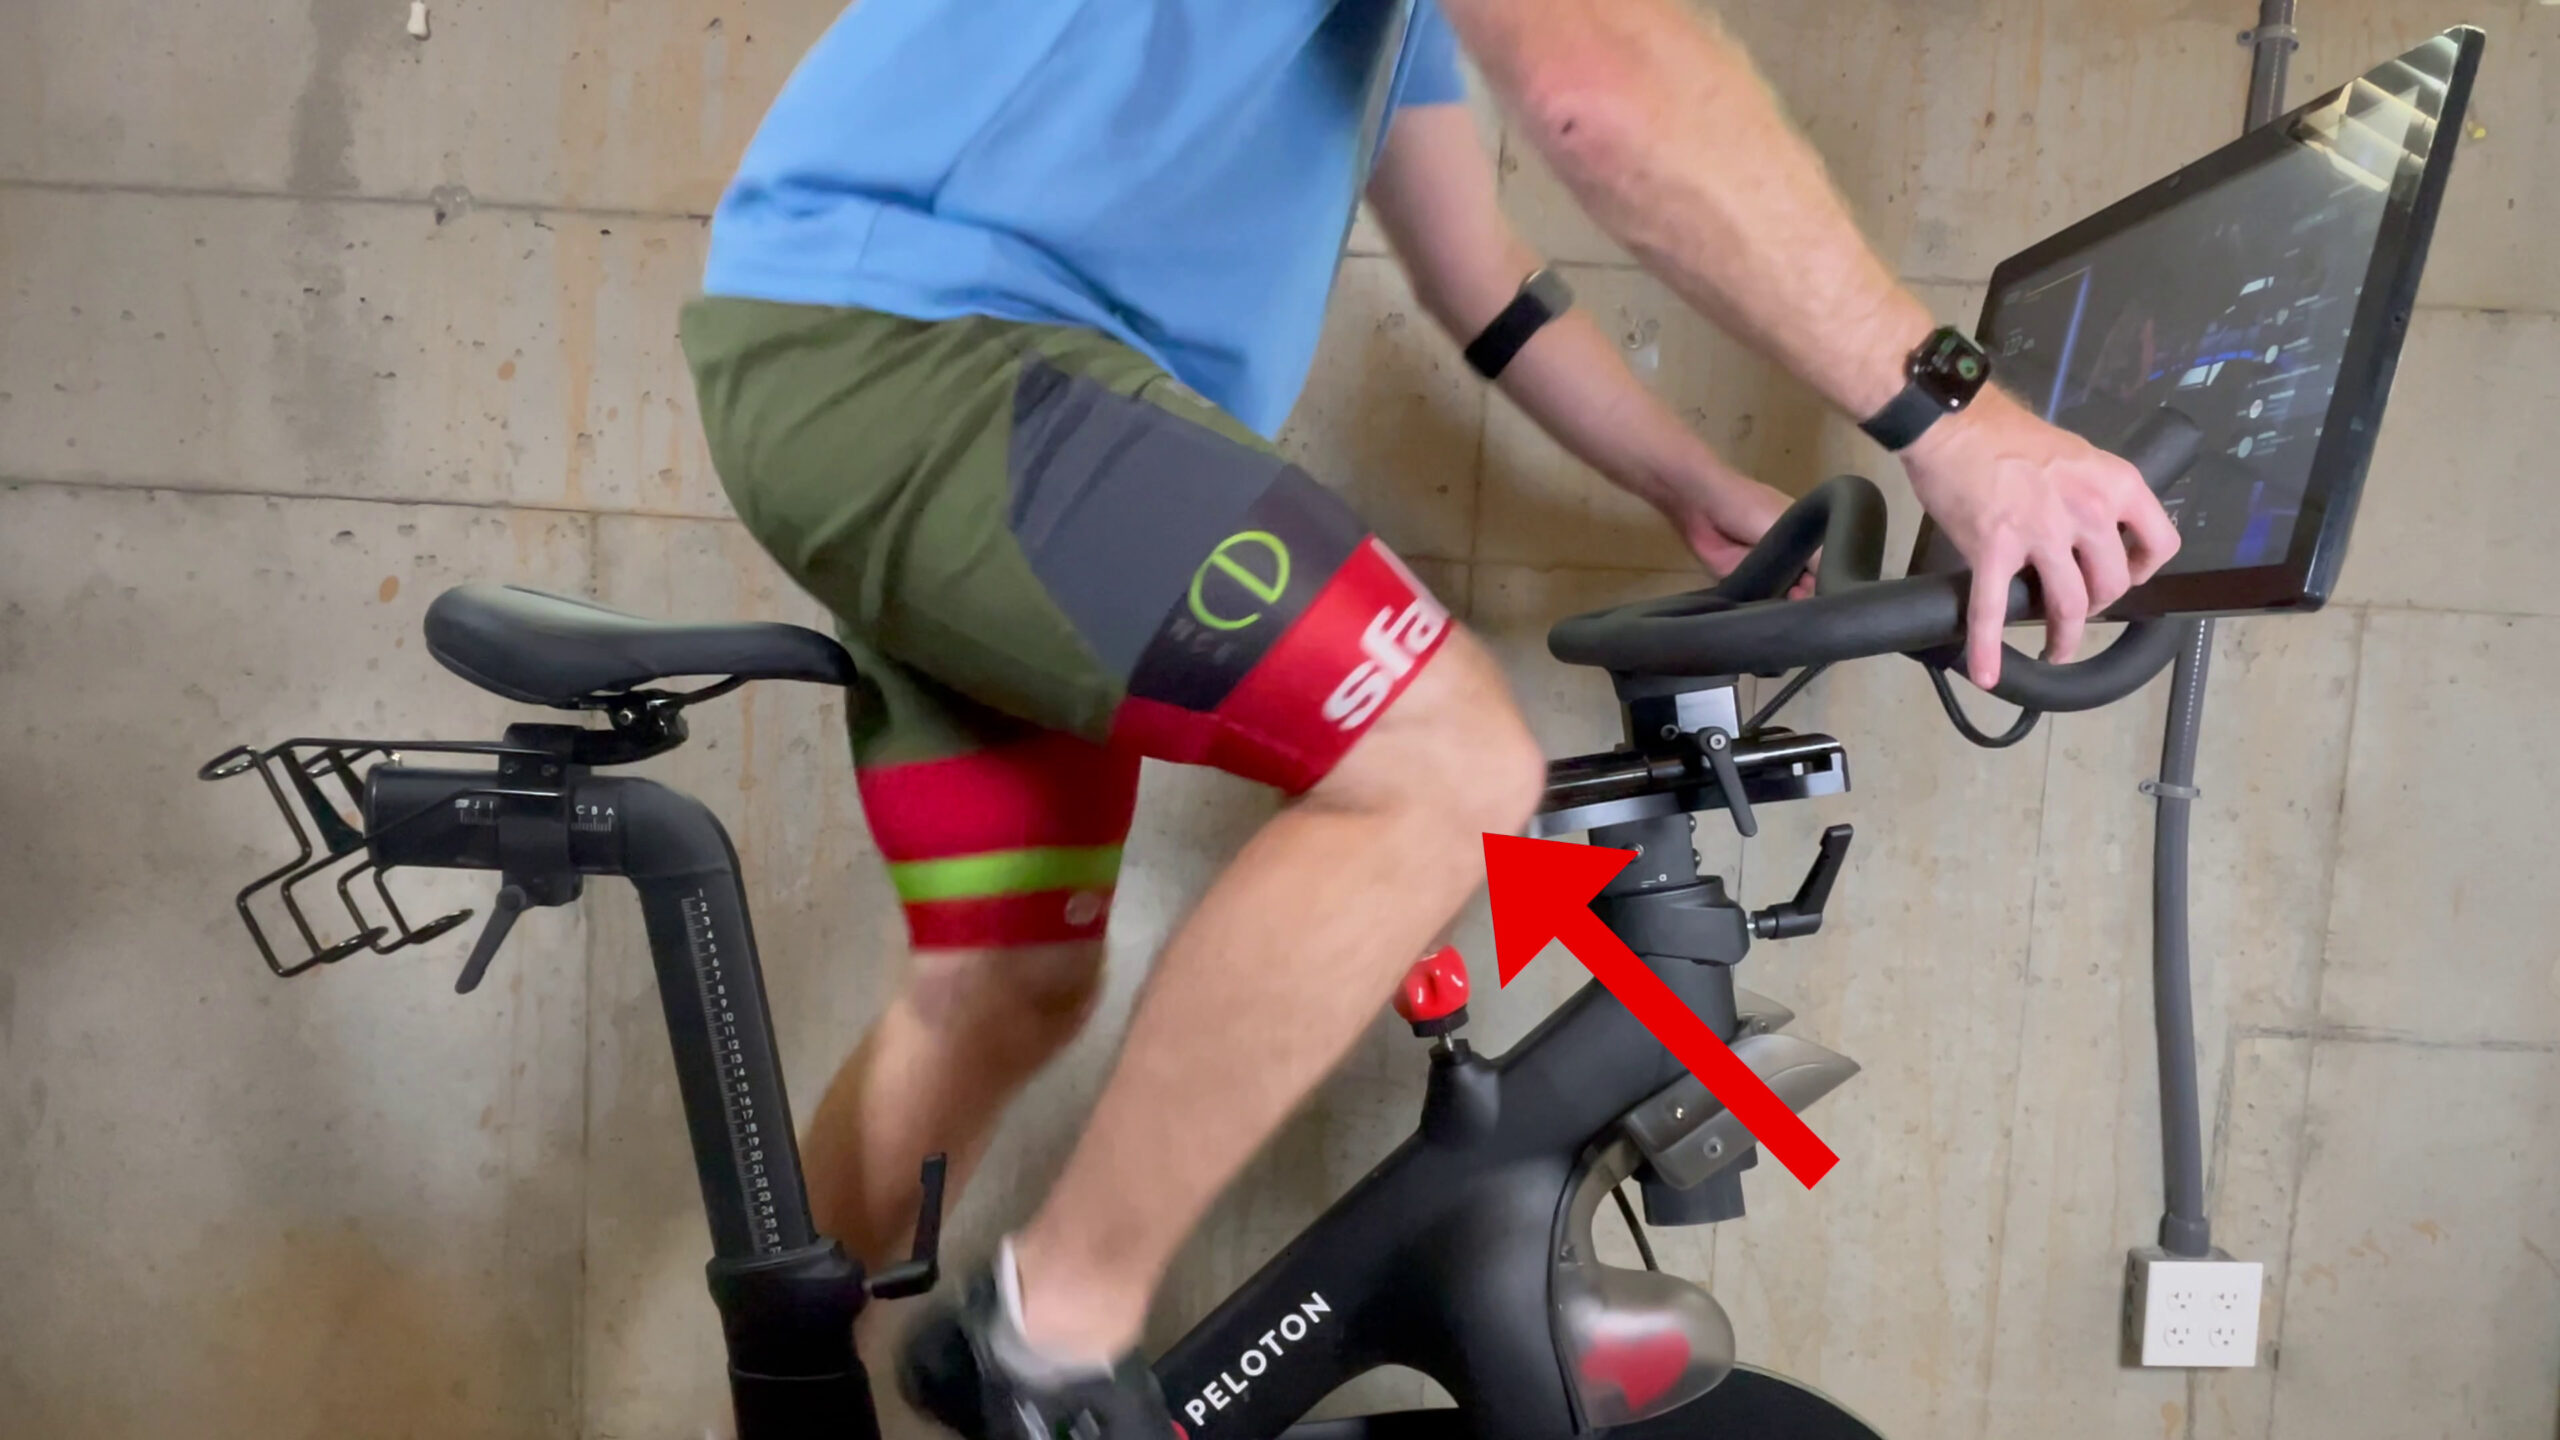
Using the two rear installation holes is also a method people can use if they run into one of the possible downsides of The Adjuster. We’ve seen a few reports that people can hit their knees on the center plate of The Adjuster while riding, particularly while out of the saddle. In our tests, we found that our knees did extend past the position of the center plate, but never once touched the plate. If your knees bend slightly inward, that’s when you would run into issues hitting the center plate. However, using the two rear installation holes will push the center plate 1.25″ further away from you, possibly giving you the extra clearance. Of course, the downside of this, is that the closest the handlebars can be is now another 1.25″ away (though this position is still closer than the stock handlebars are without The Adjuster).
The other big thing to be aware of is that the The Adjuster adds an additional few inches to the lowest the handlebars can be (around 2-3″). If you ride with your handlebars raised at all, you should be able to drop them to compensate this. If you normally ride with your handlebars lowered all the way, this will be something for you to keep in mind.
Does the Top Form Design Adjuster void the Peloton Warranty?
The safest thing to do is assume that you will void your warranty by installing the Adjuster. On TFD’s FAQ page, they state:
The Peloton® equipment warranty states the following: “Damage or equipment failure due to -Introduction of foreign objects, or modifications that are unauthorized or not recommended by Peloton.”
Only a Peloton® representative can make the determination; however, we believe this statement indicates that Peloton® will not support your warranty after you install The Adjuster to your bike. Please refer to the full Peloton® warranty page.
If you have further questions regarding your Peloton® warranty, please contact Peloton® directly.
With all that said – if you ended up having a service appointment for your Bike, and were careful about installation and removal of the Adjuster, you could temporarily remove The Adjuster for your service appointment. Would Peloton have a way to know that you had changed anything? Likely not.
We would also point people to the Magnuson–Moss Warranty Act. Among other things, it states that a company must prove that any modifications you made caused the need for repairs before being able to deny warranty coverage. This implies that Peloton might be able to say your use of the Adjuster voided your warranty for a repair of the handlebar height adjustment piece. Could they deny a warranty repair for an issue with your pedals? The Magnuson-Moss Warranty Act would imply no. With all that said – we are not lawyers, and Peloton is a multi-billion dollar company with lots of lawyers on retainer – so none of the above is legal advice! As we started this section with – you should just assume the use of The Adjuster voids your warranty.
Return Policy for the Top Form Design Adjuster
The Adjuster comes with a generous return policy – a full refund or exchange within 60 days of your purchase.
If you are not 100% satisfied with your purchase, you can return the product and get a full refund or exchange the product for another one, be it similar or not.
You can return a product for up to 60 days from the date you purchased it.
Any product you return must be in the same condition you received it and in the original packaging.
This should help give people peace of mind if they are considering ordering but aren’t sure they’ll run into issues with their knees on the center rail.
Alternatives to the Top Form Design Adjuster
As we stated at the beginning of our review, there are two main types of people who would need The Adjuster – shorter riders who want the handlebars closer, and those who want them further away due to bike fit issues. For riders who want the handlebars further away, right now, the Top Form Design Adjuster seems to be the only game in town, and there doesn’t seem to be many alternatives or competitors.
For those who might be shorter riders and just need that little extra distance to be able to reach the handlebars – there are some cheaper (both in price and quality of solution) alternatives. The cheapest? People will grab any old pool noodle they have laying around, cut open one side of it, and throw it on the handlebars. This will get the reach to the handlebars to be 1-2″ closer to you. Does it work? Sure. Will they fall off on you? Sometimes. Is it harder to grip the handlebars? Definitely – though there are very few times on the Bike you want to have a death grip on your handlebars, as you should just be resting your hands on them.
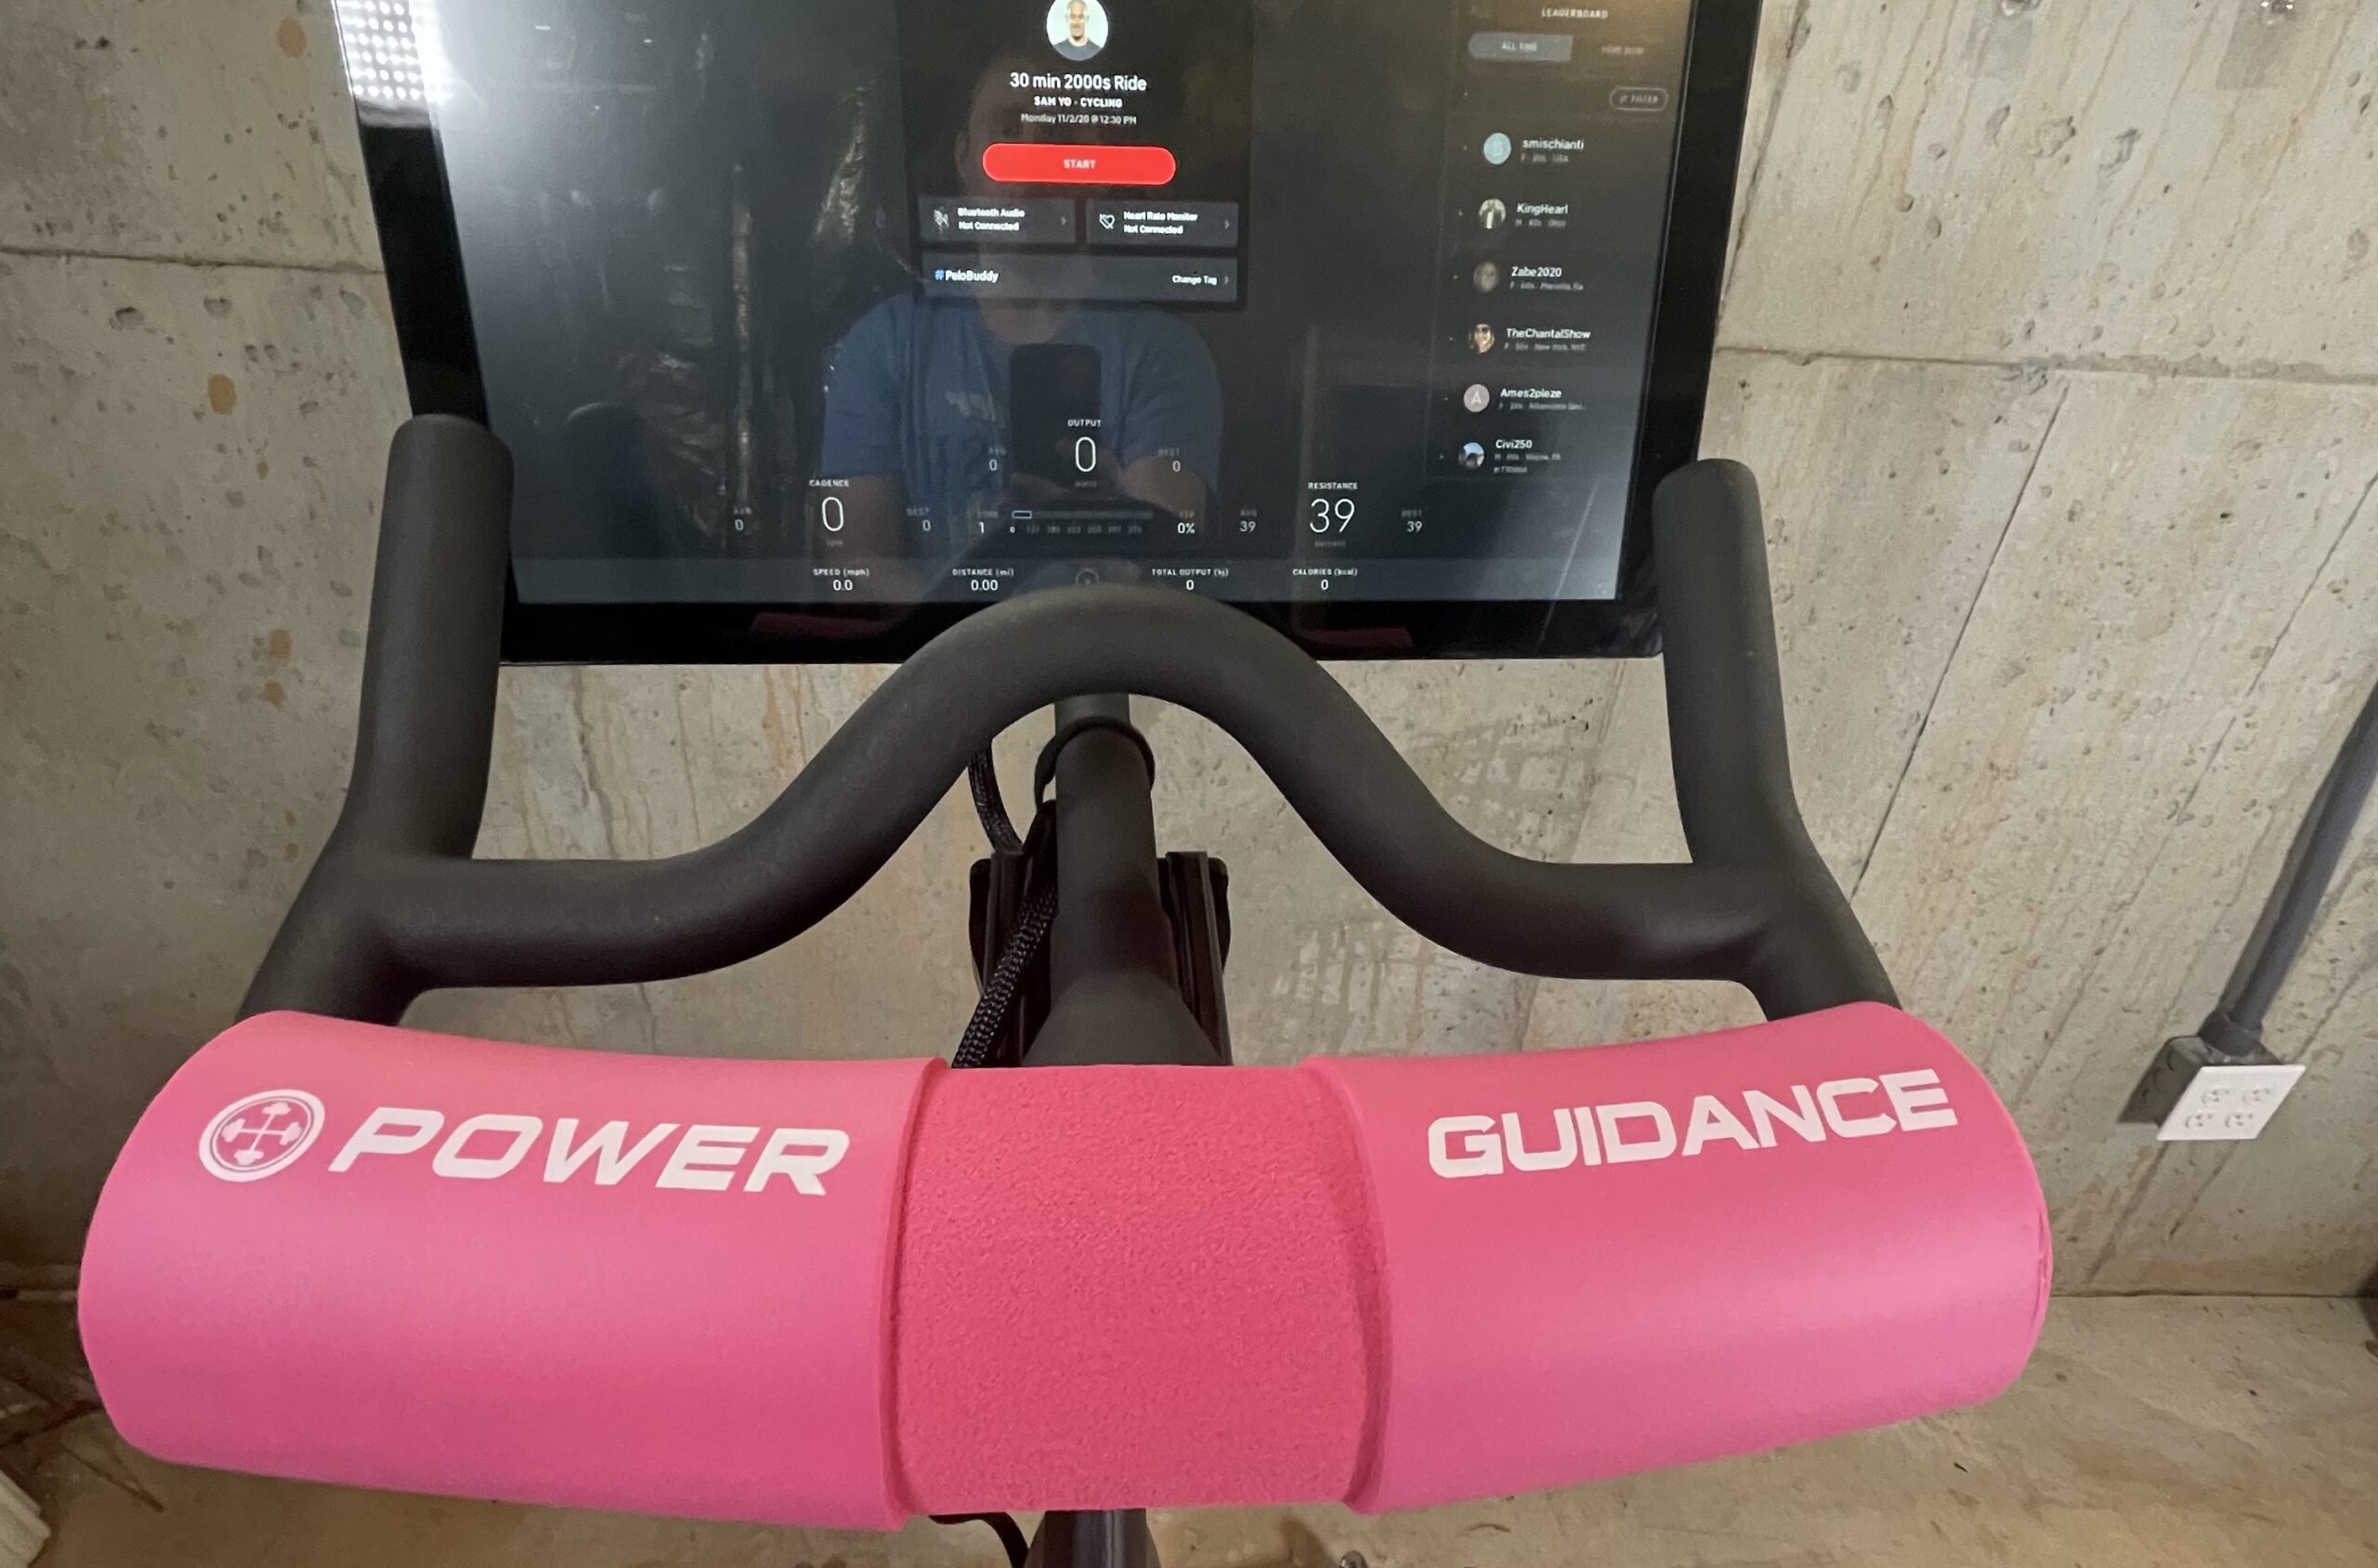
If someone wanted a slightly upgraded alternative to a pool noodle, that is slightly less likely to fall off than the pool noodle, one can try a barbell pad, or barbell squat pad. These are typically used by weight lifters, however, turn out to fit the Peloton Bike (and Bike+) handlebars OK. The end result is the same as the pool noodle – but doesn’t require you to cut it yourself, and based on some reports, might stay on the handlebar slightly better than the pool noodle. There are many options out there, but two on Amazon that are known to work for sure on a Peloton include the Power Guidance, as well as the YOGU (Note – Amazon links are affiliate links).
Both a pool noodle or barbell squat pad can get the job done for some people, at a fraction of the price. However, the difference in quality is night and day, so it’s almost not a fair comparison. We’ve seen more than one person who started out with a pool noodle or Yogu, and later upgraded to The Adjuster, and their feedback as to how they liked the upgrade was simply “I wish I had done this earlier!”
Handlebar Depth Adjustment for new Peloton Bike+ with the Top Form Design Adjuster
At time of publishing, the Top Form Design Adjuster is not compatible with the new Peloton Bike+ – we’ve seen reports that it *is* technically possible to use them together, but it is not an exact fit. It also may re-routing some fo the internal cabling of the Bike+ to instead route outside the handlebars, like it is on the original Bike. We have not tested this for ourselves so can’t verify how well it works (if it actually does). However, Top Form Design has told us they have a goal to have a new version of The Adjuster for the Bike+ available by the end 2020.
TFD Top Form Design Adjuster Summary – Is It Worth the Money
The big question people have about the Top Form Design Adjuster is simply “Is it worth the Money?”. At $249.99, this is certainly a premium add-on for your Peloton Bike. Does it provide greater flexibility in positioning on your Bike? Absolutely. Is it a well-designed & solid product? Definitely – the handlebars glide smoothly on the rails when you adjust your handlebar positions, and the aluminum and steel ensure The Adjuster is able to hold your handlebar & screen solidly in place. Is it easy to use and install? Yes! Are all of those things worth $249.99? That’s a personal choice. If you take the price out of the picture, and just ask if it’s a good product that does it’s job well? The answer to that is a resounding yes.
If you are interested in The Adjuster, you can find it here on Top Form Design’s website.
Support the site! Enjoy the news & guides we provide? Help us keep bringing you the news. Pelo Buddy is completely free, but you can help support the site with a one-time or monthly donation that will go to our writers, editors, and more. Find out more details here.
Get Our Newsletter Want to be sure to never miss any Peloton news? Sign up for our newsletter and get all the latest Peloton updates & Peloton rumors sent directly to your inbox.
Leave a Reply